CHAINS 2
PSP8/9/X
This tutorial was
written by Jemima ~ 2008
Copyright © 2008 ~ Jemima
~ All rights reserved
********************************
This was created using PSP9 but can be adapted for other versions of PSP.
You will need the
following to complete this tutorial
Materials
RIGHT CLICK >>> SAVE TARGET AS
CASTELAR.TTF
CACPINAF.TTF
Save to your WINDOWS >>> FONTS folder
(If the download shows up as an html file, click on the arrow
for "Save As Type" and select ALL FILES.)
or
to a folder where you store your extra fonts.
Metal brass.PspGradient
Save to your PSP Gradients folder
********************************
Open a new image 500 x 500
Transparent background
PSPX: Colour Depth = 8bits/channel
Flood fill with #9b0101
LAYERS >>> NEW RASTER LAYER
In your MATERIALS PALETTE
Load SOLID BLACK in your foreground & background
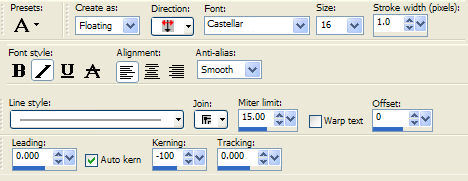
Select your TEXT tool
LINE STYLE = SOLID
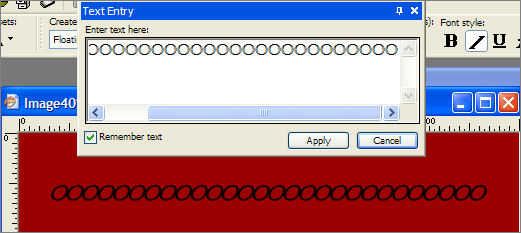
Place your cursor at the top left of your image.
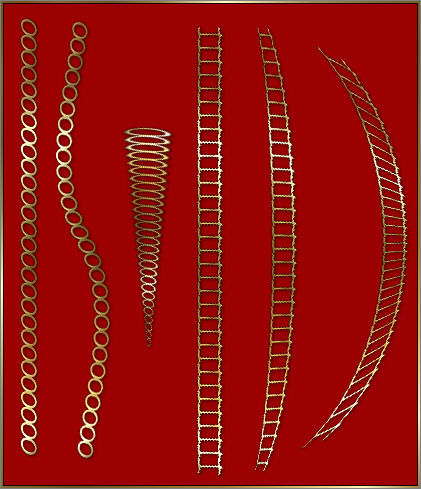
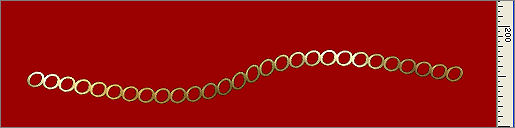
Enter a line of O's (Upper case)
DO NOT DESELECT
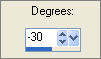
IMAGE >>> ROTATE >>> FREE ROTATE = LEFT 90
Ensure "All layers" is UNCHECKED
Reposition to the left side of your image with your MOVER tool
In your MATERIALS PALETTE
Load the ' Metal brass ' gradient in your foreground
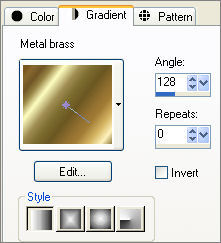
Flood fill the selection with the gradient
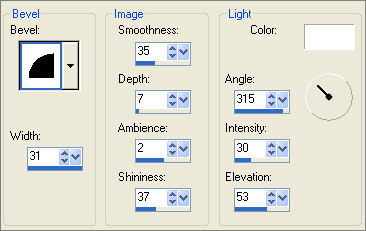
EFFECTS >>> 3D EFFECTS >>> INNER BEVEL
EFFECTS >>> 3D EFFECTS >>> DROP SHADOW
Vertical & Horizontal offsets = 0
Colour = Black
Opacity = 80
Blur = 0
DESELECT
ADJUST >>> SHARPNESS >>> SHARPEN
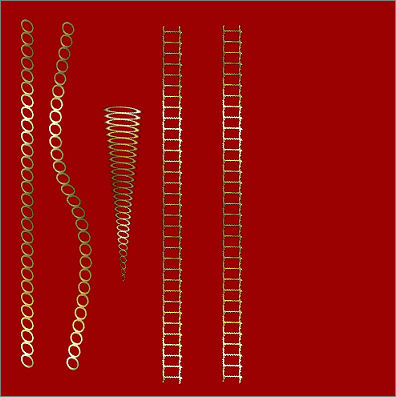
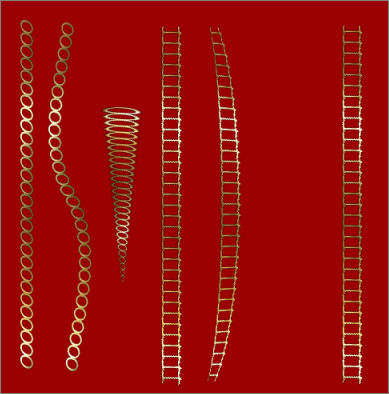
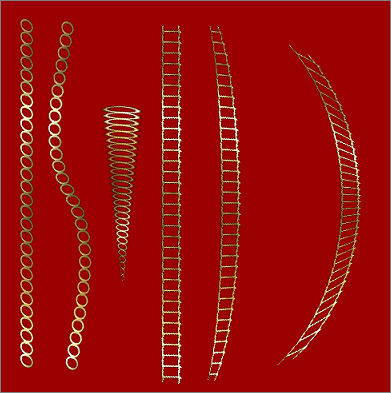
(I've shown this example horizontally to save space)

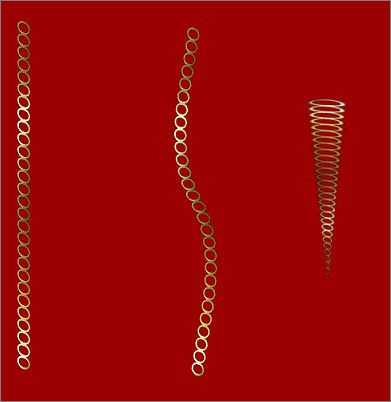
LAYERS >>> DUPLICATE
Reposition with your MOVER tool to the 250 pixels mark on your top ruler
EFFECTS >>> DISTORTION EFFECTS >>> TWIRL
(I've shown this example horizontally to save space)
ACTIVATE RASTER 2
LAYERS >>> DUPLICATE
Reposition with your MOVER tool to the 420 pixels mark on your top ruler
EFFECTS >>> DISTORTION EFFECTS >>> POLAR COORDINATES
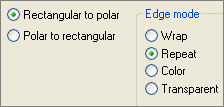 . .
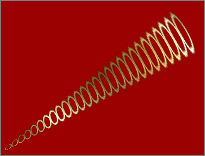
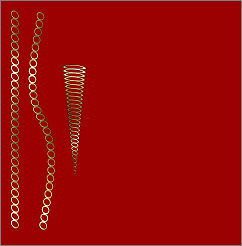
IMAGE >>> ROTATE >>> FREE ROTATE = LEFT 57
Ensure "All layers" is UNCHECKED
ADJUST >>> SHARPNESS >>> SHARPEN
Reposition with your MOVER tool
ACTIVATE THE TOP LAYER
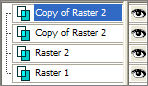
LAYERS >>> NEW RASTER LAYER
In your MATERIALS PALETTE
Load SOLID BLACK in your foreground
Select your TEXT tool
LINE STYLE = SOLID
FONT = CAC Pinafore
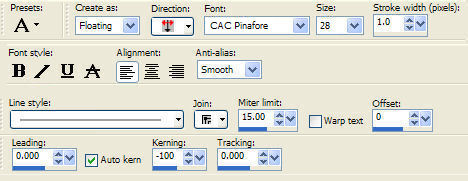
Place your cursor at the top left of your image.
Enter a line of I's (I = 'eye' Upper case)
In your MATERIALS PALETTE
Load the ' Metal brass ' gradient in your foreground ... same settings.
Flood fill the selection with the gradient
EFFECTS >>> 3D EFFECTS >>> INNER BEVEL
same settings
EFFECTS >>> 3D EFFECTS >>> DROP SHADOW
Vertical & Horizontal offsets = 0
Colour = Black
Opacity = 80
Blur = 0
DESELECT
ADJUST >>> SHARPNESS >>> SHARPEN

IMAGE >>> ROTATE >>> FREE ROTATE = LEFT 90
Ensure "All layers" is UNCHECKED
Reposition with your MOVER tool
ADJUST >>> SHARPNESS >>> SHARPEN
LAYERS >>> DUPLICATE
Reposition with your MOVER tool to the right
LAYERS >>> DUPLICATE
Reposition with your MOVER tool to the right
ACTIVATE " Copy of Raster 3 "
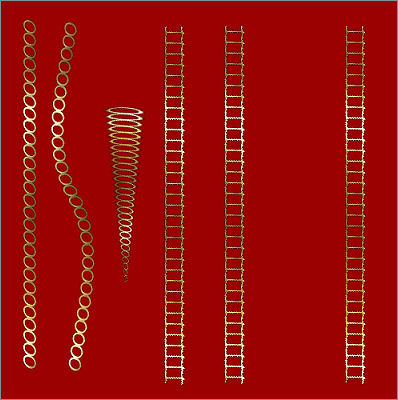
EFFECTS>>> GEOMETRIC EFFECTS >>> CIRCLE
ACTIVATE " Copy (2) of Raster 3 "
EFFECTS>>> GEOMETRIC EFFECTS >>> CIRCLE
same settings
Save as .psp image
Page designed by

for
http://www.artistrypsp.com/
Copyright ©
2000-2008 Artistry In PSP / PSP Artistry
All rights reserved.
Unless specifically made available for
download,
no graphics or text may be removed from
this site for any reason
without written permission from Artistry
In PSP / PSP Artistry
|