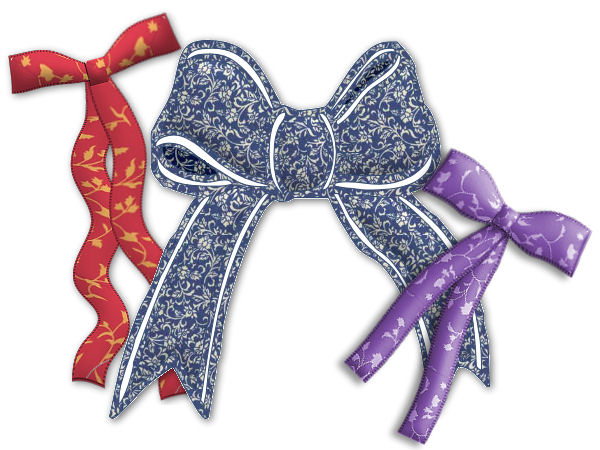
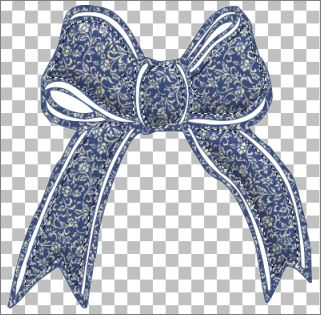
BOWS
PSP8/9/X
This tutorial was
written by Jemima ~ 2008
Copyright © 2008 ~ Jemima
~ All rights reserved
********************************
This was created using PSP9 but can be adapted for other versions of PSP.
You will need the
following to complete this tutorial
Materials
RIGHT CLICK >>> SAVE TARGET AS
894.jpg
ff1301.jpg
Save to your PSP Patterns folder
A-JF-BOW2.PspShape
Save to your PSP Shapes folder
********************************
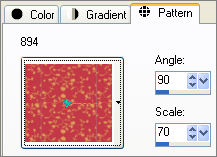
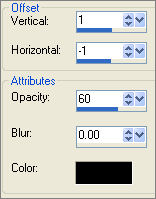
In your MATERIALS PALETTE
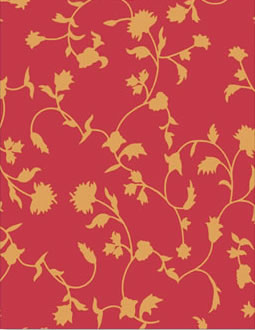
Load the ' 894 ' pattern in your foreground
using the settings below.
Load SOLID RED ' #c53848 ' in your background
Open a new image 400 x 400
Transparent background
PSPX: Colour Depth = 8bits/channel
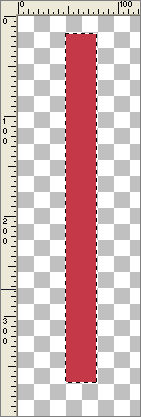
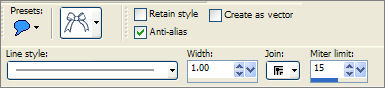
Choose your SELECTION TOOL
Selection Type = Rectangle
Mode = Replace
Feather = 0
Antialias = UNChecked
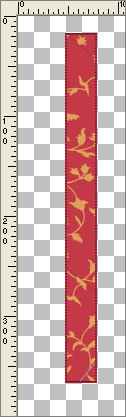
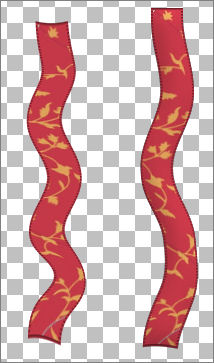
Draw a rectangle 30 pixels wide and around 340 pixels long ...
The measurements don't have to be exact.
Flood fill with SOLID RED ' #c53848 '
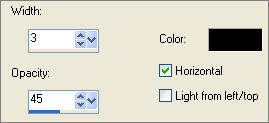
EFFECTS >>> TEXTURE EFFECTS >>> BLINDS
SELECTIONS >>> MODIFY >>> CONTRACT = 2
EDIT >>> CLEAR
Flood fill with the ' 894 ' pattern
DESELECT
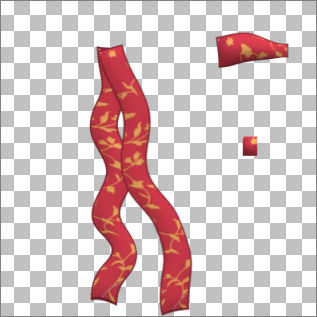
LAYERS >>> DUPLICATE
Reposition with your MOVER tool

LAYERS >>> NEW RASTER LAYER
Choose your SELECTION TOOL
Same settings
Draw a rectangle as shown below, around 100 pixels wide and 30 pixels deep
Flood fill with SOLID RED
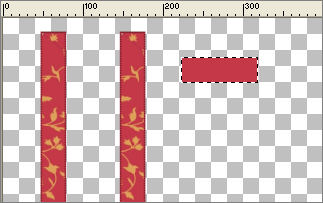
EFFECTS >>> TEXTURE EFFECTS >>> BLINDS
Same settIngs EXCEPT... UNCHECK 'HORIZONTAL'
SELECTIONS >>> MODIFY >>> CONTRACT = 2
EDIT >>> CLEAR
Flood fill with the ' 894 ' pattern
DESELECT
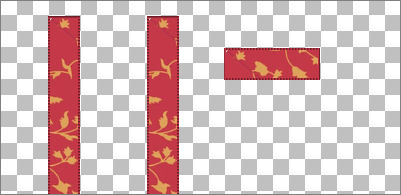
LAYERS >>> NEW RASTER LAYER
Choose your SELECTION TOOL
Same settings
Draw a rectangle as shown below, around 15 pixels wide and 20 pixels deep
Flood fill with the ' 894 ' pattern
DESELECT
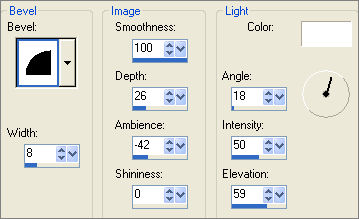
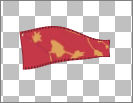
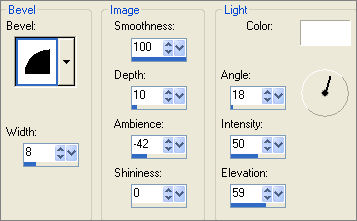
EFFECTS >>> 3D EFFECTS >>> INNER BEVEL
 . . 
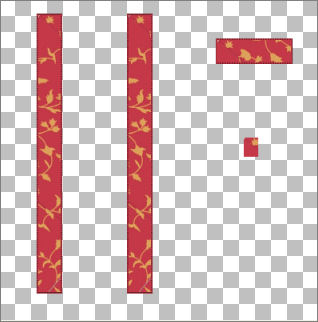
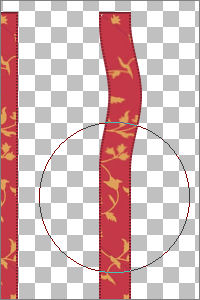
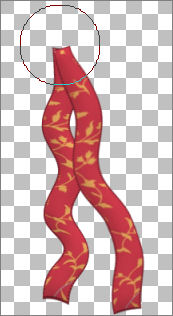
ACTIVATE RASTER 2
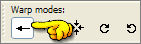
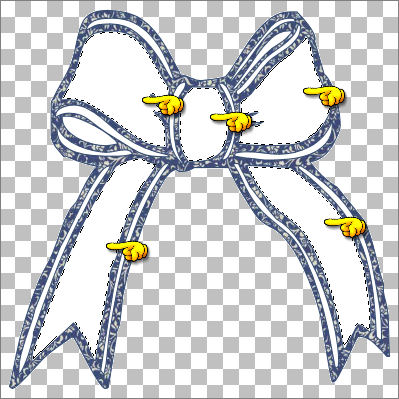
Select your WARP BRUSH tool

Select the CONTRACT mode and these settings

Place your cursor on the right hand side of the small ribbon and
press your left mouse button for a couple of seconds
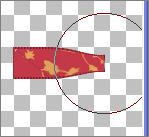
Change to the PUSH mode
Place your cursor on the centre of the small ribbon and PUSH up slightly.
Place your cursor on the left hand side of the small ribbon and PUSH down slightly.
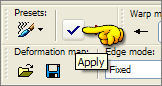
Click the APPLY symbol
 . .
EFFECTS >>> 3D EFFECTS >>> INNER BEVEL
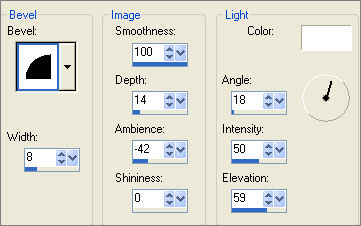 . . 
ACTIVATE Copy of Raster 1
Still using the PUSH mode ... change the SIZE to 150
Position your cursor so that the top of the circle is on top of the ribbon
PUSH slightly to the right
Position your cursor a little further down
and PUSH slightly to the left
Position your cursor a little further down
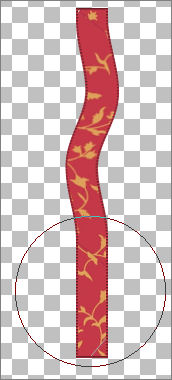
PUSH slightly to the right and play around until you are happy with the result.
Click the APPLY symbol
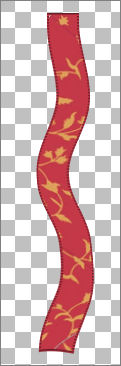
EFFECTS >>> 3D EFFECTS >>> INNER BEVEL
Same settings EXCEPT change the DEPTH to 7
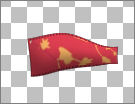
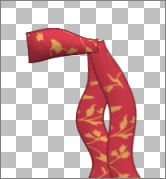
After completing the WARP effect you may find 'surplus' ribbon at the foot of your image
Select this with your SELECTION tool
EDIT >>> CLEAR
DESELECT
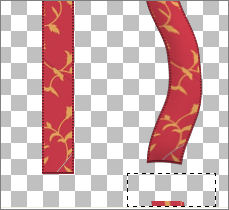
ACTIVATE RASTER 1
Play around with this ribbon as you did with the last, but create different wave effect
Click the APPLY symbol
EFFECTS >>> 3D EFFECTS >>> INNER BEVEL
Same settings
Reposition with your MOVER tool so the this ribbon sits under the ribbon on the right,
ACTIVATE Copy of Raster 1
IMAGE >>> ROTATE >>> FREE ROTATE = 15 LEFT
Ensure "All layers" is UNCHECKED
Reposition with your MOVER tool
CLOSE RASTER 2 & 3
LAYERS >>> MERGE >>> MERGE VISIBLE
Select the CONTRACT mode on your PUSH BRUSH and change the size to 100
Position your cursor at the top of the ribbons and depress
your left mouse button the shrink the top of the ribbon
Click the APPLY symbol
OPEN AND ACTIVATE RASTER 2
Reposition with your MOVER tool
LAYERS >>> DUPLICATE
IMAGE >>> MIRROR
IMAGE >>> ROTATE >>> FREE ROTATE = 30 LEFT
Ensure "All layers" is UNCHECKED
Reposition with your MOVER tool
ACTIVATE RASTER 3
Reposition with your MOVER tool to the centre of the bow
IMAGE >>> ROTATE >>> FREE ROTATE = 15 LEFT
Ensure "All layers" is UNCHECKED
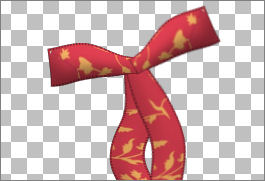
EFFECTS >>> 3D EFFECTS >>> DROP SHADOW
 . . 
(You could play around with the PUSH mode at this stage, to make the bow a little bigger if you wished)
LAYERS >>> MERGE >>> MERGE VISIBLE
Save as .psp image
***********************************************************************
In your MATERIALS PALETTE
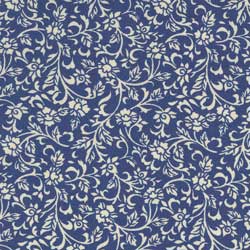
Load the ' ff1301 ' pattern in your background
using the settings below.
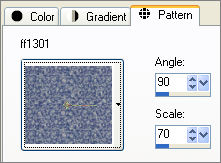
Load SOLID BLUE ' #354c71 ' in your foreground
Open a new image 400 x 400
Transparent background
PSPX: Colour Depth = 8bits/channel
Select your PRESET SHAPES tool
Locate the
A-JF-BOW2 Shape
Use these settings.. LINE STYLE = SOLID
 . . 
Start at the top left corner of your blank image and drag your cursor to the bottom right corner .

With your MAGIC WAND
Mode = Replace
Match Mode = RGB Value
Tolerance = 0
Feather = 0
Antialias = UNchecked
Sample Merged = UNCHECKED
PSP9/X: Check CONTIGUOUS
PSPX: There is no " Sample Merged"
PSPX: Use all layers = UNChecked
Select the OUTER transparent area
SELECTIONS >>> INVERT
LAYERS >>> NEW RASTER LAYER
LAYERS >>> ARRANGE >>> MOVE DOWN
Flood fill with WHITE

DESELECT
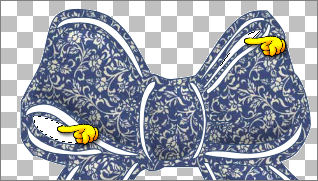
ACTIVATE RASTER 1
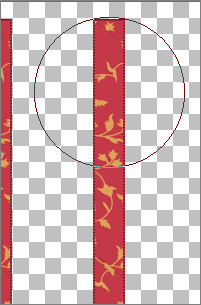
With your MAGIC WAND ...same settings... and using your SHIFT KEY...
select the areas shown below
LAYERS >>> NEW RASTER LAYER
LAYERS >>> ARRANGE >>> MOVE DOWN
SELECTIONS >>> MODIFY >>> EXPAND = 2
Flood fill with the ' ff1301 ' pattern
EFFECTS >>> 3D EFFECTS >>> INNER BEVEL
DESELECT
ACTIVATE RASTER 1
With your MAGIC WAND ...same settings... and using your SHIFT KEY...
select the areas shown below
LAYERS >>> NEW RASTER LAYER
LAYERS >>> ARRANGE >>> MOVE DOWN
SELECTIONS >>> MODIFY >>> EXPAND = 2
Flood fill with the ' ff1301 ' pattern
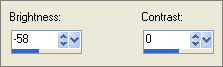
ADJUST >>> BRIGHTNESS and CONTRAST >>> BRIGHTNESS/CONTRAST
DESELECT
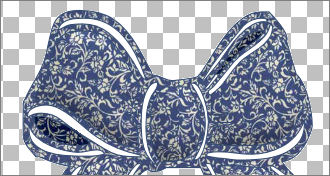
LAYERS >>> MERGE >>> MERGE VISIBLE
Save as .psp image
Page designed by

for
http://www.artistrypsp.com/
Copyright ©
2000-2008 Artistry In PSP / PSP Artistry
All rights reserved.
Unless specifically made available for
download,
no graphics or text may be removed from
this site for any reason
without written permission from Artistry
In PSP / PSP Artistry
|
