PUSSYWILLOW
PSP8/9/X
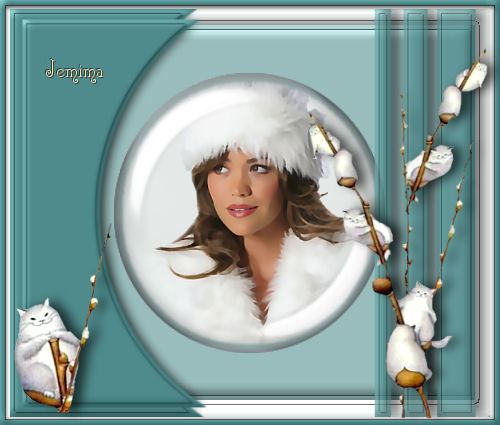
This tutorial was written by Jemima ~ July 2007
Copyright © 2007/8 ~ Jemima ~ All rights reserved
********************************
You will need the
following to complete this tutorial
Materials
Right click and SAVE TARGET AS
globe.psp
jf_women6.psp
kjb_pussywillow.psp
Save to a folder on your computer
Plugins
** EYE CANDY3 **
http://www.pircnet.com/downloads.html
********************************
REMEMBER TO SAVE YOUR WORK OFTEN
********************************
Open a new image 500 x 425
Transparent background
PSPX: Colour Depth = 8bits/channel
Flood fill with OFF WHITE " #ecf2f0 "
LAYERS >>> NEW RASTER LAYER
Flood fill with BLUE
" #89adad "
SELECTIONS >>> SELECT ALL
SELECTIONS >>> MODIFY >>> CONTRACT = 25
SELECTIONS >>> INVERT
EDIT >>> CLEAR
SELECTIONS >>> INVERT
EFFECTS >>> 3D EFFECTS >>> INNER BEVEL
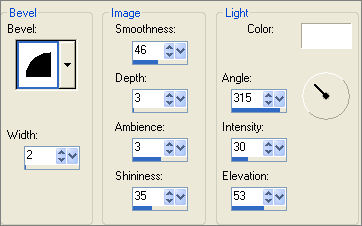
SELECTIONS >>> MODIFY >>> CONTRACT = 5
EFFECTS >>> 3D EFFECTS >>> INNER BEVEL
Same settings
EFFECTS >>> 3D EFFECTS >>> DROP SHADOW
Vertical & Horizontal offsets = 1
Colour = Black
Opacity = 60
Blur = 0
Repeat Drop Shadow effect changing
Vertical & Horizontal Offsets to - ( minus ) 1
Click OK
DESELECT
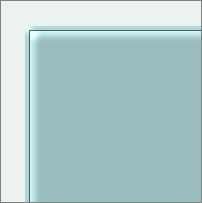
Open up the " globe.psp "image in your PSP workspace
Right click on the Title Bar and select COPY from the options
Go to your frame image ...
Right click on the Title Bar
and select PASTE AS NEW LAYER from the options.
With your MAGIC WAND
Mode = Replace
Match Mode = RGB Value
Tolerance = 0
Feather = 0
Antialias = UNchecked
Sample Merged = UNCHECKED
PSP9/X: Check CONTIGUOUS
PSPX: There is no " Sample Merged"
PSPX: Use all layers = UNChecked
Select the transparent area
outside the globe
SELECTIONS >>> INVERT
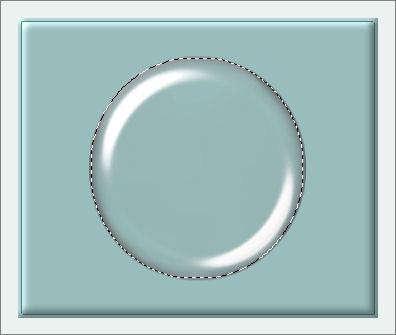
SELECTIONS >>> MODIFY >>> CONTRACT = 4
SELECTIONS >>> MODIFY >>> INSIDE/OUTSIDE FEATHER

ACTIVATE RASTER 2
EDIT >>> CLEAR
DESELECT
ACTIVATE RASTER 3
LAYERS >>> NEW RASTER LAYER
Flood fill with DARKER BLUE " #458283 "
Choose your SELECTION TOOL

Starting at 350 pixels from the left and 210 pixels down...
drag your cursor (down and to the right) so that the left edge of the ellipse
is level with the
65 pixel from the left mark.
This doesn't have to be exact... but as close as possible *S*
(If you need to.... close Raster 4 but KEEP IT ACTIVE...
so you can see the 'marching ants'... then OPEN Raster 4
to continue working.)
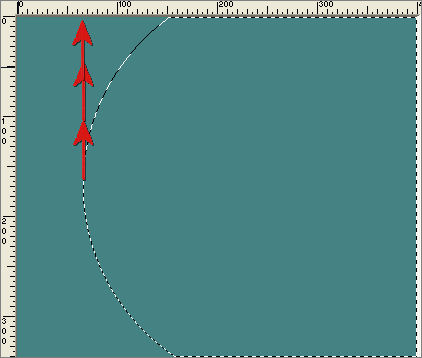
EDIT >>> CLEAR
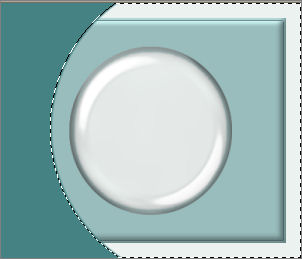
SELECTIONS >>> INVERT
EFFECTS >>> 3D EFFECTS >>> INNER BEVEL
Same settings
SELECTIONS >>> MODIFY >>> CONTRACT = 5
LAYERS >>> NEW RASTER LAYER
LAYERS >>> ARRANGE >>> MOVE DOWN
EFFECTS >>> PLUGINS >>> EYE CANDY 3 >>> DROP SHADOW
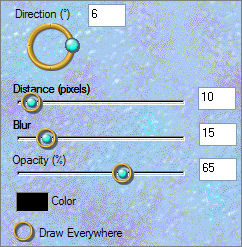
ACTIVATE RASTER 4
EFFECTS >>> 3D EFFECTS >>> DROP SHADOW
Vertical & Horizontal offsets = 1
Colour = Black
Opacity = 60
Blur = 0
Repeat Drop Shadow effect changing
Vertical & Horizontal Offsets to - (minus) 1
Click OK
DESELECT
CLOSE Raster 1, 2 and 3
LAYERS >>> MERGE >>> MERGE VISIBLE
LAYERS >>> DUPLICATE
IMAGE >>> RESIZE = 95%
Ensure "Resize all layers" is UNCHECKED
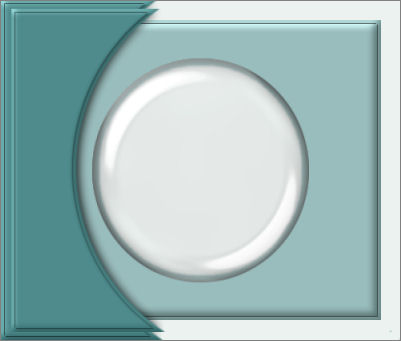
LAYERS >>> NEW RASTER LAYER
Choose your SELECTION TOOL then click on the CUSTOM SELECTION
symbol
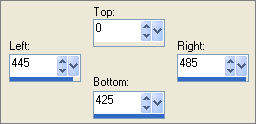
Flood fill with DARKER BLUE " #458283 "
EFFECTS >>> 3D EFFECTS >>> INNER BEVEL
Same settings
EFFECTS >>> PLUGINS >>> EYE CANDY 3 >>> DROP SHADOW
Same settings
SELECTIONS >>> MODIFY >>> CONTRACT = 5
EFFECTS >>> 3D EFFECTS >>> DROP SHADOW
Use the same settings
Click OK
Repeat Drop Shadow effect changing
Vertical & Horizontal Offsets to 1
Click OK
DESELECT
Change the layer OPACITY to 75%
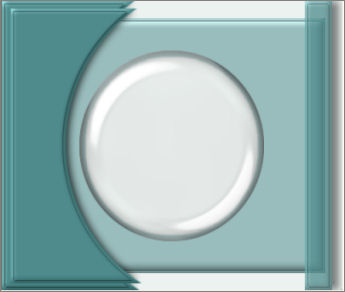
LAYERS >>> NEW RASTER LAYER
Choose your SELECTION TOOL then click on the CUSTOM SELECTION symbol
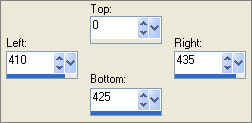
Flood fill with DARKER BLUE " #458283 "
EFFECTS >>> 3D EFFECTS >>> INNER BEVEL
Same settings
EFFECTS >>> PLUGINS >>> EYE CANDY 3 >>> DROP SHADOW
Same settings
SELECTIONS >>> MODIFY >>> CONTRACT = 5
EFFECTS >>> 3D EFFECTS >>> DROP SHADOW
Use the same settings
Click OK
Repeat Drop Shadow effect changing
Vertical & Horizontal Offsets to - (minus)1
Click OK
DESELECT
Change the layer OPACITY to 75%
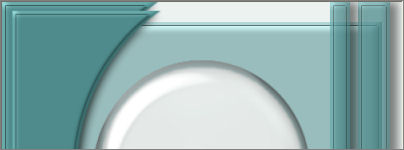
LAYERS >>> NEW RASTER LAYER
Choose your SELECTION TOOL then click on the CUSTOM SELECTION symbol
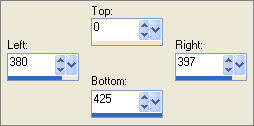
Flood fill with DARKER BLUE " #458283 "
EFFECTS >>> 3D EFFECTS >>> INNER BEVEL
Same settings
EFFECTS >>> PLUGINS >>> EYE CANDY 3 >>> DROP SHADOW
Same settings
SELECTIONS >>> MODIFY >>> CONTRACT = 5
EFFECTS >>> 3D EFFECTS >>> DROP SHADOW
Use the same settings
Click OK
Repeat Drop Shadow effect changing
Vertical & Horizontal Offsets to 1
Click OK
DESELECT
Change the layer OPACITY to 75%
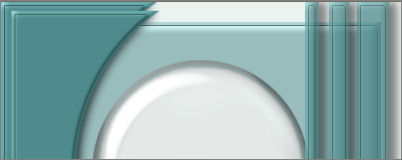
OPEN & ACTIVATE RASTER 2
With your MAGIC WAND
Same settings
Select the area on the outside of the pale green rectangle

OPEN & ACTIVATE RASTER 1
EFFECTS >>> 3D EFFECTS >>> INNER BEVEL
Same settings
Repeat Inner Bevel
SELECTIONS >>> MODIFY >>> CONTRACT = 5
EFFECTS >>> 3D EFFECTS >>> DROP SHADOW
Use the same settings
Click OK
Repeat Drop Shadow effect changing
Vertical & Horizontal Offsets to - (minus) 1
Click OK
DESELECT
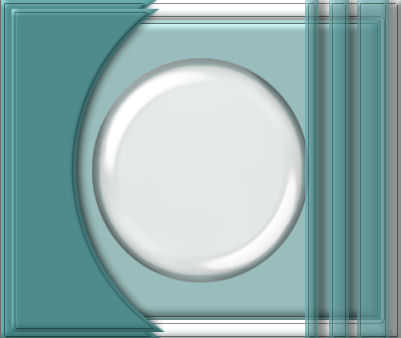
CLOSE Raster 1 and 2
(1,2 and 3 should be closed at this point)
Activate one of the other layers
LAYERS >>> MERGE >>> MERGE VISIBLE
OPEN Raster 1, 2 and 3
Still on the MERGED LAYER
IMAGE >>> RESIZE = 96%
Ensure "Resize all layers" is UNCHECKED
LAYERS >>> NEW RASTER LAYER
SELECTIONS >>> SELECT ALL
SELECTIONS >>> MODIFY >>> CONTRACT = 5
SELECTIONS >>> INVERT
Flood fill with DARKER BLUE " #458283 "
EFFECTS >>> 3D EFFECTS >>> INNER BEVEL
Same settings
EFFECTS >>> 3D EFFECTS >>> DROP SHADOW
Use the same settings
Click OK
Repeat Drop Shadow effect changing
Vertical & Horizontal Offsets to 1
Click OK
EFFECTS >>> PLUGINS >>> EYE CANDY 3 >>> DROP SHADOW
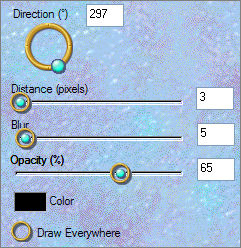
DESELECT
CLOSE Raster 1
LAYERS >>> MERGE >>> MERGE VISIBLE
Save as .psp image
OPEN & ACTIVATE Raster 1
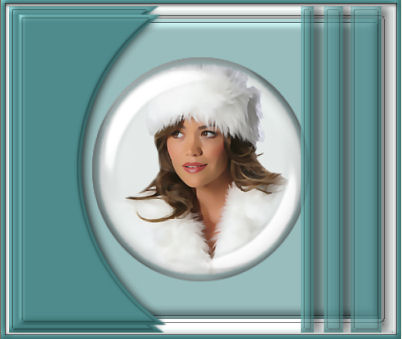
Open up the " jf_women6.psp " image in your PSP workspace
Ensure Raster 1 is active.
Right click on the Title Bar and select COPY from the options
Go to your frame image ....
Right click on the Title Bar
and select PASTE AS NEW LAYER from the options.
IMAGE >>> RESIZE = 80%
Ensure "Resize all layers" is UNCHECKED
TIP: IF YOU WANT TO REPOSITION THE IMAGE.. CLOSE THE "MERGED" LAYER,
then open once you are happy with the positioning.
Open up the " kjb_pussywillow.psp " image in your PSP workspace
WINDOW >>> DUPLICATE
Close the original Image
Select your FREEHAND SELECTION tool

Select the part of the tube indicated below
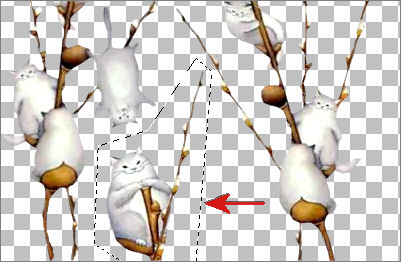
Click inside the selection to select the image
Right click on the Title Bar and select COPY from the options
Go to your frame image .... Right click on the Title Bar
and select PASTE AS NEW LAYER from the options.
Reposition using your MOVER TOOL to the bottom left of your image
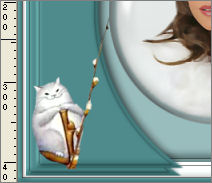
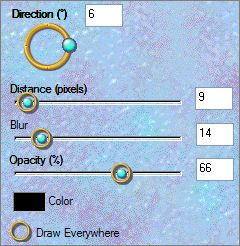
EFFECTS >>> PLUGINS >>> EYE CANDY 3 >>> DROP SHADOW
Go back to your duplicate copy of the tube and select the part shown below
using your FREEHAND SELECTION tool
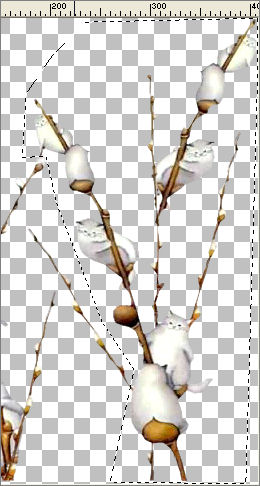
Click inside the selection to select the image
Right click on the Title Bar and select COPY from the options
Go to your frame image .... Right click on the Title Bar
and select PASTE AS NEW LAYER from the options.
IMAGE >>> RESIZE =80%
Ensure "Resize all layers" is UNCHECKED
Reposition using your MOVER TOOL to the bottom right of your image
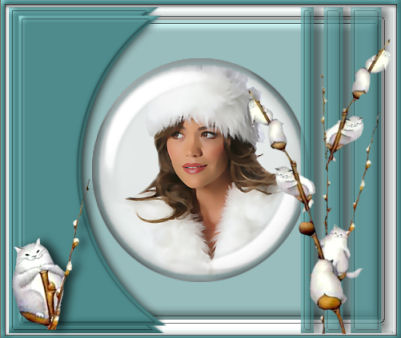
EFFECTS >>> PLUGINS >>> EYE CANDY 3 >>> DROP SHADOW
Same settings
LAYERS >>> MERGE >>> MERGE ALL (Flatten)
Save as .jpg image
TESTERS RESULTS
Page designed by

for

http://www.artistrypsp.com/
Copyright ©
2000-2008 Artistry In PSP / PSP Artistry
All rights reserved.
Unless specifically made available for
download,
no graphics or text may be removed from
this site for any reason
without written permission from Artistry
In PSP / PSP Artistry
|