PASTEL ABSTRACT FRAME
PSP8/9/X

This tutorial was written by Jemima ~ July 2007
Copyright © 2007/8 ~ Jemima ~ All rights reserved
********************************
You will need the
following to complete this tutorial
Materials
Right click and SAVE TARGET AS
normal_hres_art_ovthis.jpg
RestingInTheGarden_MistedByGini_09-03-06.psp
Save to a folder on your computer
tuval1.gif
Save to your PSP Textures folder
Plugins
** EYE CANDY3 **
http://www.pircnet.com/downloads.html
********************************
REMEMBER TO SAVE YOUR WORK OFTEN
********************************
Open up the " normal_hres_art_ovthis.jpg " image in your PSP workspace
WINDOW >>> DUPLICATE
Close the original Image
LAYERS >>> Promote background layer
LAYERS >>> DUPLICATE (4 times)
CLOSE the bottom 4 layers
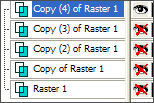
SELECTIONS >>> SELECT ALL
SELECTIONS >>> MODIFY >>> CONTRACT = 8
SELECTIONS >>> INVERT
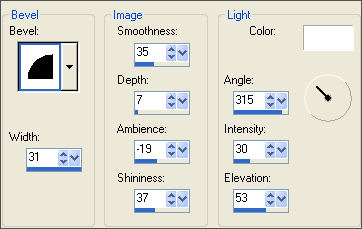
EFFECTS >>> 3D EFFECTS >>> INNER BEVEL
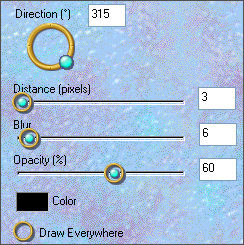
EFFECTS >>> PLUGINS >>> EYE CANDY 3 >>> DROP SHADOW
SELECTIONS >>> INVERT
SELECTIONS >>> MODIFY >>> CONTRACT = 20
EDIT >>> CLEAR
EFFECTS >>> 3D EFFECTS >>> DROP SHADOW
Vertical & Horizontal offsets = 1
Colour = Black
Opacity = 60
Blur = 0
Repeat Drop Shadow effect changing
Vertical & Horizontal Offsets to - ( minus ) 1
Click OK
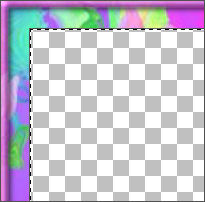
OPEN & ACTIVATE " Copy (3) of Raster 1 "
SELECTIONS >>> MODIFY >>> EXPAND = 2
SELECTIONS >>> INVERT
EDIT >>> CLEAR
SELECTIONS >>> INVERT
SELECTIONS >>> MODIFY >>> CONTRACT = 35
EDIT >>> CLEAR
DESELECT
EFFECTS >>> 3D EFFECTS >>> INNER BEVEL
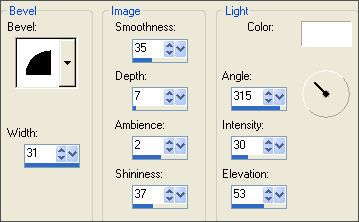
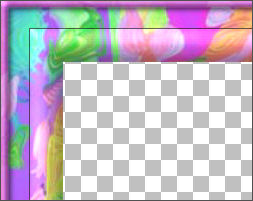
EFFECTS >>> 3D EFFECTS >>> DROP SHADOW
Use the same settings
Click OK
Repeat Drop Shadow effect changing
Vertical & Horizontal Offsets to 1
Click OK
ACTIVATE "
Copy (4) of Raster 1 "
SELECTIONS >>> SELECT ALL
SELECTIONS >>> MODIFY >>> CONTRACT = 28
SELECTIONS >>> INVERT
EFFECTS >>> PLUGINS >>> EYE CANDY 3 >>> DROP SHADOW
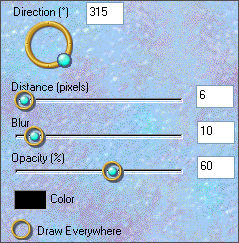
EFFECTS >>> PLUGINS >>> EYE CANDY 3 >>> DROP SHADOW
Change DIRECTION to 135
DESELECT
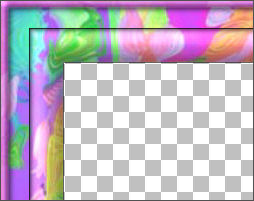
ACTIVATE " Copy (3) of Raster 1 "
With your MAGIC WAND
Mode = Replace
Match Mode = RGB Value
Tolerance = 0
Feather = 0
Antialias = UNchecked
Sample Merged = UNCHECKED
PSP9/X: Check CONTIGUOUS
PSPX: There is no " Sample Merged"
PSPX: Use all layers = UNChecked
Select the CENTRE transparent area
OPEN & ACTIVATE " Copy (2) of Raster 1"
SELECTIONS >>> MODIFY >>> CONTRACT = 10
EDIT >>> CLEAR
DESELECT
EFFECTS >>> 3D EFFECTS >>> INNER BEVEL
Same settings
EFFECTS >>> 3D EFFECTS >>> DROP SHADOW
Use the same settings
Click OK
Repeat Drop Shadow effect changing
Vertical & Horizontal Offsets to 1
Click OK
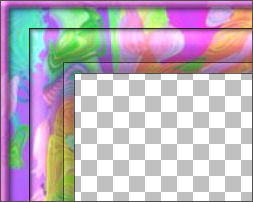
With your MAGIC WAND
Same settings
Select the CENTRE transparent area
SELECTIONS >>> INVERT
EFFECTS >>> PLUGINS >>> EYE CANDY 3 >>> DROP SHADOW
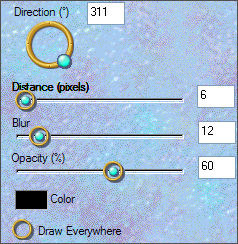
DESELECT
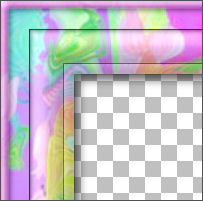
LAYERS >>> MERGE >>> MERGE VISIBLE
LAYERS >>> NEW ADJUSTMENT LAYER >>> CURVES
With your cursor move the node
from position 1 to position 2.
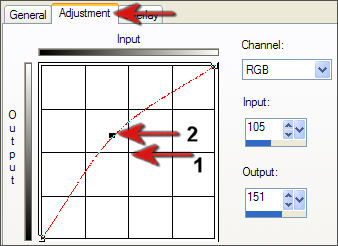
"BEFORE" on the left and "AFTER" on the right
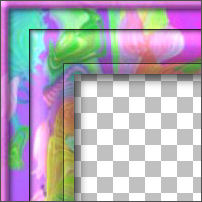 . . 
SELECTIONS >>> SELECT ALL
SELECTIONS >>> MODIFY >>> CONTRACT = 70
OPEN & ACTIVATE " Copy of Raster 1"
SELECTIONS >>> INVERT
EDIT >>> CLEAR
SELECTIONS >>> INVERT
SELECTIONS >>> MODIFY >>> CONTRACT = 17
EDIT >>> CLEAR
EFFECTS >>> 3D EFFECTS >>> DROP SHADOW
Use the same settings
Click OK
Repeat Drop Shadow effect changing
Vertical & Horizontal Offsets to 1
Click OK
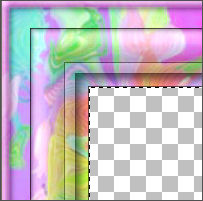
OPEN & ACTIVATE " Raster 1"
SELECTIONS >>> INVERT
EDIT >>> CLEAR
SELECTIONS >>> INVERT
SELECTIONS >>> MODIFY >>> CONTRACT = 10
EDIT >>> CLEAR
DESELECT
EFFECTS >>> 3D EFFECTS >>> INNER BEVEL
Same settings
EFFECTS >>> 3D EFFECTS >>> DROP SHADOW
Use the same settings
Click OK
Repeat Drop Shadow effect changing
Vertical & Horizontal Offsets to 1
Click OK
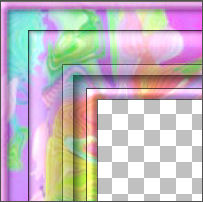
With your MAGIC WAND
Same settings
Select the area OUTSIDE the last border created
SELECTIONS >>> INVERT
LAYERS >>> ARRANGE >>> BRING TO TOP
EFFECTS >>> PLUGINS >>> EYE CANDY 3 >>> DROP SHADOW
Same settings (DIRECTION = 315)
EFFECTS >>> PLUGINS >>> EYE CANDY 3 >>> DROP SHADOW
Change DIRECTION to 135
DESELECT
ACTIVATE " Copy of Raster 1"
IMAGE >>> MIRROR
LAYERS >>> MERGE >>> MERGE VISIBLE
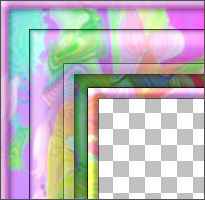
SELECTIONS >>> SELECT ALL
SELECTIONS >>> MODIFY >>> CONTRACT = 8
EFFECTS >>> 3D EFFECTS >>> DROP SHADOW
Use the same settings
Click OK
Repeat Drop Shadow effect changing
Vertical & Horizontal Offsets to 1
Click OK
DESELECT
With your MAGIC WAND
Same settings
Select the CENTRE transparent area
SELECTIONS >>> MODIFY >>> EXPAND = 2
SELECTIONS >>> INVERT
LAYERS >>> NEW RASTER LAYER
LAYERS >>> ARRANGE >>> SEND TO BOTTOM
EFFECTS >>> PLUGINS >>> EYE CANDY 3 >>> DROP SHADOW
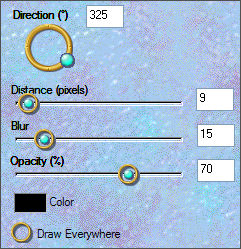
DESELECT
Save as .psp image
LAYERS >>> NEW RASTER LAYER
LAYERS >>> ARRANGE >>> SEND TO BOTTOM
Flood fill with WHITE
Open up the RestingInTheGarden_MistedByGini_09-03-06 image
in your PSP workspace
Right click on the Title Bar and select COPY from the options
Go to your frame image ....
Right click on the Title Bar
and select PASTE AS NEW LAYER from the options.
IMAGE >>> RESIZE = 60%
Ensure "Resize all layers" is UNCHECKED
EFFECTS >>> TEXTURE EFFECTS >>> TEXTURE
(Tip: If using PSPXII try using the 'Size' at 100%)
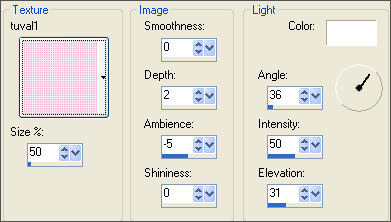
LAYERS >>> MERGE >>> MERGE ALL (Flatten)
Save as .jpg image
TESTERS RESULTS
Page designed by

for

http://www.artistrypsp.com/
Copyright ©
2000-2008 Artistry In PSP / PSP Artistry
All rights reserved.
Unless specifically made available for
download,
no graphics or text may be removed from
this site for any reason
without written permission from Artistry
In PSP / PSP Artistry
|