NINJA FRAME
PSP8/9/X
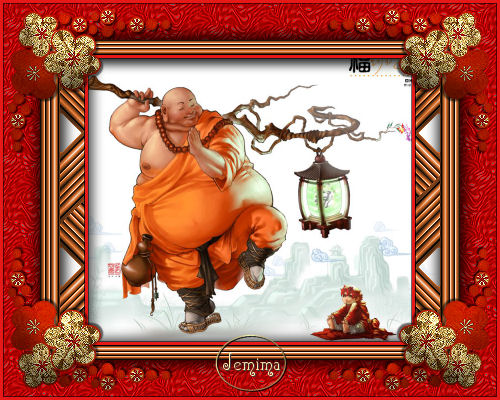
This tutorial was written by Jemima ~ July 2007
Copyright © 2007/8 ~ Jemima ~ All rights reserved
********************************
You will need the
following to complete this tutorial
Materials
Right click and SAVE TARGET AS
bktexture14
Save to your PSP Textures folder
JSC Red Side
Save to your PSP Gradients folder
MD-Oriental-Corner.psp
ninja4io.jpg
Save to a folder on your computer
Plugins
Download and extract to your PSP Plugins Folder.
** SIMPLE FILTERS **
download
** EYE CANDY3 **
http://www.pircnet.com/downloads.html
********************************
REMEMBER TO SAVE YOUR WORK OFTEN
************************************************************************************************
In your MATERIALS PALETTE
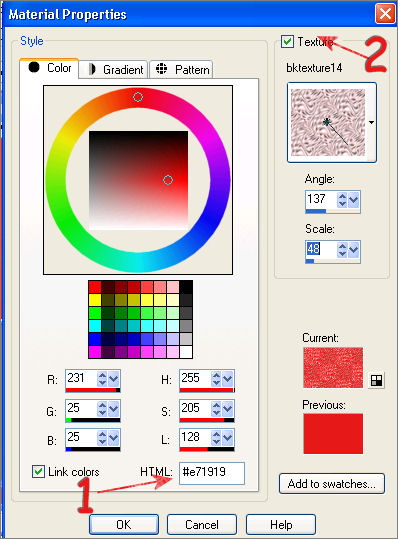
(1) : Load SOLID DARK RED " #bb0102 " in your foreground
(2) :Load the ' bktexture14 ' texture in your foreground
using the settings below.
. . 
Open a new image 500 x 400
Transparent background
PSPX: Colour Depth = 8bits/channel
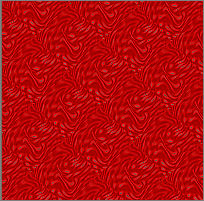
Flood fill with the ' bktexture14 ' texture (3 times)
EFFECTS >>> EDGE EFFECTS >>> ENHANCE MORE
SELECTIONS >>> SELECT ALL
SELECTIONS >>> MODIFY >>> CONTRACT = 40
EDIT >>> CLEAR
In your MATERIALS PALETTE
Click on the 'texture' option to NULL
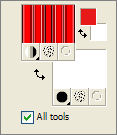
Load the ' JSC Red Side ' Gradient in your foreground
using the settings below.
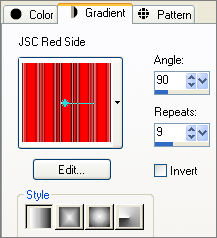 . . 
LAYERS >>> NEW RASTER LAYER
Flood fill with the ' JSC Red Side ' Gradient
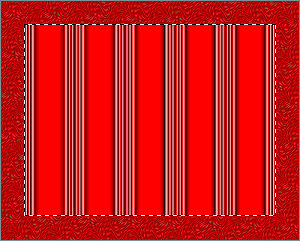
DESELECT
Choose your SELECTION TOOL then click on the CUSTOM SELECTION symbol
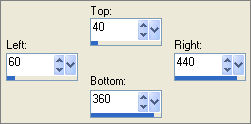
EDIT >>> CLEAR
In your MATERIALS PALETTE change the ANGLE of the Gradient to 180

LAYERS >>> NEW RASTER LAYER
Flood fill with the ' JSC Red Side ' Gradient
DESELECT
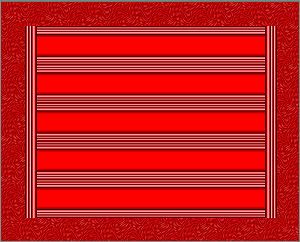
Choose your SELECTION TOOL then click on the CUSTOM SELECTION symbol
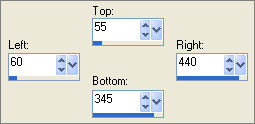
EDIT >>> CLEAR
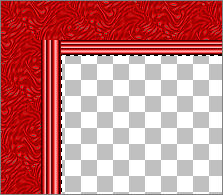
In your MATERIALS PALETTE change the ANGLE of the Gradient to 225
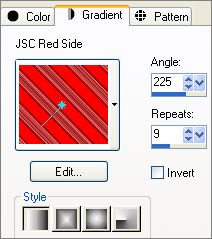
LAYERS >>> NEW RASTER LAYER
Flood fill with the ' JSC Red Side ' Gradient
DESELECT
With your MAGIC WAND
Mode = Replace
Match Mode = RGB Value
Tolerance = 0
Feather = 0
Antialias = UNchecked
Sample Merged = UNCHECKED
PSP9/X: Check CONTIGUOUS
PSPX: There is no " Sample Merged"
PSPX: Use all layers = UNChecked
Using your SHIFT key... Select the solid red sections of the gradient
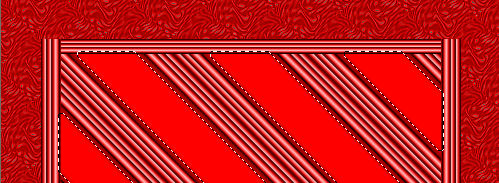
SELECTIONS >>> MODIFY >>> EXPAND = 3
EDIT >>> CLEAR
DESELECT
LAYERS >>> DUPLICATE
IMAGE >>> MIRROR
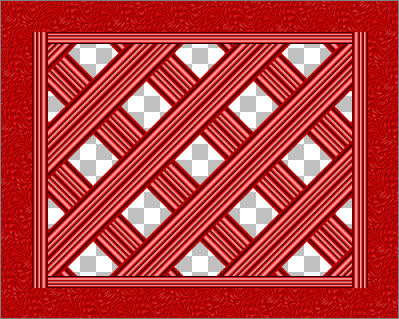
CLOSE Layers 1, 2 and 3
LAYERS >>> MERGE >>> MERGE VISIBLE
Choose your SELECTION TOOL then click on the CUSTOM SELECTION symbol
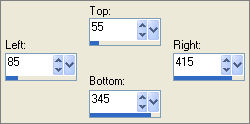
EDIT >>> CLEAR
DESELECT
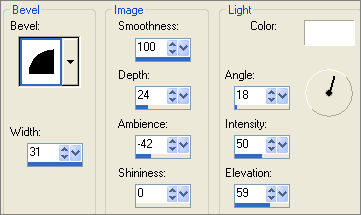
EFFECTS >>> 3D EFFECTS >>> INNER BEVEL
(This is how it should look with all layers open)

Close the Merged Layer
Open Raster 2
Open & Activate Raster 3
LAYERS >>> MERGE >>> MERGE VISIBLE
EFFECTS >>> 3D EFFECTS >>> INNER BEVEL
Same settings
Open the other Merged layer
LAYERS >>> MERGE >>> MERGE VISIBLE
With your MAGIC WAND
Same settings
Select the OUTER transparent area
SELECTIONS >>> INVERT
EFFECTS >>> PLUGINS >>> EYE CANDY 3 >>> DROP SHADOW
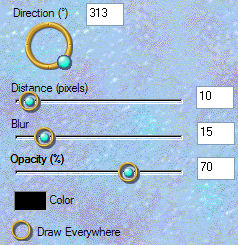
Repeat DROP SHADOW changing the DIRECTION to 125
DESELECT
Open Raster 1
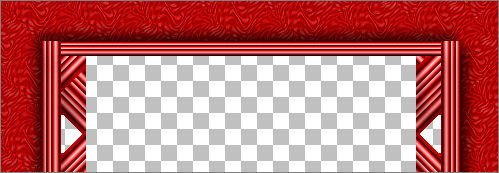
With the Merged layer active
With your MAGIC WAND
Same settings
Select the CENTRE transparent area
LAYERS >>> NEW RASTER LAYER
Flood fill with SOLID RED " #e71919 "
SELECTIONS >>> MODIFY >>> CONTRACT = 3
EDIT >>> CLEAR
DESELECT
EFFECTS >>> 3D EFFECTS >>> DROP SHADOW
Vertical & Horizontal offsets = 1
Colour = Black
Opacity = 60
Blur = 0
Repeat Drop Shadow effect changing
Vertical & Horizontal Offsets to - ( minus ) 1
Click OK
CLOSE Raster 1
LAYERS >>> MERGE >>> MERGE VISIBLE
OPEN Raster1

With your MAGIC WAND
Same settings
Select the CENTRE transparent area
LAYERS >>> NEW RASTER LAYER
LAYERS >>> ARRANGE >>> MOVE DOWN
SELECTIONS >>> MODIFY >>> EXPAND = 3
SELECTIONS >>> INVERT
EFFECTS >>> PLUGINS >>> EYE CANDY 3 >>> DROP SHADOW
change the DIRECTION to 313
DESELECT
Choose your SELECTION TOOL then click on the CUSTOM SELECTION
symbol
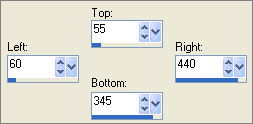
SELECTIONS >>> INVERT
EFFECTS >>> PLUGINS >>> EYE CANDY 3 >>> DROP SHADOW
Same Settings
EFFECTS >>> PLUGINS >>> EYE CANDY 3 >>> DROP SHADOW
change the DIRECTION to 125
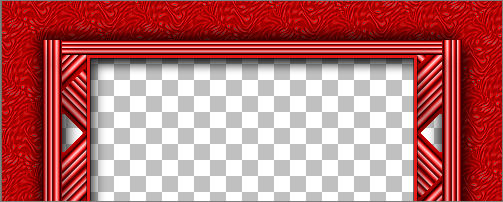
DESELECT
LAYERS >>> MERGE >>> MERGE VISIBLE
Open up the MD-Oriental-Corner.psp image in your PSP workspace
Right click on the Title Bar and select COPY from the options
Go to your frame image
Right click on the Title Bar
and select PASTE AS NEW LAYER from the options.
Reposition using your MOVER tool
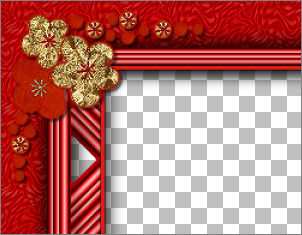
EFFECTS >>> PLUGINS >>> SIMPLE >>> TOP LEFT MIRROR
EFFECTS >>> 3D EFFECTS >>> INNER BEVEL
Same settings
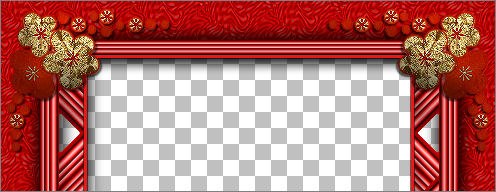
Activate the MERGED layer
With your MAGIC WAND
Same settings
Select the Inner red border
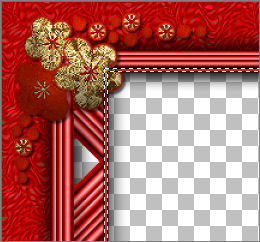
Right click on the Title Bar and select COPY from the options
Right click on the Title Bar
and select PASTE AS NEW LAYER from the options.
DESELECT
Activate the MERGED layer
Choose your SELECTION TOOL then click on the CUSTOM SELECTION symbol
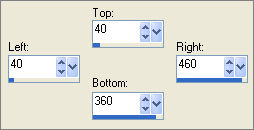
ADJUST >>> HUE & SATURATION >>> COLORIZE

ADJUST >>> SHARPNESS >>> SHARPEN
DESELECT
LAYERS >>> MERGE >>> MERGE VISIBLE
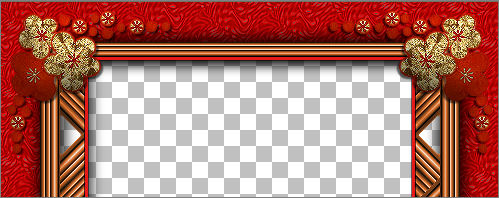
LAYERS >>> NEW RASTER LAYER
SELECTIONS >>> SELECT ALL
SELECTIONS >>> MODIFY >>> CONTRACT = 3
SELECTIONS >>> INVERT
Flood fill with SOLID RED " #e71919 "
EFFECTS >>> 3D EFFECTS >>> INNER BEVEL
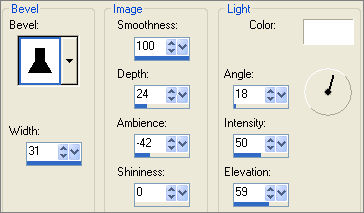
EFFECTS >>> 3D EFFECTS >>> DROP SHADOW
Vertical & Horizontal offsets = 1
Colour = Black
Opacity = 60
Blur = 0
Repeat Drop Shadow effect changing
Vertical & Horizontal Offsets to - ( minus ) 1
Click OK
DESELECT
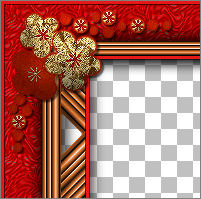
LAYERS >>> MERGE >>> MERGE VISIBLE
Save as .psp image
Open up the " ninja4io.jpg " image in your PSP workspace
WINDOW >>> DUPLICATE
Close the original Image
IMAGE >>> RESIZE = 50%
Ensure "Resize all layers" is CHECKED
Right click on the Title Bar and select COPY from the options
Go to your frame image ,,,
Right click on the Title Bar
and select PASTE AS NEW LAYER from the options.
LAYERS >>> ARRANGE >>> SEND TO BOTTOM
LAYERS >>> MERGE >>> MERGE ALL (Flatten)
Save as .jpg image
TESTERS RESULTS
Page designed by

for

http://www.artistrypsp.com/
Copyright ©
2000-2008 Artistry In PSP / PSP Artistry
All rights reserved.
Unless specifically made available for
download,
no graphics or text may be removed from
this site for any reason
without written permission from Artistry
In PSP / PSP Artistry
|