KNOCK-OFF FRAME
PSP8/9/X
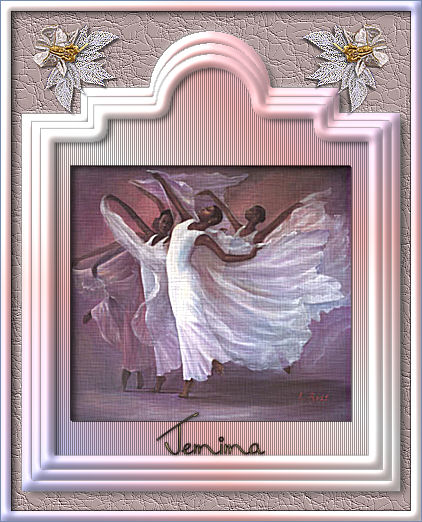
This tutorial was written by Jemima ~ June 2007
Copyright © 2007/8 ~ Jemima ~ All rights reserved
********************************
You will need the
following to complete this tutorial
Materials
Right click and SAVE TARGET AS
StanleyDiane-03-JoanOfArc-sj.jpg
R229.jpg
MD-Oriental-Corner-3.psp
Save to a folder on your computer
linenPOP.bmp
Save to your PSP Textures folder
vbs16.jgd
Save to your PSP Gradients folder
OR
use a gradient of your choice
Plugins
** EYE CANDY3 **
http://www.pircnet.com/downloads.html
OR
http://www.fleursauvage.be/utilitaire/filtres/filtres.htm
********************************
REMEMBER TO SAVE YOUR WORK OFTEN
********************************
In your MATERIALS PALETTE
Load the ' vbs16 ' gradient in your foreground OR a gradient of your choice...
using the settings below.
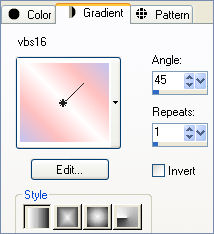
Load SOLID DARK PINK' #b39e9e ' in your background

Open a new image 420 x 520
Transparent background
PSPX: Colour Depth = 8bits/channel
This is the reason I called this a "Knock-Off" frame..
we are going to pinch the 'shape'
from this painting ...
Open the " StanleyDiane-03-JoanOfArc-sj.jpg " image in your PSP workspace
With your MAGIC WAND
Mode = Replace
Match Mode = RGB Value
Tolerance = 90
Feather = 0
Antialias = UNchecked
Sample Merged = UNCHECKED
PSP9/X: Check CONTIGUOUS
PSPX: There is no " Sample Merged"
PSPX: Use all layers = UNChecked
Select the OUTER creamy white area
SELECTIONS >>> INVERT
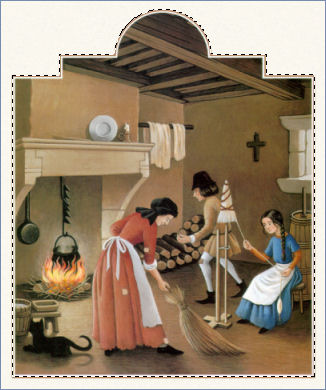
Right click on the Title Bar and select COPY from the options
Go to your new blank image ....
Right click on the Title Bar
and select PASTE AS NEW LAYER from the options.
With your MAGIC WAND
Same settings
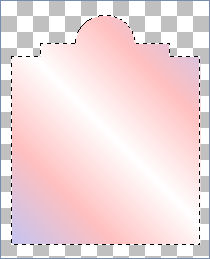
Select the OUTER transparent area
SELECTIONS >>> INVERT
EDIT >>> CLEAR
Flood fill with the ' vbs16 ' gradient
CLOSE the " StanleyDiane-03-JoanOfArc-sj.jpg " image
Now... back to your frame image...
SELECTIONS >>> MODIFY >>> CONTRACT = 15
EDIT >>> CLEAR
DESELECT
EFFECTS >>> 3D EFFECTS >>> INNER BEVEL
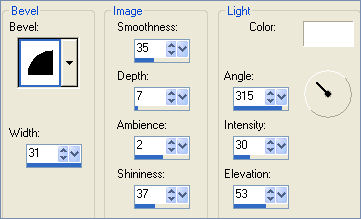
EFFECTS >>> 3D EFFECTS >>> DROP SHADOW
Vertical & Horizontal offsets = 1
Colour = GREY ( #808080 )
Opacity = 60
Blur = 0
Repeat Drop Shadow effect changing
Vertical & Horizontal Offsets to - ( minus ) 1
Click OK
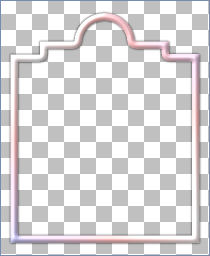
LAYERS >>> DUPLICATE
IMAGE >>> RESIZE = 95%
Ensure "Resize all layers" is UNCHECKED
LAYERS >>> DUPLICATE
IMAGE >>> RESIZE = 95%
Ensure "Resize all layers" is UNCHECKED
CLOSE Raster 1
LAYERS >>> MERGE >>> MERGE VISIBLE
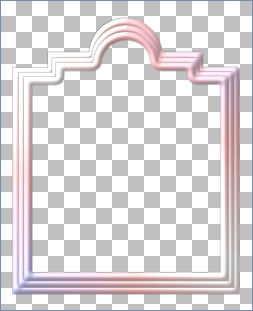
With your MAGIC WAND
Same settings
Select the CENTRE transparent area
SELECTIONS >>> MODIFY >>> EXPAND = 5
LAYERS >>> NEW RASTER LAYER
LAYERS >>> ARRANGE >>> MOVE DOWN
Flood fill with GRADIENT
EFFECTS >>> TEXTURE EFFECTS >>> BLINDS
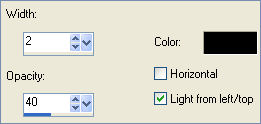
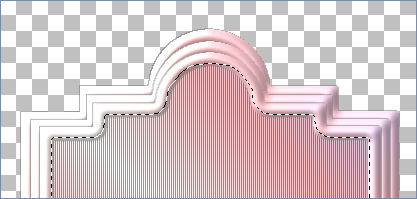
DESELECT
Choose your SELECTION TOOL then click on the CUSTOM SELECTION
symbol
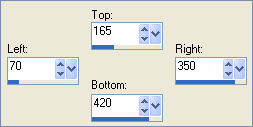
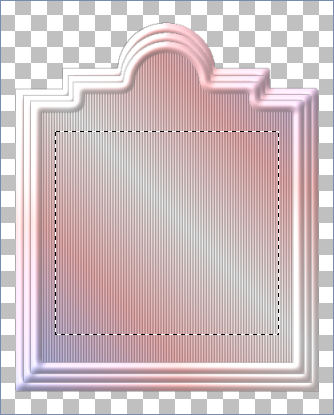
EDIT >>> CLEAR
EFFECTS >>> 3D EFFECTS >>> DROP SHADOW
Vertical & Horizontal offsets = 1
Colour = Black
Opacity = 60
Blur = 0
Repeat Drop Shadow effect changing
Vertical & Horizontal Offsets to - ( minus ) 1
Click OK
DESELECT
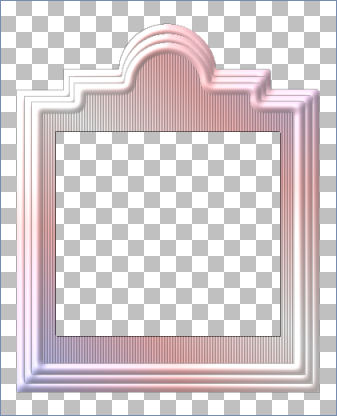
ACTIVATE THE MERGED LAYER
With your MAGIC WAND
Same settings
Select the CENTRE transparent area
SELECTIONS >>> MODIFY >>> EXPAND = 3
SELECTIONS >>> INVERT
LAYERS >>> NEW RASTER LAYER
LAYERS >>> ARRANGE >>> MOVE DOWN
EFFECTS >>> PLUGINS >>> EYE CANDY 3 >>> DROP SHADOW
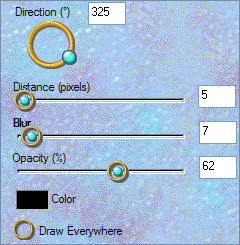
DESELECT
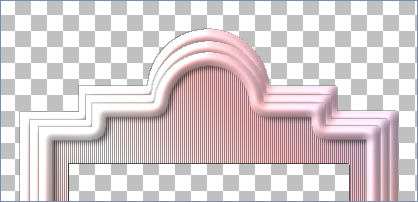
ACTIVATE RASTER 2
With your MAGIC WAND
Same settings
Select the CENTRE transparent area
SELECTIONS >>> INVERT
LAYERS >>> NEW RASTER LAYER
LAYERS >>> ARRANGE >>> MOVE DOWN
EFFECTS >>> PLUGINS >>> EYE CANDY 3 >>> DROP SHADOW
Same settings
DESELECT
LAYERS >>> MERGE >>> MERGE VISIBLE
With your MAGIC WAND
Same settings
Select the OUTER transparent area
SELECTIONS >>> MODIFY >>> EXPAND = 3
LAYERS >>> NEW RASTER LAYER
LAYERS >>> ARRANGE >>> MOVE DOWN
Flood fill with SOLID DARK PINK' #b39e9e '
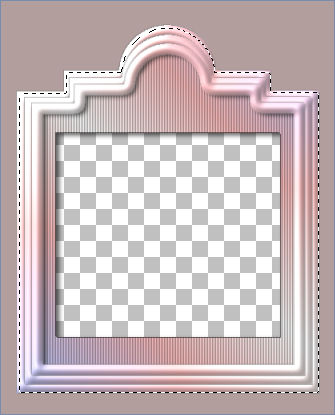
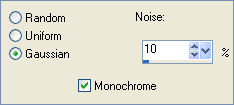
ADJUST >>> ADD/REMOVE NOISE >>> ADD NOISE
EFFECTS >>> TEXTURE EFFECTS >>> FINE LEATHER
COLOUR = "
#dcdcdc "
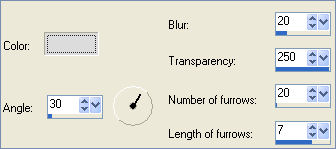
SELECTIONS >>> INVERT
EFFECTS >>> PLUGINS >>> EYE CANDY 3 >>> DROP SHADOW
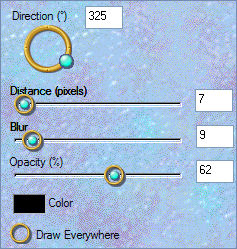
DESELECT
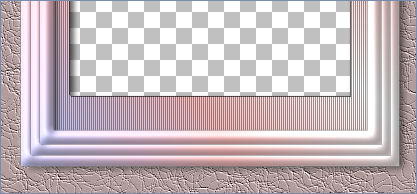
LAYERS >>> MERGE >>> MERGE VISIBLE
LAYERS >>> NEW RASTER LAYER
SELECTIONS >>> SELECT ALL
SELECTIONS >>> MODIFY >>> CONTRACT = 10
SELECTIONS >>> INVERT
Flood fill with GRADIENT
EFFECTS >>> 3D EFFECTS >>> INNER BEVEL
Same settings
EFFECTS >>> 3D EFFECTS >>> DROP SHADOW
Vertical & Horizontal offsets = 1
Colour = Black
Opacity = 60
Blur = 0
Repeat Drop Shadow effect changing
Vertical & Horizontal Offsets to - ( minus ) 1
Click OK
EFFECTS >>> PLUGINS >>> EYE CANDY 3 >>> DROP SHADOW

DESELECT
OPEN & ACTIVATE Raster 1
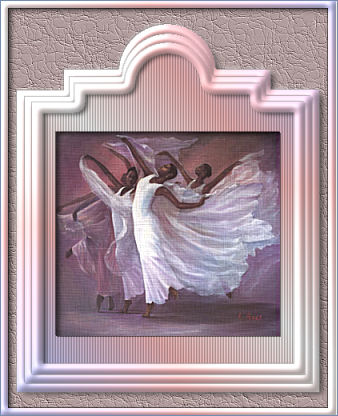
Open the " R229.jpg " image in your PSP workspace
Right click on the Title Bar and select COPY from the options
Go to your frame image ...
Right click on the Title Bar
and select PASTE AS NEW LAYER from the options.
IMAGE >>> RESIZE = 90%
Ensure "Resize all layers" is UNCHECKED
Reposition with your MOVER tool
EFFECTS >>> TEXTURE EFFECTS >>> TEXTURE
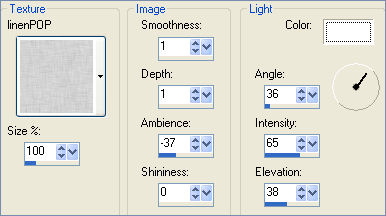
ADJUST >>> SHARPNESS >>> SHARPEN MORE
ACTIVATE RASTER 2
Open the " MD-Oriental-Corner-3.psp " image in your PSP workspace
Right click on the Title Bar and select COPY from the options
Go to your frame image ... Right click on the Title Bar
and select PASTE AS NEW LAYER from the options.
Reposition with your MOVER tool
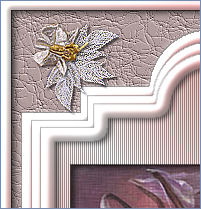
LAYERS >>> DUPLICATE
IMAGE >>> MIRROR
Close Raster 3
LAYERS >>> MERGE >>> MERGE VISIBLE
Save as .psp image
*/*/*/*/*/*/*/*/*/*/*
Open Raster 3
LAYERS >>> MERGE >>> MERGE ALL (Flatten)
IMAGE >>> ADD BORDERS = 1 SYMMETRIC
COLOUR =
SOLID DARK PINK' #b39e9e '
Save as .jpg image
TESTERS RESULTS
Page designed by

for

http://www.artistrypsp.com/
Copyright ©
2000-2008 Artistry In PSP / PSP Artistry
All rights reserved.
Unless specifically made available for
download,
no graphics or text may be removed from
this site for any reason
without written permission from Artistry
In PSP / PSP Artistry
|