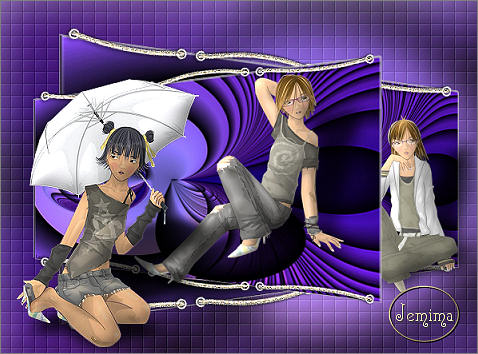
PURPLE VIBES
PSP8/9/X

This tutorial was
written by Jemima ~ January 2007
Copyright © 2007 ~ Jemima
~ All rights reserved
********************************
This was created using PSP9 but can be adapted for other versions of PSP.
You will need the
following to complete this tutorial
Materials
Vibes.jpg
snakerand5-kl.psp
MQQN~CHANNII__2_BY_MAXIMK.psp
MQQN~OLI CHANNII BY_MAXIMK.psp
MQQN~THOUGHTS BY_MAXIMK.psp
Save to a folder on your computer
Plugins
** EYE CANDY3 **
HERE
********************************
Open all your images in PSP and minimize
Open a new image 600 x 450
Transparent background
PSPX: Colour Depth = 8bits/channel
Flood fill with " #b982fd "
EFFECTS >>> TEXTURE EFFECTS >>> BLINDS
COLOUR = #461818
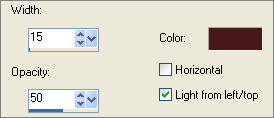
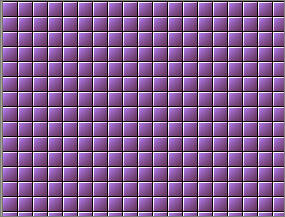
EFFECTS >>> TEXTURE EFFECTS >>> BLINDS
Same settings, but this time check the HORIZONTAL option.
EFFECTS >>> EDGE EFFECTS >>> ENHANCE MORE
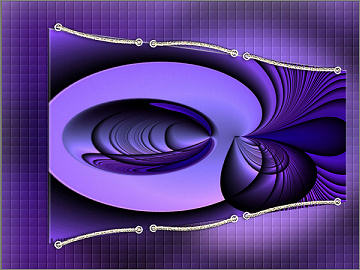
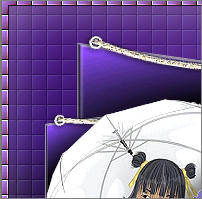
(This example is only a corner section of the image)
Open up the Vibes.jpg image in your PSP workspace
Right click on the Title Bar and select COPY from the options
Right click on the Title Bar of your tag image
and select PASTE AS NEW LAYER from the options.
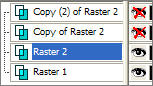
LAYERS >>> DUPLICATE
LAYERS >>> DUPLICATE
Close the 2 duplicated layers and activate Raster 2
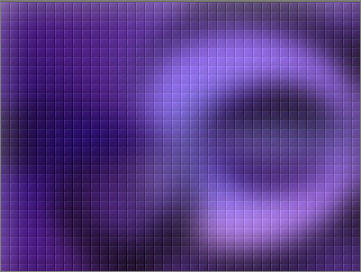
ADJUST >>> BLUR >>> GAUSSIAN BLUR
RADIUS = 25.00
IMAGE >>> MIRROR
In your LAYER PALETTE change the OPACITY to 82%
ACTIVATE "Copy of Raster 2"
IMAGE >>> RESIZE = 85%
Ensure "Resize all layers" is UNCHECKED
PSP8 / PSP9 |
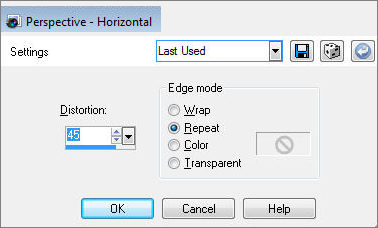
EFFECTS>>> GEOMETRIC EFFECTS >>> PERSPECTIVE HORIZONTAL
 |
PSP10 / PSP12 |
EFFECTS>>> GEOMETRIC EFFECTS >>> PERSPECTIVE HORIZONTAL
 |
Maximize snakerand5-kl.psp in your PSP workspace
Right click on the Title Bar and select COPY from the options
Right click on the Title Bar of your tag image
and select PASTE AS NEW LAYER from the options.
IMAGE >>> ROTATE >>> FREE ROTATE = RIGHT 90
Ensure "All layers" is UNCHECKED
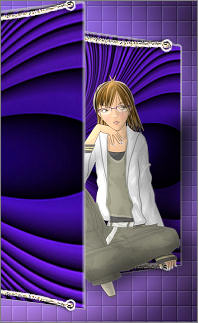
Reposition with your MOVER tool to the top of the image
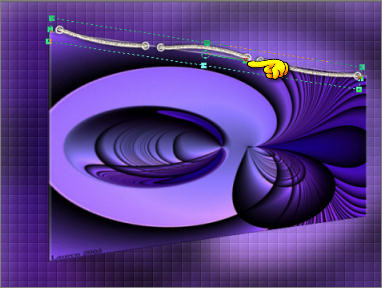
Select your DEFORMATION tool
Using the 'rotating' node twist the snakerand5-kl so it is parallel to the top of the image
and reposition as shown below.
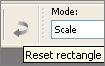
Click the RESET RECTANGLE arrow
LAYERS >>> DUPLICATE
IMAGE >>> FLIP
ACTIVATE "Copy of Raster 2"
EFFECTS >>> 3D EFFECTS >>> DROP SHADOW
Vertical & Horizontal offsets = 1
Colour = GREY " #c0c0c0 "
Opacity = 80
Blur = 0
Repeat Drop Shadow effect changing
Vertical & Horizontal Offsets to - ( minus ) 1
Click OK
ACTIVATE "Copy (2) of Raster 2"
IMAGE >>> RESIZE = 75%
Ensure "Resize all layers" is UNCHECKED
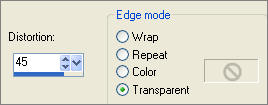
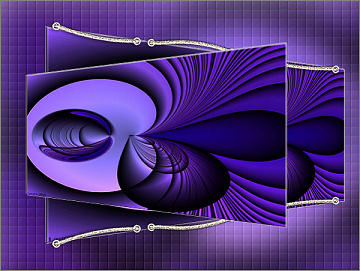
EFFECTS>>> GEOMETRIC EFFECTS >>> PERSPECTIVE HORIZONTAL
Change the "DISTORTION" option to - (minus) 45
EFFECTS >>> 3D EFFECTS >>> DROP SHADOW
Vertical & Horizontal offsets = 1
Colour = GREY " #c0c0c0 "
Opacity = 80
Blur = 0
Repeat Drop Shadow effect changing
Vertical & Horizontal Offsets to - ( minus ) 1
Click OK
Maximize snakerand5-kl.psp in your PSP workspace
Right click on the Title Bar and select COPY from the options
Right click on the Title Bar of your tag image
and select PASTE AS NEW LAYER from the options.
IMAGE >>> RESIZE = 85%
Ensure "Resize all layers" is UNCHECKED
IMAGE >>> ROTATE >>> FREE ROTATE = RIGHT 90
Ensure "All layers" is UNCHECKED
Reposition with your MOVER tool to the top of the image
Select your DEFORMATION tool
Using the 'rotating' node twist the snakerand5-kl so it is parallel to the top of the image
and reposition as shown below.
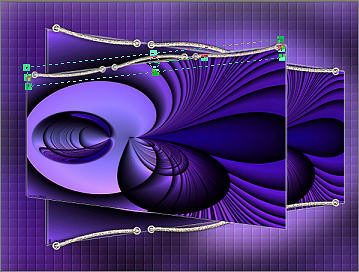
Click the RESET RECTANGLE arrow
ADJUST >>> SHARPNESS >>> SHARPEN MORE
LAYERS >>> DUPLICATE
IMAGE >>> FLIP
Open up the MQQN~THOUGHTS BY_MAXIMK.psp image in your PSP workspace
Right click on the Title Bar and select COPY from the options
Right click on the Title Bar of your tag image
and select PASTE AS NEW LAYER from the options.
IMAGE >>> RESIZE = 45%
Ensure "Resize all layers" is UNCHECKED
ADJUST >>> SHARPNESS >>> SHARPEN
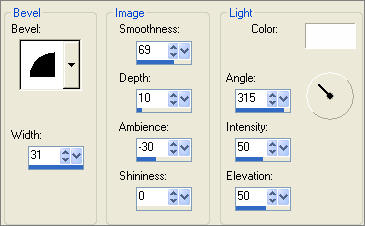
EFFECTS >>> 3D EFFECTS >>> INNER BEVEL
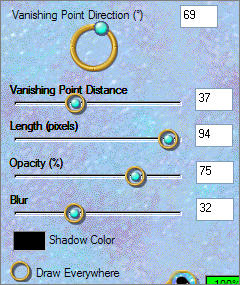
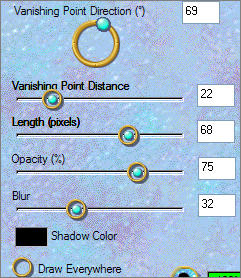
EFFECTS >>> PLUGINS >>> EYE CANDY 3 >>> PERSPECTIVE SHADOW
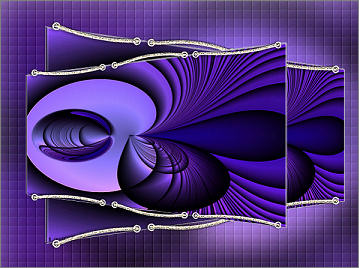
Reposition with your MOVER tool to the right side of the tag
LAYERS >>> ARRANGE >>> MOVE DOWN (3 times)
Reposition with your MOVER tool as shown below
ACTIVATE " Copy of Raster 4 "
Open up the MQQN~OLI CHANNII BY_MAXIMK.psp image in your PSP workspace
Right click on the Title Bar and select COPY from the options
Right click on the Title Bar of your tag image
and select PASTE AS NEW LAYER from the options.
IMAGE >>> RESIZE = 58%
Ensure "Resize all layers" is UNCHECKED
ADJUST >>> SHARPNESS >>> SHARPEN
EFFECTS >>> 3D EFFECTS >>> INNER BEVEL
Same settings
EFFECTS >>> PLUGINS >>> EYE CANDY 3 >>> PERSPECTIVE SHADOW
Same settings
Open up the MQQN~CHANNII__2_BY_MAXIMK.psp image in your PSP workspace
Right click on the Title Bar and select COPY from the options
Right click on the Title Bar of your tag image
and select PASTE AS NEW LAYER from the options.
IMAGE >>> MIRROR
IMAGE >>> RESIZE = 62%
Ensure "Resize all layers" is UNCHECKED
ADJUST >>> SHARPNESS >>> SHARPEN
EFFECTS >>> 3D EFFECTS >>> INNER BEVEL
Same settings
EFFECTS >>> PLUGINS >>> EYE CANDY 3 >>> PERSPECTIVE SHADOW
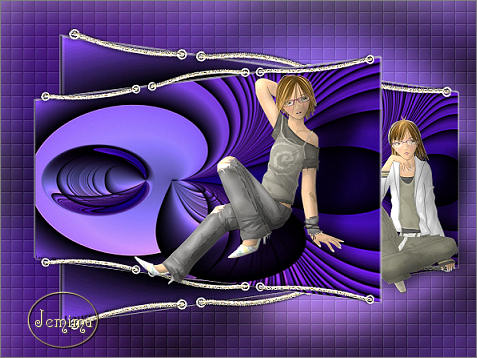
Reposition with your MOVER tool as shown below
ADJUST >>> SHARPNESS >>> SHARPEN
LAYERS >>> MERGE >>> MERGE VISIBLE
SELECTIONS >>> SELECT ALL
SELECTIONS >>> MODIFY >>> CONTRACT = 6
SELECTIONS >>> INVERT
Flood fill with " #b982fd "
EFFECTS >>> TEXTURE EFFECTS >>> BLINDS
Same settings
EFFECTS >>> TEXTURE EFFECTS >>> BLINDS
Same settings, but this time UNcheck the HORIZONTAL option.
EFFECTS >>> EDGE EFFECTS >>> ENHANCE MORE
EFFECTS >>> 3D EFFECTS >>> DROP SHADOW
Vertical & Horizontal offsets = 1
Colour = Black
Opacity = 80
Blur = 0
Repeat Drop Shadow effect changing
Vertical & Horizontal Offsets to - ( minus ) 1
Click OK
DESELECT
LAYERS >>> MERGE >>> MERGE ALL (Flatten)
Save as .jpg image
TESTERS RESULTS
Page designed by

for

Copyright ©
2000-2010 Artistry In PSP / PSP Artistry
All rights reserved.
Unless specifically made available for
download,
no graphics or text may be removed from
this site for any reason
without written permission from Artistry
In PSP / PSP Artistry
|