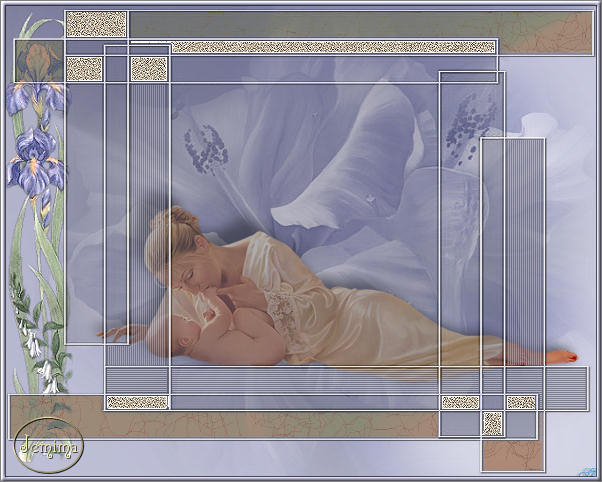
INNOCENCE
PSP8/9/X

This tutorial was
written by Jemima ~ January 2007
Copyright © 2007 ~ Jemima
~ All rights reserved
********************************
This was created using PSP9 but can be adapted for other versions of PSP.
You will need the
following to complete this tutorial
Materials
Left click and SAVE
Srg061.jpg
Tyleress_Mask 12.jpg
Suz~Mothers Soft Lullabye.psp
TheHeartOfTheIris_MistedByGini_06-29-06.tub
bella-iris.psp
Save to a folder on your computer
Plugins
** EYE CANDY3 **
http://www.pircnet.com/downloads.html
OR
http://www.fleursauvage.be/utilitaire/filtres/filtres.htm
********************************
Open up the Srg061.jpg image in your PSP workspace
WINDOW >>> DUPLICATE
Close the original Image
LAYERS >>> Promote background layer
LAYERS >>> NEW RASTER LAYER
Flood fill with LILAC " #c9cadc "
Open up the Tyleress_Mask 12.jpg image in your PSP workspace... and minimise.
LAYERS >>> NEW MASK LAYER >>> FROM IMAGE

LAYERS >>> DELETE

LAYERS >>> MERGE >>> MERGE GROUP
EFFECTS >>> EDGE EFFECTS >>> ENHANCE
With your MAGIC WAND

PSP9/X: Check CONTIGUOUS
PSPX: There is no " Sample Merged"
PSPX: Use all layers = UNChecked
Select the areas shown below

LAYERS >>> NEW RASTER LAYER
Flood fill with DARK LILAC " #b1b1c9 "
EFFECTS >>> TEXTURE EFFECTS >>> BLINDS

Change the LAYER OPACITY to 50%
DESELECT

ACTIVATE " Group - Raster 2 "
PSP8/9: ADJUST >>> BRIGHTNESS and CONTRAST >>> GAMMA CORRECTION

PSPX:- ADJUST >>> Brightness & Contrast >>> Histogram Adjustment

With your MAGIC WAND ...
Same settings
BUT... Change TOLERANCE to 30
Select the areas shown below (at the bottom of the image)

LAYERS >>> NEW RASTER LAYER
Flood fill with LILAC " #c9cadc "
EFFECTS >>> TEXTURE EFFECTS >>> BLINDS
Same settings BUT this time check HORIZONTAL
Change the LAYER OPACITY to 60%
DESELECT

ACTIVATE " Group - Raster 2 "
With your MAGIC WAND ...
Same settings ...
Select the areas shown below
ZOOM IN using your SHIFT KEY to pick up the stray pixels


LAYERS >>> NEW RASTER LAYER
Flood fill with TAN " #af8977 "
EFFECTS >>> TEXTURE EFFECTS >>> FINE LEATHER

DESELECT
Change the BLEND MODE to DARKEN

ACTIVATE " Group - Raster 2 "
With your MAGIC WAND ... Same settings ... Select the areas shown below

LAYERS >>> NEW RASTER LAYER
Flood fill with LIGHT TAN " #c0b19f "
ADJUST >>> ADD/REMOVE NOISE >>> ADD NOISE

EFFECTS >>> EDGE EFFECTS >>> ENHANCE
DESELECT

ACTIVATE RASTER 1
Open up the TheHeartOfTheIris_MistedByGini_06-29-06.tub image in your PSP workspace
Right click on the Title Bar and select COPY from the options
Right click on the Title Bar of your tag image
and select PASTE AS NEW LAYER from the options.
Change the BLEND MODE to LUMINANCE

Open up the Suz~Mothers Soft Lullabye.psp image in your PSP workspace
Right click on the Title Bar and select COPY from the options
Right click on the Title Bar of your tag image
and select PASTE AS NEW LAYER from the options.
Drag it a little to the right so that when we resize it
part of it will be showing outside
the mask layer
IMAGE >>> RESIZE = 60%
Ensure "Resize all layers" is UNCHECKED
Grab her foot and drag her down to the position shown below

Open up the bella-iris.psp image in your PSP workspace
Right click on the Title Bar and select COPY from the options
Right click on the Title Bar of your tag image
and select PASTE AS NEW LAYER from the options.
Grab it (at the bottom of the image) with your MOVER tool and drag th the left.
IMAGE >>> RESIZE = 95%
Ensure "Resize all layers" is UNCHECKED

ACTIVATE " Group - Raster 2 "
EFFECTS >>> 3D EFFECTS >>> DROP SHADOW
Vertical & Horizontal offsets = 1
Colour = Black
Opacity = 60
Blur = 0
ACTIVATE RASTER 7
EFFECTS >>> PLUGINS >>> EYE CANDY 3 >>> PERSPECTIVE SHADOW

LAYERS >>> MERGE >>> MERGE VISIBLE
LAYERS >>> NEW RASTER LAYER
SELECTIONS >>> SELECT ALL
SELECTIONS >>> MODIFY >>> CONTRACT = 4
SELECTIONS >>> INVERT
Flood fill with LILAC " #c9cadc "
EFFECTS >>> 3D EFFECTS >>> INNER BEVEL

EFFECTS >>> 3D EFFECTS >>> DROP SHADOW
Vertical & Horizontal offsets = 1
Colour = Black
Opacity = 60
Blur = 0
Repeat Drop Shadow effect changing
Vertical & Horizontal Offsets to - ( minus ) 1
Click OK
DESELECT
LAYERS >>> MERGE >>> MERGE ALL (Flatten)
Save as .jpg image
TESTERS RESULTS
Page designed by

for
http://www.artistrypsp.com/
Copyright © 2000-2007 Artistry In PSP / PSP Artistry
All rights reserved.
Unless specifically made available for
download,
no graphics or text may be removed from
this site for any reason
without written permission from Artistry
In PSP / PSP Artistry
TUTORIAL INDEX
|