FLIGHT
PSP8/9/X
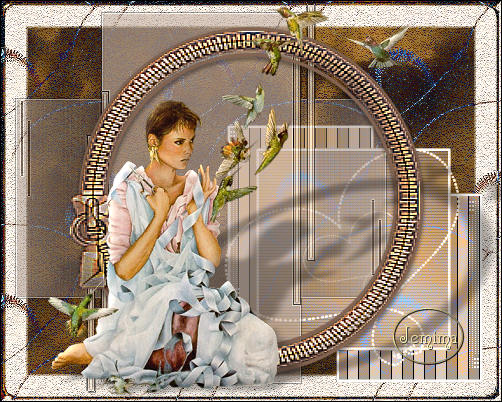
This tutorial was
written by Jemima ~ January 2007
Copyright © 2007 ~ Jemima
~ All rights reserved
********************************
This was created using PSP9 but can be adapted for other versions of PSP.
You will need the
following to complete this tutorial
Materials
LEFT CLICK >>> SAVE
white-clouds-sky-k75.jpg
PmsTemp369.psp
IDI[Backs]S1@26[1].11.5.psp
DoubleCircleTemp-SmooooochesFramez.psp
ivy_roundzippers.psp
sr_girlwithbirds.tub
Save to a folder on your computer
Plugins
** EYE CANDY3 **
http://www.pircnet.com/downloads.html
********************************
Open all your images in PSP and minimize.
In your MATERIALS PALETTE
Load LIGHT BROWN "#b8a091 " in your foreground
Load GREY "#bdb9b2" in your background
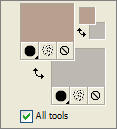
Open a new image 500 x 400
Transparent background
PSPX: Colour Depth = 8bits/channel
Flood fill with GREY
Open up the white-clouds-sky-k75.jpg image in your PSP workspace
Right click on the Title Bar and select COPY from the options
Right click on the Title Bar of your tag image
and select PASTE AS NEW LAYER from the options.
Change the BLEND MODE to DIFFERENCE
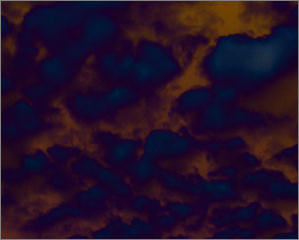
Open up the PmsTemp369.psp image in your PSP workspace
Right click on the Title Bar and select COPY from the options
Right click on the Title Bar of your tag image
and select PASTE AS NEW LAYER from the options.
Go to your LAYER PALETTE
Change the BLEND MODE to LUMINANCE (L)
Reposition with your MOVER tool

Open up the IDI[Backs]S1@26[1].11.5.psp image in your PSP workspace
Right click on the Title Bar and select COPY from the options
Right click on the Title Bar of your tag image
and select PASTE AS NEW LAYER from the options.
Go to your LAYER PALETTE
Change the OPACITY to 62%
Reposition with your MOVER tool

EFFECTS >>> 3D EFFECTS >>> DROP SHADOW
Vertical & Horizontal offsets = 1
Colour = Black
Opacity = 60
Blur = 0
Repeat Drop Shadow effect changing
Vertical & Horizontal Offsets to - ( minus ) 1
Click OK
EFFECTS >>> EDGE EFFECTS >>> ENHANCE MORE
Open up the DoubleCircleTemp-SmooooochesFramez.psp image in your PSP workspace
Right click on the Title Bar and select COPY from the options
Right click on the Title Bar of your tag image
and select PASTE AS NEW LAYER from the options.
Choose your SELECTION TOOL
Selection Type = Rectangle
Mode = Replace
Feather = 0
Antialias = Checked
Draw a rectangle around the circles

Click inside the rectangle to select the circles.
Flood fill with the
LIGHT BROWN "#b8a091 "
EFFECTS >>> 3D EFFECTS >>> INNER BEVEL
COLOUR = LIGHT BROWN "#b8a091 "

EFFECTS >>> PLUGINS >>> EYE CANDY 3 >>> DROP SHADOW

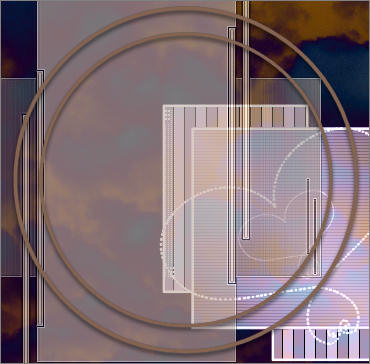
Open up the ivy_roundzippers.psp image in your PSP workspace
Make sure layer 5 is active
Right click on the Title Bar and select COPY from the options
Right click on the Title Bar of your tag image
and select PASTE AS NEW LAYER from the options.
Select your DEFORMATION tool
Choose the SCALE Mode and the default settings
Drag the indicated NODES to the outer edge of the double circle.
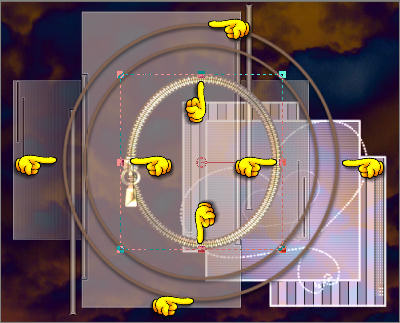
EFFECTS >>> 3D EFFECTS >>> INNER BEVEL
Same settings
EFFECTS >>> EDGE EFFECTS >>> ENHANCE MORE
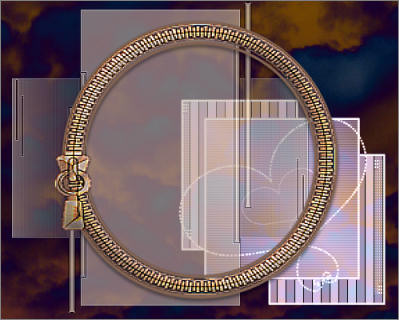
Make sure layer 5 is active
Open up the sr_girlwithbirds.tub image in your PSP workspace
Right click on the Title Bar and select COPY from the options
Right click on the Title Bar of your tag image
and select PASTE AS NEW LAYER from the options.
IMAGE >>> RESIZE = 70%
Ensure "Resize all layers" is UNCHECKED
Use your MOVER TOOL to move the image down a little.
Choose your SELECTION TOOL
Same settings
Draw a rectangle around the uppermost bird ...
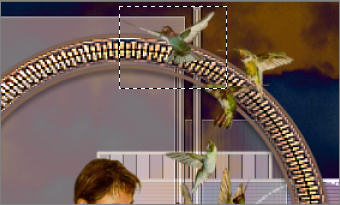
Click inside the rectangle to select the bird.
EDIT >>> CUT
Right click on the Title Bar of your tag image
and select PASTE AS NEW SELECTION from the options.
and position it as shown below
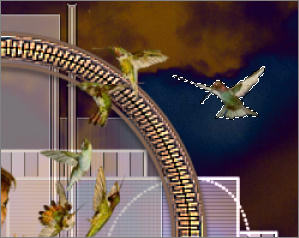
DESELECT
Reposition the image with your MOVER tool

EFFECTS >>> 3D EFFECTS >>> INNER BEVEL

ADJUST >>> SHARPNESS >>> SHARPEN
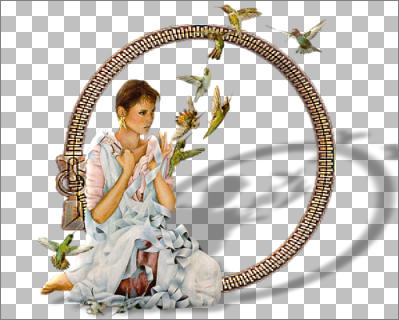
CLOSE RASTER LAYERS 1 TO 5
LAYERS >>> MERGE >>> MERGE VISIBLE
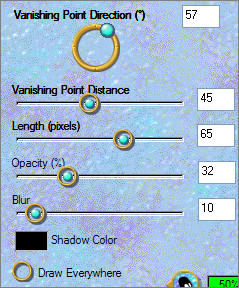
EFFECTS >>> PLUGINS >>> EYE CANDY 3 >>> PERSPECTIVE SHADOW
OPEN ALL LAYERS
ACTIVATE RASTER 2
SELECTIONS >>> SELECT ALL
SELECTIONS >>> MODIFY >>> CONTRACT = 15
SELECTIONS >>> MODIFY >>> SELECT SELECTIONS BORDERS

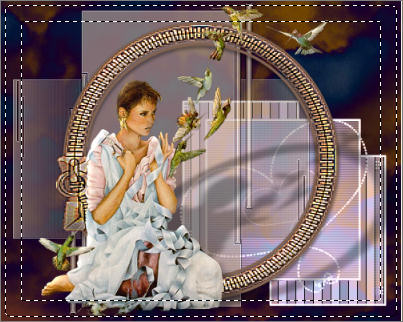
EDIT >>> CLEAR
DESELECT
With your MAGIC WAND
Mode = Replace
Match Mode = RGB Value
Tolerance = 95
Feather = 0
Antialias = UNchecked
Sample Merged = UNCHECKED
PSP9/X: Check CONTIGUOUS
PSPX: There is no " Sample Merged"
PSPX: Use all layers = UNChecked
Select the OUTER border
EFFECTS >>> 3D EFFECTS >>> INNER BEVEL

EFFECTS >>> EDGE EFFECTS >>> ENHANCE MORE

Save as .psp image
From here on is optional....
(1) ... You can... with your existing image ...
WINDOW >>> DUPLICATE
(so you don't mess up the original creation)
Minimise the original..
With your duplicated image...
LAYERS >>> MERGE >>> MERGE VISIBLE
Add TEXT on a new layer
then...
LAYERS >>> MERGE >>> MERGE ALL (Flatten)
Save as .jpg image
|
|
| |
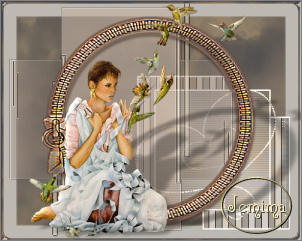
(2) ... ACTIVATE RASTER 2 and play around with the BLEND MODES
for example...
LUMINANCE
|
|
| MULTIPLY |
 |
| EXCLUSION |
 |
This way you can have a few different tags from the one basic creation *S*
|
| |
OR
You could do the following.... (3)
|
ACTIVATE RASTER 1
EFFECTS >>> TEXTURE EFFECTS >>> SCULPTURE
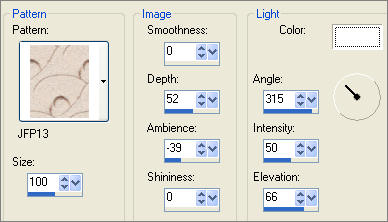
LAYERS >>> MERGE >>> MERGE ALL (Flatten)
Save as .jpg image
|
|
I hope you enjoyed doing this tutorial,
TESTERS RESULTS
Page designed by

for
http://www.artistrypsp.com/
Copyright ©
2000-2007 Artistry In PSP / PSP Artistry
All rights reserved.
Unless specifically made available for
download,
no graphics or text may be removed from
this site for any reason
without written permission from Artistry
In PSP / PSP Artistry
TUTORIAL INDEX |