XMAS 2 - 2007
PSP8/9
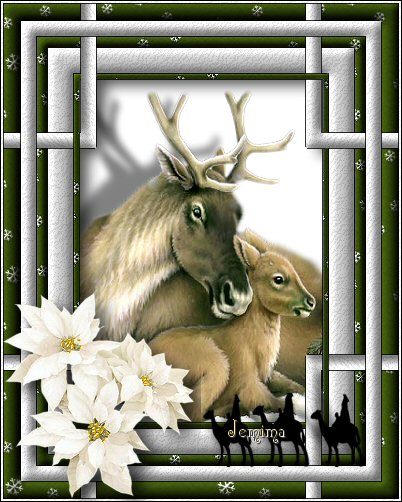
This tutorial was
written by Jemima ~ January 2007
Copyright © 2007 ~ Jemima
~ All rights reserved
********************************
You will need the
following to complete this tutorial
Materials
" winni[1].bg.xmas11.3.jpg "
" sorrywhitebg.jpg "
Click link... then....
Right click and Save Image As to your PSP Patterns folder
" jcc-WhitePointsiettas-11-05.psp "
Click link... then....
Right click and Save Image As to a folder on your computer
Plugins
** EYE CANDY3 **
http://www.pircnet.com/downloads.html
~*~*~*~*~*~*~*~*~*~*~*~*~
** SIMPLE FILTERS **
download
********************************
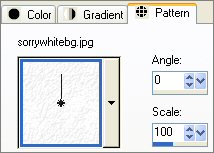
In your MATERIALS PALETTE load
" winni[1].bg.xmas11.3.jpg " in the foreground and
" sorrywhitebg.jpg " in the background using these settings
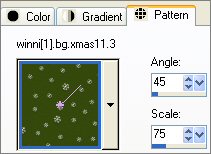 .. .. 
Open a new image 400 x 500
Transparent background
Flood fill with " winni[1].bg.xmas11.3 " foreground pattern
SELECTIONS >>> SELECT ALL
SELECTIONS >>> MODIFY >>> CONTRACT = 20
SELECTIONS >>> INVERT
EFFECTS >>> 3D EFFECTS >>> INNER BEVEL
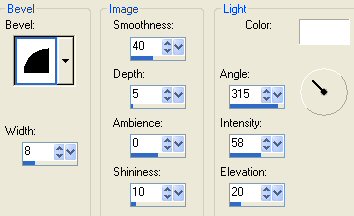
EFFECTS >>> 3D EFFECTS >>> DROP SHADOW
Vertical & Horizontal offsets = 1
Colour = Black
Opacity = 80
Blur = 0
Repeat
Drop Shadow effect changing
Vertical & Horizontal Offsets to - ( minus ) 1
Click OK
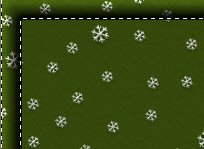
SELECTIONS >>> INVERT
LAYERS >>> NEW RASTER LAYER
Flood fill with " sorrywhitebg " pattern
SELECTIONS >>> MODIFY >>> CONTRACT = 15
EDIT >>> CLEAR
DESELECT
EFFECTS >>> 3D EFFECTS >>> INNER BEVEL
Change DEPTH to 2
EFFECTS >>> 3D EFFECTS >>> DROP SHADOW
Use the same settings
Click OK
Repeat Drop Shadow effect changing
Vertical & Horizontal Offsets to 1
Click OK
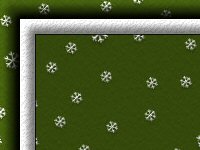
With your MAGIC WAND
Select the CENTRE transparent area
Activate Raster 1
EDIT >>> CLEAR
LAYERS >>> NEW RASTER LAYER
Flood fill with " winni[1].bg.xmas11.3 " foreground pattern
SELECTIONS >>> MODIFY >>> CONTRACT = 10
EDIT >>> CLEAR
DESELECT
EFFECTS >>> 3D EFFECTS >>> INNER BEVEL
Change DEPTH to 5
EFFECTS >>> 3D EFFECTS >>> DROP SHADOW
Use the same settings
Click OK
Repeat Drop Shadow effect changing
Vertical & Horizontal Offsets to 1
Click OK
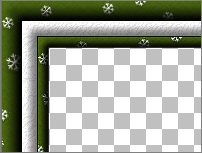
With your MAGIC WAND
Select the CENTRE transparent area
LAYERS >>> NEW RASTER LAYER
Flood fill with " sorrywhitebg " pattern
SELECTIONS >>> MODIFY >>> CONTRACT = 25
EDIT >>> CLEAR
DESELECT
EFFECTS >>> 3D EFFECTS >>> INNER BEVEL
Change DEPTH to 2
EFFECTS >>> 3D EFFECTS >>> DROP SHADOW
Use the same settings
Click OK
Repeat Drop Shadow effect changing
Vertical & Horizontal Offsets to 1
Click OK
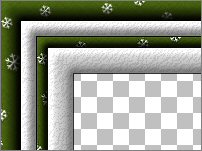
With your MAGIC WAND
Select the CENTRE transparent area
LAYERS >>> NEW RASTER LAYER
Flood fill with " sorrywhitebg " pattern
SELECTIONS >>> MODIFY >>> CONTRACT = 5
EDIT >>> CLEAR
DESELECT
EFFECTS >>> 3D EFFECTS >>> INNER BEVEL
Change DEPTH to 5
EFFECTS >>> 3D EFFECTS >>> DROP SHADOW
Use the same settings
Click OK
Repeat Drop Shadow effect changing
Vertical & Horizontal Offsets to 1
Click OK
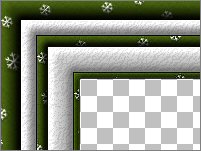
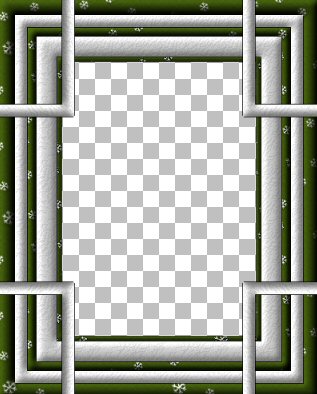
Activate Raster 2
LAYERS >>> DUPLICATE
EFFECTS >>> IMAGE EFFECTS >>> OFFSET
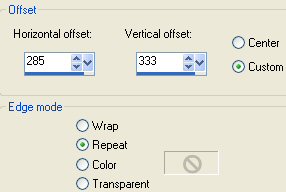
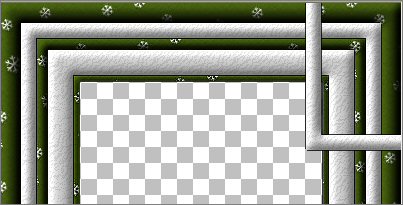
LAYERS >>> DUPLICATE
IMAGE >>> MIRROR
If there's a gap... Carefully use your MOVER tool to move the offset next to the green border
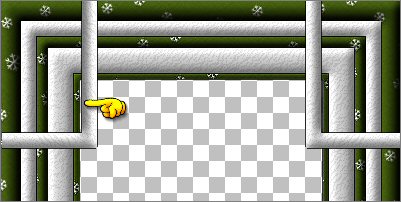
LAYERS >>> DUPLICATE
IMAGE >>> FLIP
Activate " Copy of Raster 2 "
LAYERS >>> DUPLICATE
IMAGE >>> FLIP
Go to your LAYER PALETTE and close the layers shown below
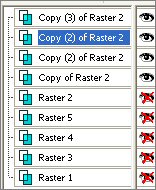
LAYERS >>> MERGE >>> MERGE VISIBLE
OPEN ALL LAYERS
Rearrange the layers as shown below
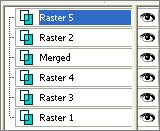 .. .. 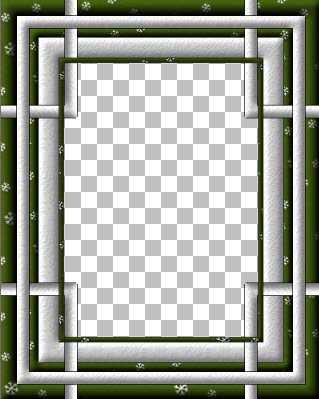
With Raster 5 active, select your SELECTION TOOL
SELECTION TYPE = RECTANGLE
MODE = REPLACE
FEATHER = 0
ANTIALIAS = UNCHECKED
Hold down your SHIFT KEY and select the areas shown below
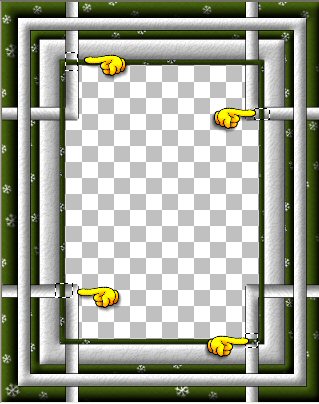
EDIT >>> CLEAR
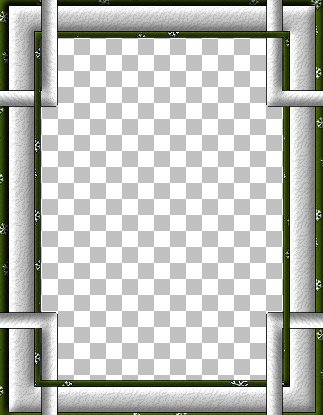
LAYERS >>> MERGE >>> MERGE VISIBLE
SELECTIONS >>> SELECT ALL
SELECTIONS >>> MODIFY >>> CONTRACT = 2
SELECTIONS >>> INVERT
Flood fill with " sorrywhitebg " pattern
EFFECTS >>> 3D EFFECTS >>> DROP SHADOW
Use the same settings
Click OK
Repeat Drop Shadow effect changing
Vertical & Horizontal Offsets to 1
Click OK
DESELECT
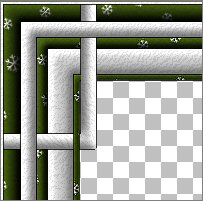
With your MAGIC WAND
Same settings
Select the CENTRE transparent area
SELECTIONS >>> MODIFY >>> EXPAND = 3
SELECTIONS >>> INVERT
LAYERS >>> NEW RASTER LAYER
LAYERS >>> ARRANGE >>> SEND TO BOTTOM
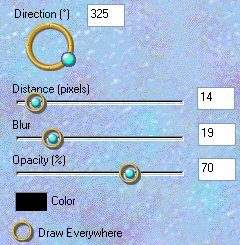
EFFECTS >>> PLUGINS >>> EYE CANDY 3 >>> DROP SHADOW
DESELECT
LAYERS >>> MERGE >>> MERGE VISIBLE
Save as .psp image
OPEN up the " jcc-WhitePointsiettas-11-05 " tube
Right click on the Title Bar and select COPY from the options
Go to your frame image
LAYERS >>> NEW RASTER LAYER
Right click on the Title Bar
and select PASTE AS NEW SELECTION from the options.
IMAGE >>> RESIZE = 50%
Ensure "Resize all layers" is UNCHECKED
Position the tube in the bottom left corner
DESELECT
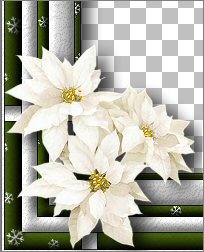
Your frame is now ready for an image of your choice
Once you insert your image
LAYERS >>> MERGE >>> MERGE ALL (Flatten)
Save as .jpg image
Page designed by

for

http://www.artistrypsp.com/
Copyright © 2000-2007 Artistry In PSP / PSP Artistry
All rights reserved.
Unless specifically made available for
download,
no graphics or text may be removed from
this site for any reason
without written permission from Artistry
In PSP / PSP Artistry
|