Warp & Noise
PSP8/9
This tutorial was
written by Jemima ~ January 2007
Copyright © 2007 ~ Jemima
~ All rights reserved
Updated 24 Nov. 2008
********************************
You will need the
following to complete this tutorial
Materials
" goldfill1.bmp "
Click link... then....
Right click and Save Image As to your PSP Patterns folder
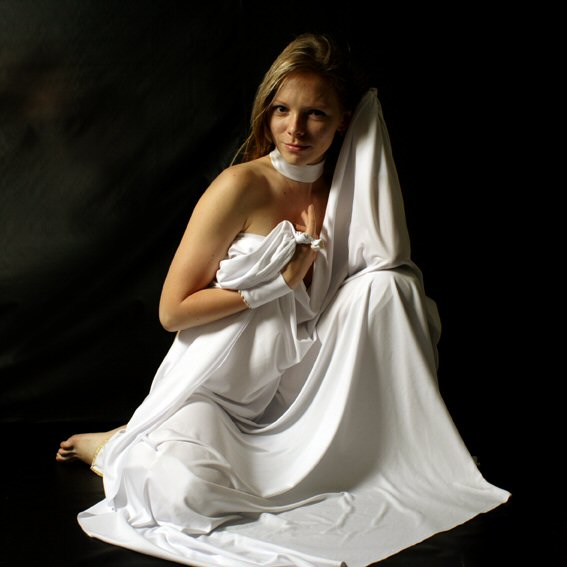
" JF_WhiteVision.psp "
" 294538_73.jpg "
Click link... then....
Right click and Save Image As to a folder on your computer
if you wish to use these images
Plugins
** EYE CANDY3 **
http://www.pircnet.com/downloads.html
********************************
Open a new image 400 x 500
Transparent background
Flood fill with MAROON ( #571915 ) OR a colour of your choice
SELECTIONS >>> SELECT ALL
SELECTIONS >>> MODIFY >>> CONTRACT = 25
EDIT >>> CLEAR
DESELECT
NOTE 1: (PSP8)
When I came to redo this tut with instructions and examples, the next effect
didn't work right away... may be a bug in my PSP8.. kept showing window type squares.
BUT I persisted and the correct 'warp' worked after about the 3rd try. So if you come across
the same problem... persist until it works *S*
NOTE 2: (PSP9)
With the next instructions for the WARP effect....
If the result is not the same as the example after doing the effect,
you may have to save your image as a .psp image,
close PSP and close all open pages/folders etc
and REBOOT your computer.
Then reopen PSP and your saved image and try the effect once more.
I don't know if it's peculiar to my version (PSP9) but when retesting this tut
I had the problem mentioned above.
Rebooting solved the problem.
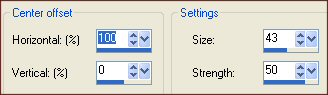
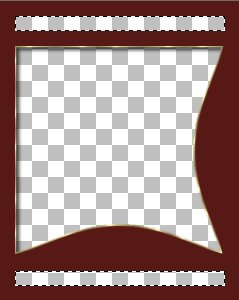
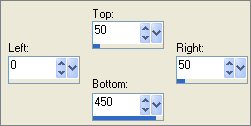
EFFECTS >>> DISTORTION EFFECTS >>> WARP
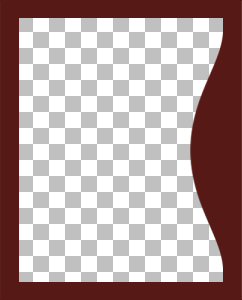
LAYERS >>> DUPLICATE
IMAGE >>> ROTATE >>> FREE ROTATE = RIGHT 90
Ensure "All layers" is UNCHECKED
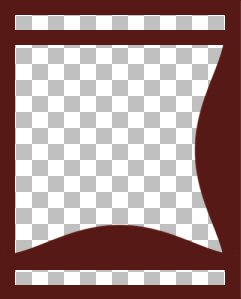
LAYERS >>> MERGE >>> MERGE VISIBLE
With your MAGIC WAND
Mode = Replace
Match Mode = RGB Value
Tolerance = 0
Feather = 1
Antialias = Checked (OUTSIDE)
Sample Merged = UNCHECKED
PSP9/X: Check CONTIGUOUS
PSPX: There is no " Sample Merged"
PSPX: Use all layers = UNChecked
PSP9/X: ANTIALIAS = Inside
Select the INNER transparent area
LAYERS >>> NEW RASTER LAYER
LAYERS >>> ARRANGE >>> MOVE DOWN
SELECTIONS >>> MODIFY >>> EXPAND = 2
Flood fill with GOLD pattern
Angle = 0
Size = 100
SELECTIONS >>> MODIFY >>> CONTRACT = 4
EDIT >>> CLEAR
DESELECT

With your MAGIC WAND
Same settings
Select the INNER transparent area
SELECTIONS >>> MODIFY >>> EXPAND = 2
SELECTIONS >>> INVERT
LAYERS >>> NEW RASTER LAYER
LAYERS >>> ARRANGE >>> SEND TO BOTTOM
EFFECTS >>> PLUGINS >>> EYE CANDY 3 >>> DROP SHADOW
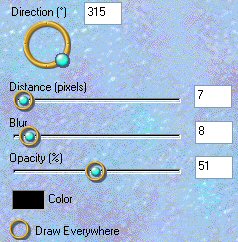
REPEAT DROP SHADOW
DESELECT

On your LAYER PALETTE activate the 'Merged' layer
With your MAGIC WAND
Mode = Replace
Match Mode = RGB Value
Tolerance = 0
Feather = 0
Antialias = UNchecked
Sample Merged = UNCHECKED
PSP9/X: Check CONTIGUOUS
PSPX: There is no " Sample Merged"
PSPX: Use all layers = UNChecked
and while holding down your SHIFT key select the upper and lower transparent areas
Flood fill with GOLD
SELECTIONS >>> MODIFY >>> CONTRACT = 2
EDIT >>> CLEAR
EFFECTS >>> 3D EFFECTS >>> DROP SHADOW
Vertical & Horizontal offsets = 1
Colour = Black
Opacity = 60
Blur = 0
Repeat Drop Shadow effect changing
Vertical & Horizontal Offsets to - ( minus ) 1
Click OK
DESELECT
With your MAGIC WAND ... same settings
and while holding down your SHIFT key select the upper and lower transparent areas again
LAYERS >>> NEW RASTER LAYER
LAYERS >>> ARRANGE >>> SEND TO BOTTOM
SELECTIONS >>> MODIFY >>> EXPAND = 2
Flood fill with BLACK
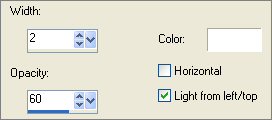
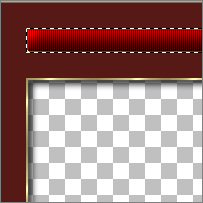
EFFECTS >>> TEXTURE EFFECTS >>> BLINDS
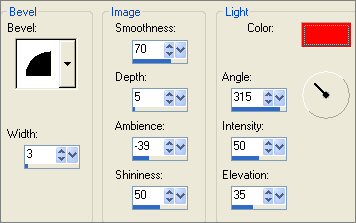
EFFECTS >>> 3D EFFECTS >>> INNER BEVEL
COLOUR = ( #FF0000 )
On your LAYER PALETTE activate the 'Merged' layer
LAYERS >>> NEW RASTER LAYER
SELECTIONS >>> INVERT
Flood fill with GOLD
SELECTIONS >>> INVERT
SELECTIONS >>> MODIFY >>> EXPAND = 2
SELECTIONS >>> INVERT
EDIT >>> CLEAR
DESELECT
EFFECTS >>> 3D EFFECTS >>> DROP SHADOW
Vertical & Horizontal offsets = 1
Colour = Black
Opacity = 60
Blur = 0
Repeat Drop Shadow effect changing
Vertical & Horizontal Offsets to - ( minus ) 1
Click OK
LAYERS >>> NEW RASTER LAYER
SELECTIONS >>> SELECT ALL
SELECTIONS >>> MODIFY >>> CONTRACT = 2
SELECTIONS >>> INVERT
Flood fill with GOLD
EFFECTS >>> 3D EFFECTS >>> DROP SHADOW
Use the same settings
Click OK
Repeat Drop Shadow effect changing
Vertical & Horizontal Offsets to 1
Click OK
DESELECT
LAYERS >>> NEW RASTER LAYER
SELECTIONS >>> SELECT ALL
SELECTIONS >>> MODIFY >>> CONTRACT = 5
Flood fill with GOLD
SELECTIONS >>> MODIFY >>> CONTRACT = 2
EDIT >>> CLEAR
DESELECT
EFFECTS >>> 3D EFFECTS >>> DROP SHADOW
Use the same settings
Click OK
Repeat Drop Shadow effect changing
Vertical & Horizontal Offsets to 1
Click OK

In your LAYER PALETTE - Activate the "Merged" layer
With your MAGIC WAND
Tolerance = 12
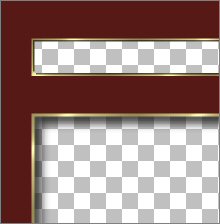
Select the plain maroon area
SELECTIONS >>> MODIFY >>> CONTRACT = 22
In your LAYER PALETTE - Activate top layer
LAYERS >>> NEW RASTER LAYER
Flood fill with BLACK
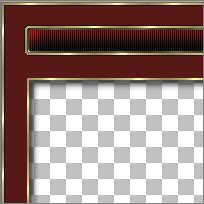
EFFECTS >>> TEXTURE EFFECTS >>> BLINDS
Same settings
EFFECTS >>> 3D EFFECTS >>> INNER BEVEL
Same settings
DESELECT
(The stripes are distorted in the example because of the reduction in size)
In your LAYER PALETTE - Activate bottom layer
LAYERS >>> NEW RASTER LAYER
LAYERS >>> ARRANGE >>> SEND TO BOTTOM
Choose your SELECTION TOOL then click on the CUSTOM SELECTION
symbol
Flood fill with MAROON
EFFECTS >>> TEXTURE EFFECTS >>> BLINDS
Same settings
EFFECTS >>> 3D EFFECTS >>> INNER BEVEL
Same settings
SELECTIONS >>> INVERT
Flood fill with GOLD
SELECTIONS >>> MODIFY >>> CONTRACT = 2
EDIT >>> CLEAR
EFFECTS >>> 3D EFFECTS >>> DROP SHADOW
Vertical & Horizontal offsets = - ( minus ) 1
Colour = Black
Opacity = 60
Blur = 0
SELECTIONS >>> INVERT
EFFECTS >>> PLUGINS >>> EYE CANDY 3 >>> DROP SHADOW
Same settings
DESELECT
In your LAYER PALETTE - Activate the merged layer
With your MAGIC WAND
Same settings
Select the CENTRE transparent area
SELECTIONS >>> INVERT
In your LAYER PALETTE - Activate the Merged layer
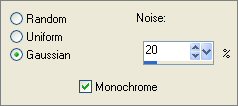
ADJUST >>> ADD/REMOVE NOISE >>> ADD NOISE
ADJUST >>> SHARPNESS >>> SHARPEN
DESELECT
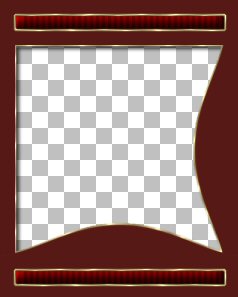
LAYERS >>> MERGE >>> MERGE VISIBLE
Save as .psp image
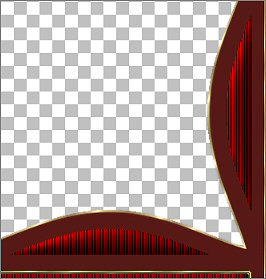
Your frame is now ready for an image of your choice
*/*/*/*/*/*/*/*/*/*/*/
To add images like my result...
Activate your frame image
WINDOW >>> DUPLICATE
Close the original frame and save for later use.
LAYERS >>> NEW RASTER LAYER
LAYERS >>> ARRANGE >>> MOVE DOWN
Flood fill with BLACK
Open up the 294538_73.jpg image
WINDOW >>> DUPLICATE
Close the original image
IMAGE >>> GREYSCALE
IMAGE >>> Increase Color Depth >>> 16 million colors (24bit)
IMAGE RESIZE
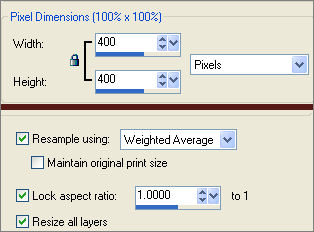
Right click on the Title Bar and select COPY from the options
IMAGE >>> RESIZE = 75%
Ensure "Resize all layers" is UNCHECKED
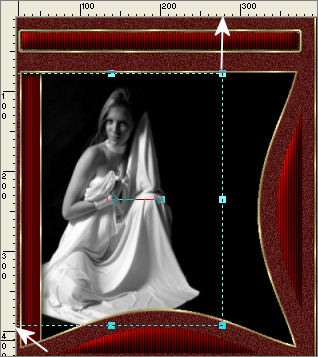
Select your DEFORMATION tool
Drag the centre top node down to the bottom of the gold border.
Drag the centre side node level with the 280 pixel mark
Drag the centre bottom node up level with the 390 pixel mark
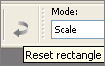
Click the RESET RECTANGLE arrow
ADJUST >>> SHARPNESS >>> SHARPEN MORE
In your LAYER PALETTE
reduce OPACITY to 60%
Open up the JF_WhiteVision.psp tube
Right click on the Title Bar and select COPY from the options
Right click on the Title Bar of your frame image
and select PASTE AS NEW LAYER from the options.
IMAGE >>> RESIZE = 75%
Ensure "Resize all layers" is UNCHECKED
and reposition as shown
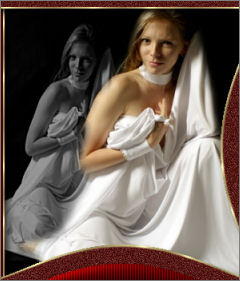
LAYERS >>> MERGE >>> MERGE ALL (Flatten)
Save as .gif image
We're saving as a .gif image because I used a red tone and
red appears to 'bleed' whensaved as a .jpg image.
Page designed by

for

http://www.artistrypsp.com/
Copyright © 2000-2009 Artistry In PSP / PSP Artistry
All rights reserved.
Unless specifically made available for
download,
no graphics or text may be removed from
this site for any reason
without written permission from Artistry
In PSP / PSP Artistry
|