TIGER - TIGER
PSP8/9
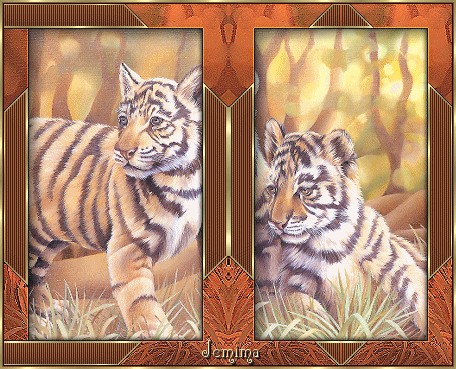
This tutorial was
written by Jemima ~ September 2006
Copyright © 2006/7 ~ Jemima
~ All rights reserved
********************************
You will need the
following to complete this tutorial
Materials
" animals 15-juni-2006.jpg "
Click link... then....
Right click and Save Image As to a folder on your computer
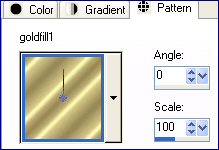
GOLDFILL PATTERN
Click link... then....
Right click and Save Image As to your PSP Patterns folder
** EYE CANDY3 **
http://www.pircnet.com/downloads.html
** UNPLUGGED TOOLS **
http://www.fleursauvage.be/utilitaire/filtres/filtres.htm
********************************
SAVE OFTEN .. you never know when PSP will 'hiccup'!
In your MATERIALS PALETTE load "goldfill1" in the foreground.
Open the "animals 15-juni-2006.jpg" image in your PSP workspace
WINDOW >>> DUPLICATE
Close the original Image
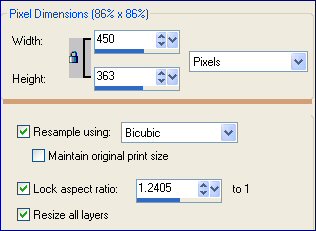
IMAGE >>> RESIZE
Ensure "Resize all layers" is CHECKED
LAYERS >>> PROMOTE BACKGROUND LAYER
SELECTIONS >>> SELECT ALL
SELECTIONS >>> MODIFY >>> CONTRACT = 25
LAYERS >>> DUPLICATE
EDIT >>> CLEAR
SELECTIONS >>> INVERT
EFFECTS >>> 3D Effects >>> Drop Shadow
Vertical & Horizontal offsets = 1
Colour = Black
Opacity = 100
Blur = 0
Repeat Drop Shadow effect changing
Vertical & Horizontal Offsets to - ( minus ) 1
Click OK
EFFECTS >>> PLUGINS>>> UNPLUGGED SHAPES >>> ROTOCUBE

Click OK
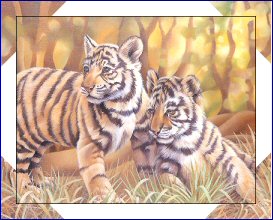
DESELECT
With your MAGIC WAND
Mode = Replace
Match Mode = RGB Value
Tolerance = 0
Feather = 0
Antialias = UNchecked
Sample Merged = UNCHECKED
PSP9 USERS: CHECK CONTIGUOUS
Hold down your SHIFT key
and select the WHITE areas
SELECTIONS >>> INVERT
EFFECTS >>> 3D EFFECTS >>> INNER BEVEL
COLOUR = (
#D49674 )
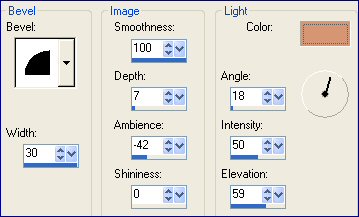
EFFECTS >>> EDGE EFFECTS >>> ENHANCE
REPEAT Inner Bevel
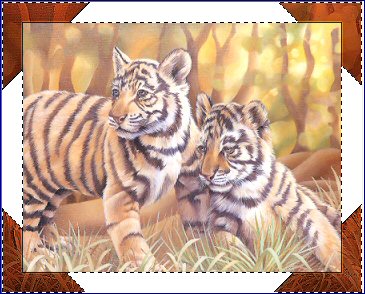
SELECTIONS >>> INVERT
EDIT >>> CLEAR
LAYERS >>> NEW RASTER LAYER
Flood Fill selected areas with Tan colour #D39E77
EFFECTS >>> TEXTURE EFFECTS >>> BLINDS
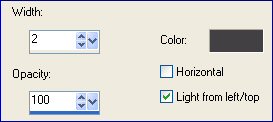
REPEAT Inner Bevel
LAYERS >>> NEW RASTER LAYER
Flood fill selected areas with GOLD pattern
SELECTIONS >>> MODIFY >>> CONTRACT = 2
EDIT >>> CLEAR
DESELECT
Highlight "Copy of Raster 1"

ADJUST >>> BRIGHTNESS and CONTRAST >>> BRIGHTNESS/CONTRAST

CLOSE Raster 1
LAYERS >>> MERGE >>> MERGE VISIBLE
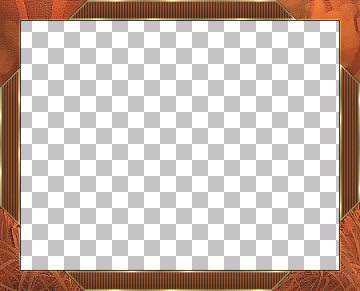
LAYERS >>> DUPLICATE
EFFECTS >>> REFLECTION EFFECTS >>> ROTATING MIRROR
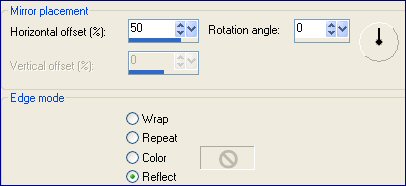
LAYERS >>> MERGE >>> MERGE VISIBLE
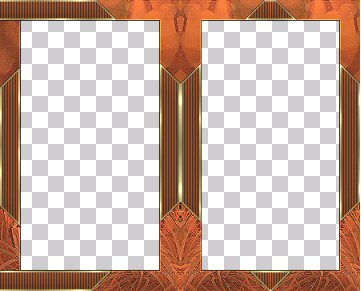
OPEN & Highlight Raster 1 to activate
With your SELECTION TOOL

Select the area shown below
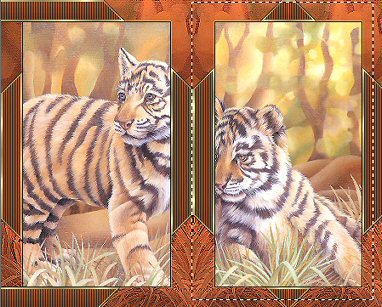
and slide the tiger slightly to the right...
SELECTIONS >>> INVERT
and slide the left tiger slightly to the left... so their heads are clearly visible
DESELECT
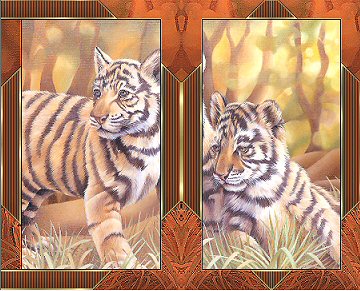
Highlight the MERGED layer to activate
With your MAGIC WAND
Same settings and holding down your SHIFT key
Select the inner centre sections of the frame.
SELECTIONS >>> INVERT
EFFECTS >>> PLUGINS >>> EYE CANDY 3 >>> DROP SHADOW
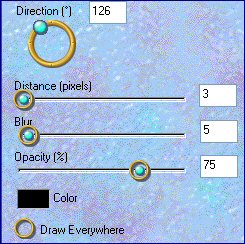
EFFECTS >>> PLUGINS >>> EYE CANDY 3 >>> DROP SHADOW
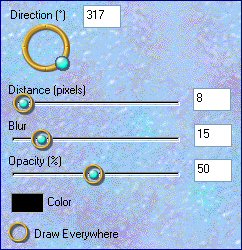
DESELECT
IMAGE >>> CANVAS SIZE
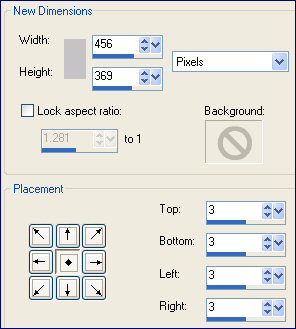
With your MAGIC WAND... Same settings
Select the outer transparent area
Flood fill with Maroon #924B27
EFFECTS >>> 3D Effects >>> Drop Shadow
Vertical & Horizontal offsets = 1
Colour = Black
Opacity = 100
Blur = 0
Repeat Drop Shadow effect changing
Vertical & Horizontal Offsets to - ( minus ) 1
Click OK
DESELECT
SELECTIONS >>> SELECT ALL
SELECTIONS >>> MODIFY >>> CONTRACT = 2
SELECTIONS >>> INVERT
Flood fill with GOLD pattern
DESELECT
( If you wish to reuse this frame
now is the time to save it as a .psp image )
LAYERS >>> MERGE >>> MERGE ALL (Flatten)
Save as a .GIF image
(I found when I saved it as a .jpg image parts of the frame were altered)
~*~*~*~*~*~*~*~*~*~*~*~*~*~
Page designed by

for

http://www.artistrypsp.com/
Copyright ©
2000-2007 Artistry In PSP / PSP Artistry
All rights reserved.
Unless specifically made available for
download,
no graphics or text may be removed from
this site for any reason
without written permission from Artistry
In PSP / PSP Artistry
|