Thanksgiving 2007
PSP8/9
This tutorial was
written by Jemima ~ January 2007
Copyright © 2007 ~ Jemima
~ All rights reserved
********************************
You will need the
following to complete this tutorial
Materials
" background_cinco " Pattern
" Smoke.pspimage " Pattern
Click link... then....
Right click and Save Image As to your PSP Patterns folder
" JF_Patt_TG.jpg " Pattern
" chili_Chestnuts01.psp " Tube
" johncurrin-thanksgiving.psp " Tube
Click link... then....
Right click and Save Image As to a folder on your computer
********************************
Open the " JF_Patt_TG " in your workspace
In your MATERIALS PALETTE
locate and load " JF_Patt_TG " PATTERN
in the foreground.
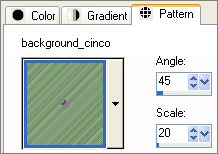
Load " background_cinco " in the background
using these settings
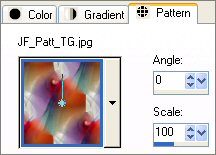 .. .. 
Open a new image 450 x 450
Transparent background
Flood fill with " JF_Patt_TG "
BORDER 1
SELECTIONS >>> SELECT ALL
SELECTIONS >>> MODIFY >>> CONTRACT = 25
EDIT >>> CLEAR
DESELECT
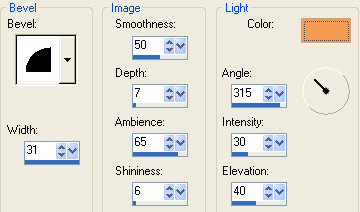
EFFECTS >>> 3D EFFECTS >>> INNER BEVEL
COLOUR = ( #F19857 )
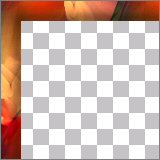
With your MAGIC WAND
Mode = Replace
Match Mode = RGB Value
Tolerance = 0
Feather = 0
Antialias = UNchecked
Sample Merged = UNCHECKED
PSP9 USERS: CHECK CONTIGUOUS
Select the CENTRE transparent area
LAYERS >>> NEW RASTER LAYER
Flood fill with " background_cinco " pattern
SELECTIONS >>> MODIFY >>> CONTRACT = 3
EDIT >>> CLEAR
DESELECT
With your MAGIC WAND
Tolerance = 140
Select the green border
EFFECTS >>> EDGE >>> ENHANCE
EFFECTS >>> 3D EFFECTS >>> DROP SHADOW
Vertical & Horizontal offsets = 1
Colour = Black
Opacity = 55
Blur = 0
Repeat Drop Shadow effect changing
Vertical & Horizontal Offsets to - ( minus ) 1
Click OK
DESELECT
LAYERS >>> MERGE >>> MERGE VISIBLE
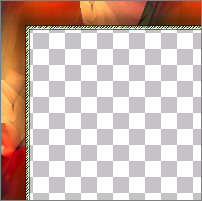
BORDER 2
With your MAGIC WAND ... Select the CENTRE transparent area
LAYERS >>> NEW RASTER LAYER
Flood fill with " JF_Patt_TG "
SELECTIONS >>> MODIFY >>> CONTRACT = 15
EDIT >>> CLEAR
DESELECT
IMAGE >>> FLIP
Repeat INNER BEVEL
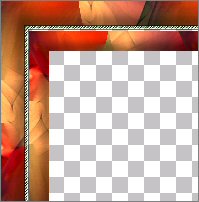
With your MAGIC WAND
Select the CENTRE transparent area
LAYERS >>> NEW RASTER LAYER
Flood fill with " background_cinco " pattern
SELECTIONS >>> MODIFY >>> CONTRACT = 3
EDIT >>> CLEAR
DESELECT
With your MAGIC WAND
Tolerance = 140
Select the green border
EFFECTS >>> EDGE >>> ENHANCE
EFFECTS >>> 3D EFFECTS >>> DROP SHADOW
Vertical & Horizontal offsets = 1
Colour = Black
Opacity = 55
Blur = 0
Repeat Drop Shadow effect changing
Vertical & Horizontal Offsets to - ( minus ) 1
Click OK
DESELECT
CLOSE the MERGED layer
LAYERS >>> MERGE >>> MERGE VISIBLE
Rename this layer 'Merged 2'
OPEN the MERGED layer to view frame so far.
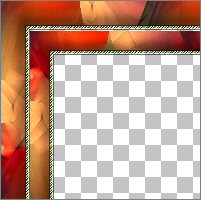
BORDER 3
Load solid Orange ( #E03305 ) in your MATERIALS PALETTE background.
With your MAGIC WAND
Select the CENTRE transparent area
LAYERS >>> NEW RASTER LAYER
Flood fill with solid Orange
SELECTIONS >>> MODIFY >>> CONTRACT = 12
EDIT >>> CLEAR
DESELECT
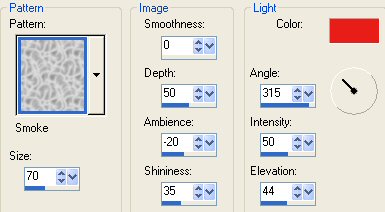
EFFECTS >>> TEXTURE EFFECTS >>> SCULPTURE
COLOUR = (
#E71D1D )
PATTERN = SMOKE
CLOSE the "Merged" & "Merged 2" layers
With your MAGIC WAND
Select the CENTRE transparent area
LAYERS >>> NEW RASTER LAYER
Flood fill with " background_cinco " pattern
SELECTIONS >>> MODIFY >>> CONTRACT = 3
EDIT >>> CLEAR
DESELECT
With your MAGIC WAND
Select the green border
EFFECTS >>> EDGE >>> ENHANCE
EFFECTS >>> 3D EFFECTS >>> DROP SHADOW
Vertical & Horizontal offsets = 1
Colour = Black
Opacity = 55
Blur = 0
Repeat Drop Shadow effect changing
Vertical & Horizontal Offsets to - ( minus ) 1
Click OK
DESELECT
Activate Raster 1
With your MAGIC WAND
Select the OUTER transparent area
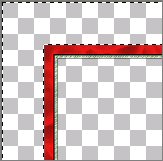
LAYERS >>> NEW RASTER LAYER
Flood fill with " background_cinco " pattern
SELECTIONS >>> INVERT
SELECTIONS >>> MODIFY >>> EXPAND = 3
SELECTIONS >>> INVERT
EDIT >>> CLEAR
DESELECT
With your MAGIC WAND
Select the green border
EFFECTS >>> EDGE >>> ENHANCE
EFFECTS >>> 3D EFFECTS >>> DROP SHADOW
Vertical & Horizontal offsets = 1
Colour = Black
Opacity = 55
Blur = 0
Repeat Drop Shadow effect changing
Vertical & Horizontal Offsets to - ( minus ) 1
Click OK
DESELECT
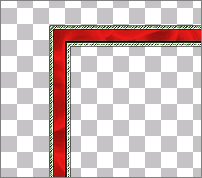
LAYERS >>> MERGE >>> MERGE VISIBLE
Rename this layer MERGED 3
On your LAYER PALETTE move MERGED 3 between
the "Merged" and " Merged 2 " layers

LAYERS >>> DUPLICATE
EFFECTS>>> GEOMETRIC EFFECTS >>> PERSPECTIVE - VERTICAL

LAYERS >>> DUPLICATE
IMAGE >>> FLIP
CLOSE " Merged 3 "
LAYERS >>> MERGE >>> MERGE VISIBLE
Rename this layer "Merged 4 "
On your LAYER PALETTE ... OPEN ALL LAYERS
Drag " Merged 4 " Under " Merged 3 "

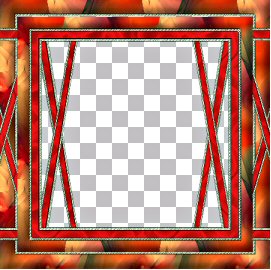
LAYERS >>> MERGE >>> MERGE VISIBLE
With your MAGIC WAND ...
Same settings
and while depressing your SHIFT key select all the inner transparent sections
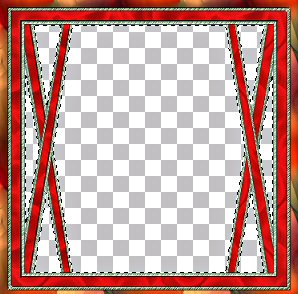
SELECTIONS >>> MODIFY >>> EXPAND = 2
LAYERS >>> NEW RASTER LAYER
LAYERS >>> ARRANGE >>> MOVE DOWN
SELECTIONS >>> INVERT
EFFECTS >>> 3D EFFECTS >>> DROP SHADOW
Vertical & Horizontal offsets = 7
Colour = Black
Opacity = 55
Blur = 10.00
DESELECT
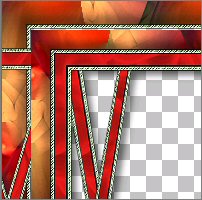
LAYERS >>> MERGE >>> MERGE VISIBLE
Save as a .psp image
LAYERS >>> NEW RASTER LAYER
Select your FREEHAND SELECTION tool

Open the " chili_Chestnuts01.psp " tube.
Section off part of the image shown below
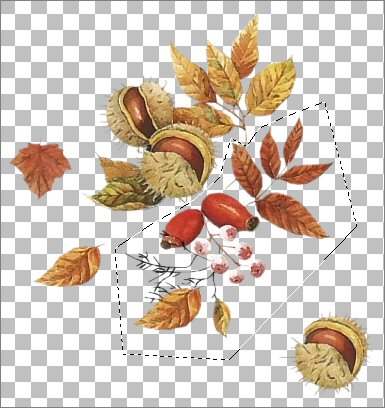
Right click on the Title Bar and select COPY from the options
Go to your frame image
Right click on the Title Bar
and select PASTE AS NEW SELECTION from the options.
Reposition in the bottom Right Corner
EFFECTS >>> 3D EFFECTS >>> DROP SHADOW
Vertical & Horizontal offsets = 7
Colour = Black
Opacity = 55
Blur = 10.00
DESELECT
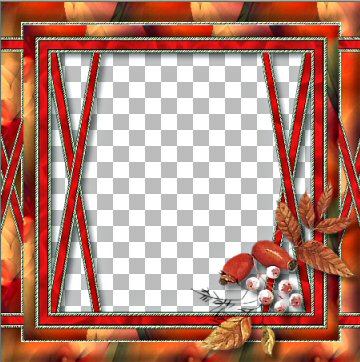
Activate the " chili_Chestnuts01.psp " tube.
Section off part of the image shown below
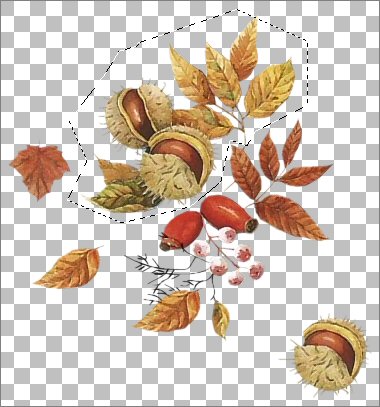
Right click on the Title Bar and select COPY from the options
Go to your frame image
Right click on the Title Bar
and select PASTE AS NEW SELECTION from the options.
Reposition in the Top LeftCorner
IMAGE >>> RESIZE = 80%
Ensure "Resize all layers" is UNCHECKED
ADJUST >>> SHARPNESS >>> SHARPEN
EFFECTS >>> 3D EFFECTS >>> DROP SHADOW
Vertical & Horizontal offsets = 7
Colour = Black
Opacity = 55
Blur = 10.00
DESELECT
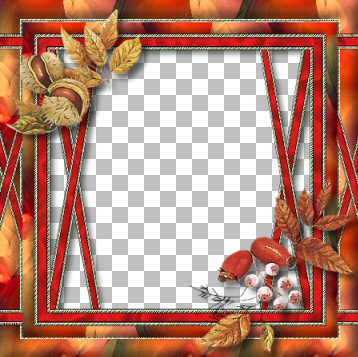
LAYERS >>> MERGE >>> MERGE VISIBLE
LAYERS >>> NEW RASTER LAYER
SELECTIONS >>> SELECT ALL
SELECTIONS >>> MODIFY >>> CONTRACT = 3
SELECTIONS >>> INVERT
Flood fill with " background_cinco " pattern
EFFECTS >>> EDGE EFFECTS >>> ENHANCE
EFFECTS >>> 3D EFFECTS >>> DROP SHADOW
Vertical & Horizontal offsets = 1
Colour = Black
Opacity = 55
Blur = 0
Repeat Drop Shadow effect changing
Vertical & Horizontal Offsets to - ( minus ) 1
Click OK
DESELECT
LAYERS >>> MERGE >>> MERGE VISIBLE
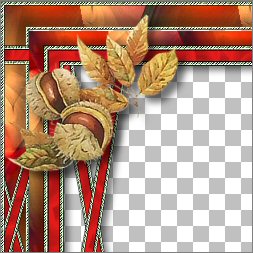
Save as .psp image
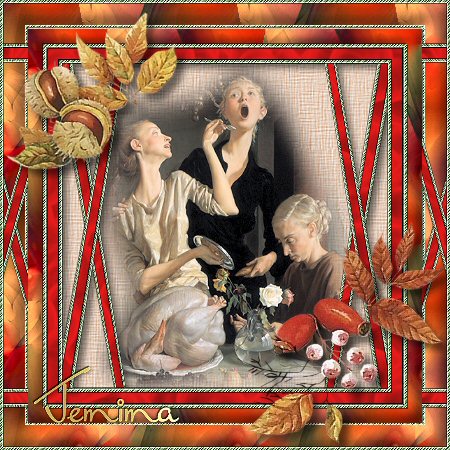
Your frame is ready for an image of your choice.
or you can use the Thanksgiving tube supplied.
THEN save a a .jpg image
Page designed by

for

http://www.artistrypsp.com/
Copyright ©
2000-2007 Artistry In PSP / PSP Artistry
All rights reserved.
Unless specifically made available for
download,
no graphics or text may be removed from
this site for any reason
without written permission from Artistry
In PSP / PSP Artistry
|