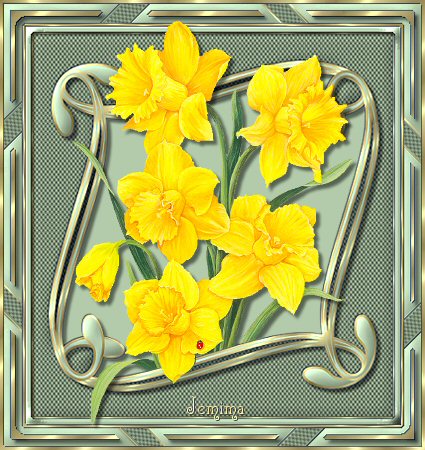
SCROLL FRAME
PSP8/9
This tutorial was
written by Jemima ~ January 2007
Copyright © 2007 ~ Jemima
~ All rights reserved
********************************
You will need the
following Materials to complete this tutorial
goldfill pattern
Click link... then....
Right click and Save Image As to your PSP Patterns folder
Daffodil tube
Click link... then....
Right click and Save Image As to a folder on your computer
lace61 Texture
Click link... then....
Right click and Save Image As to your PSP Textures folder.
shape12130434.PspShape
Click link... then....
Right click and Save Image As to your PSP PresetShapes folder
** EYE CANDY3 **
http://www.pircnet.com/downloads.html
********************************
Open a new image 425 x 450
Transparent background
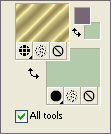
Background colour = #B3CBAB
Foreground Pattern = goldfill
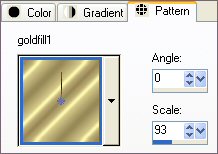 ... ...
Select your PRESET SHAPES tool, choose 'shape 34'
and use these settings
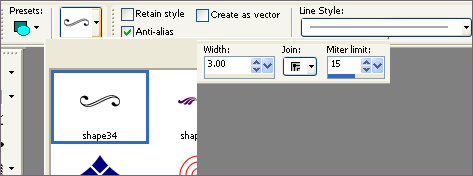
Starting at position 20, 20 draw the scroll finishing at 405, 100
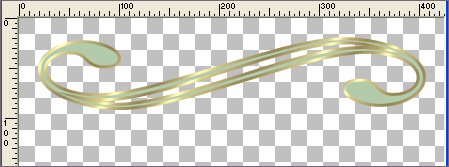
ADJUST >>> SHARPNESS >>> UNSHARP MASK

LAYERS >>> DUPLICATE
IMAGE >>> FLIP
IMAGE >>> MIRROR
LAYERS >>> MERGE >>> MERGE VISIBLE
LAYERS >>> DUPLICATE
IMAGE >>> ROTATE >>> FREE ROTATE = left 90
Ensure "All layers" is UNCHECKED
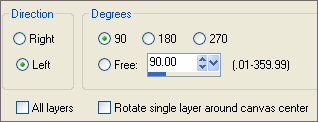
IMAGE >>> MIRROR
LAYERS >>> MERGE >>> MERGE VISIBLE
ADJUST >>> SHARPNESS >>> UNSHARP MASK (Same settings)
EFFECTS >>> 3D EFFECTS >>> INNER BEVEL
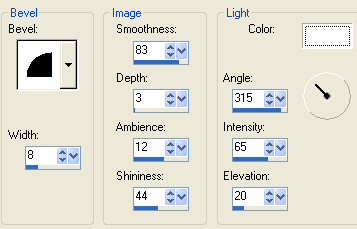
EFFECTS >>> 3D Effects >>> Drop Shadow
Vertical & Horizontal offsets = 1
Colour = Black
Opacity = 65
Blur = 0
Repeat Drop Shadow effect changing
Vertical & Horizontal Offsets to - ( minus ) 1
Click OK
IMAGE >>> RESIZE = 90
Ensure "Resize all layers" is UNCHECKED
With your MAGIC WAND
Mode = Replace
Match Mode = RGB Value
Tolerance = 0
Feather = 0
Antialias = UNchecked
Sample Merged = UNCHECKED
PSP9 USERS: CHECK CONTIGUOUS
Select the CENTRE transparent area
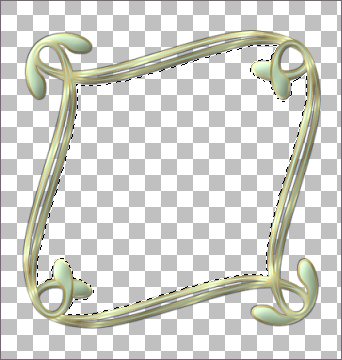
SELECTIONS >>> MODIFY >>> EXPAND = 5
SELECTIONS >>> INVERT
LAYERS >>> NEW RASTER LAYER
LAYERS >>> ARRANGE >>> MOVE DOWN
Flood fill with GREEN
EFFECTS >>> TEXTURE EFFECTS >>> TEXTURE
Select 'lace61'
COLOUR = #808080
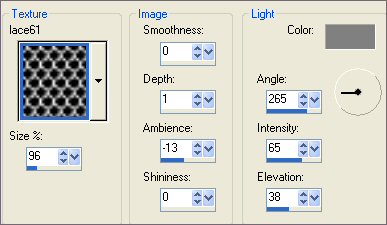
EFFECTS >>> 3D EFFECTS >>> INNER BEVEL (Same settings)
ADJUST >>> SHARPNESS >>> SHARPEN
DESELECT
Activate the MERGED LAYER
EFFECTS >>> PLUGINS >>> EYE CANDY 3 >>> DROP SHADOW
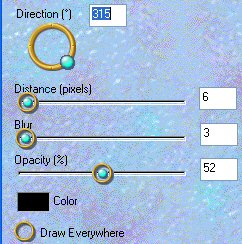
LAYERS >>> NEW RASTER LAYER
SELECTIONS >>> SELECT ALL
SELECTIONS >>> MODIFY >>> CONTRACT = 10
SELECTIONS >>> INVERT
Flood fill with GOLD
SELECTIONS >>> MODIFY >>> CONTRACT = 2
EDIT >>> CLEAR
EFFECTS >>> 3D Effects >>> Drop Shadow
Vertical & Horizontal offsets = 1
Colour = Black
Opacity = 65
Blur = 0
Repeat Drop Shadow effect changing
Vertical & Horizontal Offsets to - ( minus ) 1
Click OK
LAYERS >>> NEW RASTER LAYER
Flood fill with GREEN
EFFECTS >>> 3D EFFECTS >>> INNER BEVEL
Same settings - BUT change the DEPTH to 10
EDIT >>> Repeat Inner Bevel
EDIT >>> Repeat Inner Bevel
DESELECT
With your MAGIC WAND
Same settings
Select the CENTRE transparent area
SELECTIONS >>> INVERT
EFFECTS >>> PLUGINS >>> EYE CANDY 3 >>> DROP SHADOW
Same settings
DESELECT
LAYERS >>> MERGE >>> MERGE VISIBLE
IMAGE >>> RESIZE = 90%
Ensure "Resize all layers" is UNCHECKED
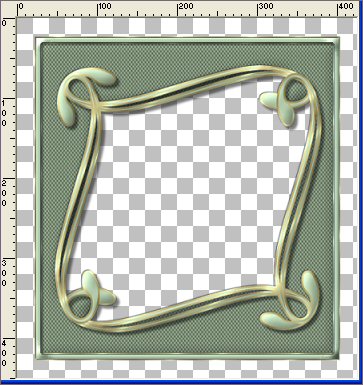
With your MAGIC WAND
Same settings
Select the OUTER transparent area
LAYERS >>> NEW RASTER LAYER
LAYERS >>> ARRANGE >>> MOVE DOWN
Flood fill with GOLD
SELECTIONS >>> MODIFY >>> CONTRACT = 2
EFFECTS >>> 3D Effects >>> Drop Shadow
Vertical & Horizontal offsets = 1
Colour = Black
Opacity = 100
Blur = 0
Repeat Drop Shadow effect changing
Vertical & Horizontal Offsets to - ( minus ) 1
Click OK
EDIT >>> CLEAR
LAYERS >>> NEW RASTER LAYER
LAYERS >>> ARRANGE >>> MOVE DOWN
Flood fill with GREEN
EFFECTS >>> TEXTURE EFFECTS >>> TEXTURE
Same settings
DESELECT
ADJUST >>> SHARPNESS >>> SHARPEN
IMAGE >>> ROTATE >>> FREE ROTATE = Left 45
Ensure "All layers" is UNCHECKED
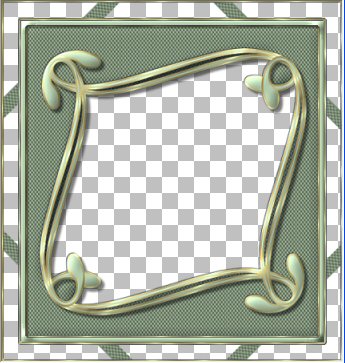
With your MAGIC WAND
Same settings
Select the INNER and while depressing your SHIFT key
select the OUTER transparent areas
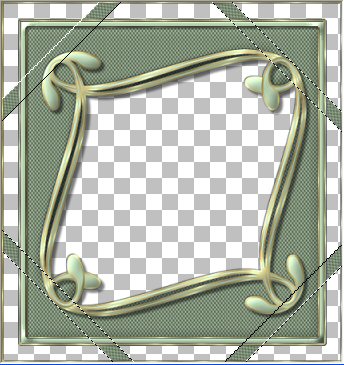
Flood fill with GOLD
SELECTIONS >>> MODIFY >>> CONTRACT = 2
EDIT >>> CLEAR
EFFECTS >>> 3D Effects >>> Drop Shadow
Vertical & Horizontal offsets = 1
Colour = Black
Opacity = 100
Blur = 0
Repeat Drop Shadow effect changing
Vertical & Horizontal Offsets to - ( minus ) 1
Click OK
DESELECT
LAYERS >>> MERGE >>> MERGE VISIBLE
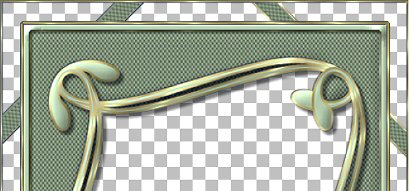
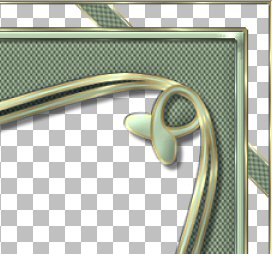
With your MAGIC WAND
Same settings
and while depressing your SHIFT key
select ALL the OUTER transparent areas
Flood fill with GREEN
EFFECTS >>> 3D EFFECTS >>> INNER BEVEL
Same settings - BUT change the DEPTH to 2
SELECTIONS >>> MODIFY >>> CONTRACT = 7
LAYERS >>> NEW RASTER LAYER
Flood fill with GOLD
EFFECTS >>> 3D Effects >>> Drop Shadow
Vertical & Horizontal offsets = 1
Colour = Black
Opacity = 100
Blur = 0
Repeat Drop Shadow effect changing
Vertical & Horizontal Offsets to - ( minus ) 1
Click OK
EFFECTS >>> PLUGINS >>> EYE CANDY 3 >>> DROP SHADOW
Same settings
DESELECT
IMAGE >>> RESIZE = 99
Ensure "Resize all layers" is UNCHECKED
SELECTIONS >>> SELECT ALL
SELECTIONS >>> MODIFY >>> CONTRACT = 3
SELECTIONS >>> INVERT
Flood fill with GOLD
DESELECT
With your MAGIC WAND
Same settings
Select the CENTRE transparent area
SELECTIONS >>> MODIFY >>> EXPAND = 3
SELECTIONS >>> INVERT
LAYERS >>> NEW RASTER LAYER
Flood fill with GREEN
DESELECT
LAYERS >>> ARRANGE >>> MOVE DOWN
LAYERS >>> MERGE >>> MERGE VISIBLE
Save as a .psp image
Your frame is now ready for an image of your choice.
~*~*~*~*~*~*~*~*~*~
To add the daffodils....
With your frame image
WINDOWS >>> DUPLICATE
Close the original frame
LAYERS >>> NEW RASTER LAYER
LAYERS >>> ARRANGE >>> MOVE DOWN
Flood fill with GREEN
Activate the MERGED LAYER
Open up the daffodil tube
Right click on the Title Bar and select COPY from the options
Go to your frame image
Right click on the Title Bar
and select PASTE AS NEW LAYER from the options.
IMAGE >>> RESIZE = 60 %
Ensure "Resize all layers" is UNCHECKED
EFFECTS >>> PLUGINS >>> EYE CANDY 3 >>> DROP SHADOW
Same settings
Change the Layer Opacity to 50%
Select your FREEHAND SELECTION tool and use these settings

Select the bottom section of the flower as shown below
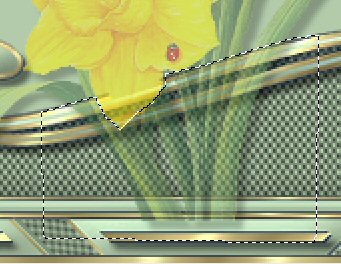
EDIT >>> CLEAR
DESELECT
Change the Layer Opacity to 100%
LAYERS >>> MERGE >>> MERGE ALL (Flatten)
Save a a .jpg image
Page designed by

for

http://www.artistrypsp.com/
Copyright © 2000-2006 Artistry In PSP / PSP Artistry
All rights reserved.
Unless specifically made available for
download,
no graphics or text may be removed from
this site for any reason
without written permission from Artistry
In PSP / PSP Artistry
|