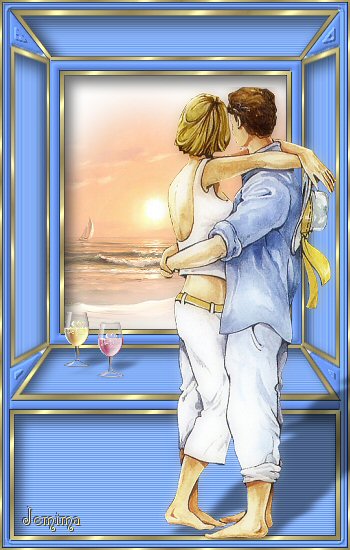
RECESS FRAME
PSP8/9
This tutorial was
written by Jemima ~ January 2007
Copyright © 2007 ~ Jemima
~ All rights reserved
********************************
You will need the
following to complete this tutorial
Materials:
rw-catching_a_morning_breeze~misted.psp
couple83.tub
CelebrationGlasses.psp
Click link... then....
save to a folder on your computer
goldfill1.bmp
Click link... then....
Right click and Save Image As to your PSP Patterns folder
~*~*~*~*~*~*~*~*~*~*~*~*~*~
** EYE CANDY3 **
http://www.pircnet.com/downloads.html
********************************
SAVE OFTEN
.. you never know when PSP will 'hiccup'!
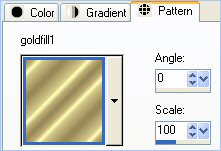
Foreground = goldfill1 pattern
Background colour = BLUE ( #A8C6FA )
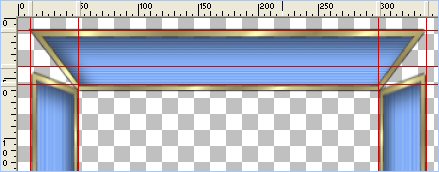
Open a new image 350 x 550
Transparent background.
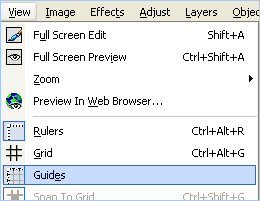
If your RULER is not showing...
VIEW >>> RULER
( We are going to use 'GUIDES' to make it easier to line up the sections. )
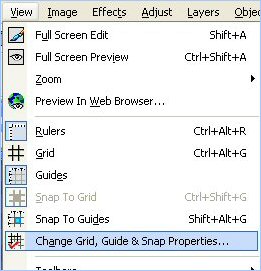
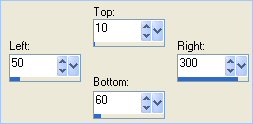
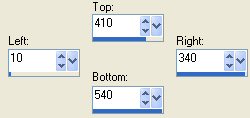
VIEW >>> Change Grid, Guide & Snap Properties..."
Use these settings
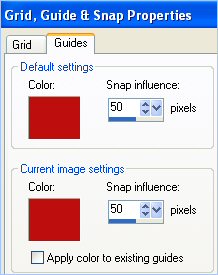
Click OK
VIEW >>> Guides
We'll do the horizontal guides first.
Place your cursor on the top ruler and drag to the 540 pixel mark.
Repeat this process to the following positions:
400, 365, 350, 55, 40, and 10
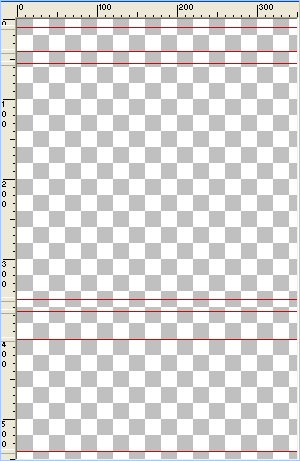
On the RULER you will notice raised areas where the guide lines are positioned.
If you right click on these you can double check and/or correct the positions.
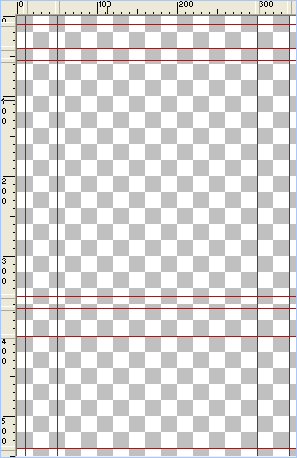
Now we'll do the vertical guides.
Using the left side ruler,
place your cursor on the ruler and drag to the 340 pixel mark.
Repeat this process to the following positions:
300, 50, and 10
Choose your SELECTION TOOL then click on the CUSTOM SELECTION
symbol
Flood fill with goldfill1 pattern
SELECTIONS >>> MODIFY >>> CONTRACT = 4
EDIT >>> CLEAR
DESELECT
EFFECTS >>> 3D Effects >>> Drop Shadow
Vertical & Horizontal offsets = 1
Colour = Black
Opacity = 65
Blur = 0
Repeat Drop Shadow effect changing
Vertical & Horizontal Offsets to - ( minus ) 1
Click OK
With your MAGIC WAND
Mode = Replace
Match Mode = RGB Value
Tolerance = 0
Feather = 0
Antialias = UNchecked
Sample Merged = UNCHECKED
PSP9 USERS: CHECK CONTIGUOUS
Select the INNER transparent area
LAYERS >>> NEW RASTER LAYER
LAYERS >>> ARRANGE >>> MOVE DOWN
Flood fill with BLUE
EFFECTS >>> TEXTURE EFFECTS >>> BLINDS
COLOUR = #5290F6
SELECTIONS >>> INVERT
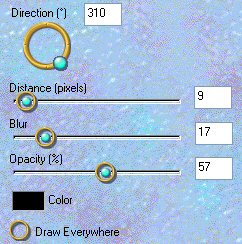
EFFECTS >>> PLUGINS >>> EYE CANDY 3 >>> DROP SHADOW
DESELECT
LAYERS >>> MERGE >>> MERGE VISIBLE
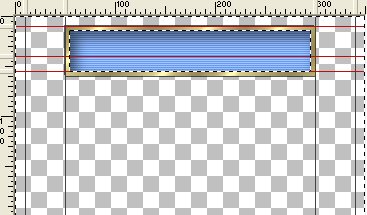
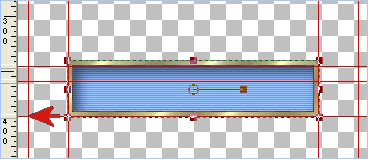
Select your DEFORMATION tool
Hold down your CTRL key and position your cursor over the top left node,
drag to the left in line with the 10 pixel position.
Choose your SELECTION TOOL
LAYERS >>> NEW RASTER LAYER
click on the CUSTOM SELECTION
symbol

Flood fill with goldfill1 pattern
SELECTIONS >>> MODIFY >>> CONTRACT = 4
EDIT >>> CLEAR
DESELECT
EFFECTS >>> 3D Effects >>> Drop Shadow
Vertical & Horizontal offsets = 1
Colour = Black
Opacity = 65
Blur = 0
Repeat Drop Shadow effect changing
Vertical & Horizontal Offsets to - ( minus ) 1
Click OK
With your MAGIC WAND
Select the INNER transparent area
LAYERS >>> NEW RASTER LAYER
LAYERS >>> ARRANGE >>> MOVE DOWN
Flood fill with BLUE
EFFECTS >>> TEXTURE EFFECTS >>> BLINDS
same settings
SELECTIONS >>> INVERT
EFFECTS >>> PLUGINS >>> EYE CANDY 3 >>> DROP SHADOW
DESELECT
CLOSE the Merged layer
LAYERS >>> MERGE >>> MERGE VISIBLE
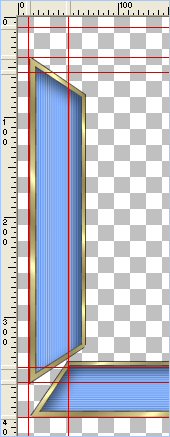
Select your DEFORMATION tool
Hold down your CTRL key and position your cursor over the bottom left node,
drag to the left in line with the 10 pixel position.

Select your MOVER TOOL
LAYERS >>> DUPLICATE
MAGE >>> ROTATE >>> FREE ROTATE = RIGHT 90
Ensure "All layers" is UNCHECKED
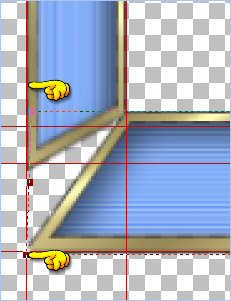
| Move to position shown |
 |
| |
|
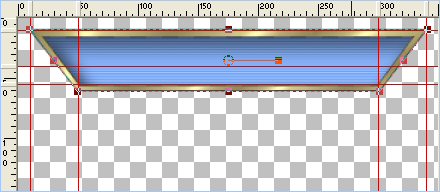
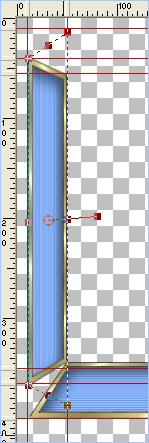
Select your DEFORMATION tool
Drag the centre right
node leftwards,
to the 50 pixel guide.
Depress your CTRL key -
Drag the top right node upwards level
with the 10 pixel mark (from the top) and
50 pixel mark (from the left) on the left ruler.
You can double check the positioning in your STATUS bar at the bottom if your PSP window.
|
 |
| |
|
LAYERS >>> DUPLICATE
IMAGE >>> MIRROR
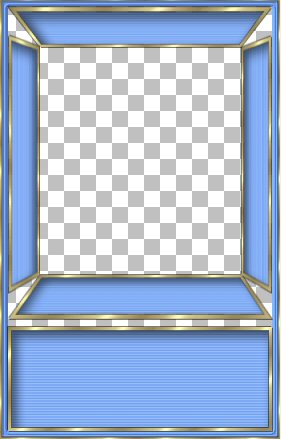
OPEN the bottom Merged layer
..
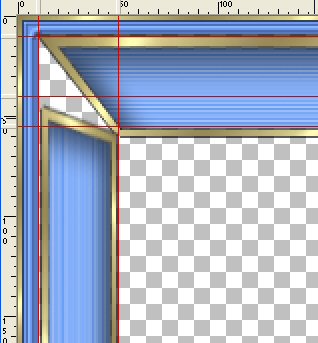
If the top and side panels are overlapping use your DEFORM TOOL
and by moving the centre top and centre bottom nodes,
to lower the side panels to fit as shown below.
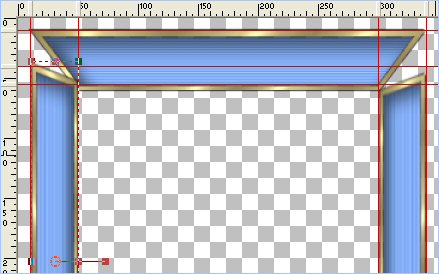
ZOOM in to make sure edges and corners are lined up with the guides.
If not... use the DEFORM tool to correct the positioning.
LAYERS >>> MERGE >>> MERGE VISIBLE
Select yor MOVER tool to close the DEFORMATION tool
SELECTIONS >>> SELECT ALL
SELECTIONS >>> MODIFY >>> CONTRACT = 10
SELECTIONS >>> INVERT
Flood fill with BLUE
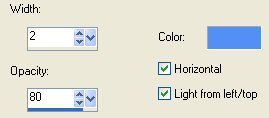
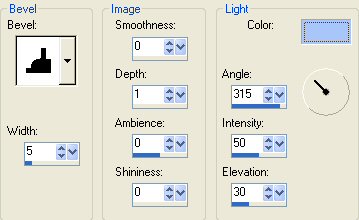
EFFECTS >>> 3D EFFECTS >>> INNER BEVEL
COLOUR =
#A8C6FA
DESELECT
SELECTIONS >>> SELECT ALL
SELECTIONS >>> MODIFY >>> CONTRACT = 2
SELECTIONS >>> INVERT
Flood fill with GOLD
EFFECTS >>> 3D EFFECTS >>> DROP SHADOW
Use the same settings
Click OK
Repeat Drop Shadow effect changing
Vertical & Horizontal Offsets to 1
Click OK
DESELECT
LAYERS >>> NEW RASTER LAYER
Choose your SELECTION TOOL then click on the CUSTOM SELECTION symbol
Flood fill with goldfill1 pattern
SELECTIONS >>> MODIFY >>> CONTRACT = 4
EDIT >>> CLEAR
LAYERS >>> NEW RASTER LAYER
LAYERS >>> ARRANGE >>> MOVE DOWN
Flood fill with BLUE
EFFECTS >>> TEXTURE EFFECTS >>> BLINDS
same settings
DESELECT
Activate Raster 1
With your MAGIC WAND ...Tolerance = 110
Select the gold border
EFFECTS >>> 3D Effects >>> Drop Shadow
Vertical & Horizontal offsets = 1
Colour = Black
Opacity = 65
Blur = 0
Repeat Drop Shadow effect changing
Vertical & Horizontal Offsets to - ( minus ) 1
Click OK
DESELECT
With your MAGIC WAND
Select the INNER area
SELECTIONS >>> INVERT
EFFECTS >>> PLUGINS >>> EYE CANDY 3 >>> DROP SHADOW
DESELECT
VIEW >>> GUIDES
(to remove Guides)
LAYERS >>> MERGE >>> MERGE VISIBLE
With your MAGIC WAND ,,,
Same settings.
Select the OUTER transparent areas
LAYERS >>> NEW RASTER LAYER
LAYERS >>> ARRANGE >>> MOVE DOWN
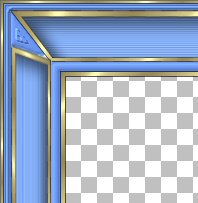
SELECTIONS >>> MODIFY >>> EXPAND = 2
Flood fill with BLUE
EFFECTS >>> 3D EFFECTS >>> INNER BEVEL
CHANGE THE 'WIDTH' TO 10
ADJUST >>> SHARPNESS >>> SHARPEN
DESELECT
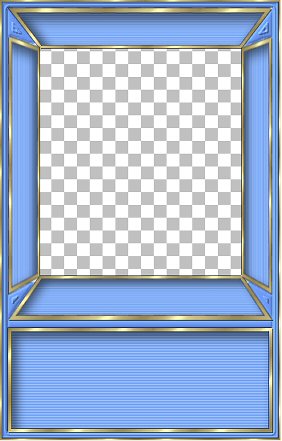
LAYERS >>> MERGE >>> MERGE VISIBLE
With your MAGIC WAND ,,,
Same settings.
Select the INNER transparent area
LAYERS >>> NEW RASTER LAYER
Flood fill with BLUE
SELECTIONS >>> MODIFY >>> CONTRACT = 10
EDIT >>> CLEAR
Flood fill with goldfill1
SELECTIONS >>> MODIFY >>> CONTRACT = 4
EDIT >>> CLEAR
DESELECT
With your MAGIC WAND ... Tolerance = 0
select the blue border you just created
EFFECTS >>> 3D EFFECTS >>> INNER BEVEL
same settings
DESELECT
With your MAGIC WAND ... Tolerance = 86
select the GOLD border you just created
EFFECTS >>> 3D EFFECTS >>> DROP SHADOW
Use the same settings
Click OK
Repeat Drop Shadow effect changing
Vertical & Horizontal Offsets to 1
Click OK
DESELECT
With your MAGIC WAND ... Tolerance = 0
Select the INNER transparent area.
SELECTIONS >>> INVERT
EFFECTS >>> PLUGINS >>> EYE CANDY 3 >>> DROP SHADOW
DESELECT
LAYERS >>> MERGE >>> MERGE VISIBLE
At this stage you should save your image for future use as a .psp file
Then.. WINDOW >>> DUPLICATE
Close your original frame and work with the copy.
LAYERS >>> NEW RASTER LAYER
LAYERS >>> ARRANGE >>> MOVE DOWN
Flood fill with WHITE
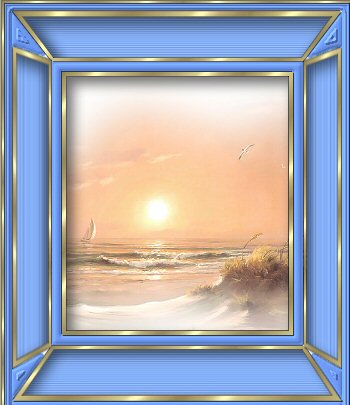
Open up the " rw-catching_a_morning_breeze~misted.psp " tube
Right click on the Title Bar and select COPY from the options
Go to your frame image
Right click on the Title Bar
and select PASTE AS NEW LAYER from the options.
IMAGE >>> RESIZE = 65%
Ensure "Resize all layers" is UNCHECKED
Use your MOVER tool to reposition.
Activate the Merged layer
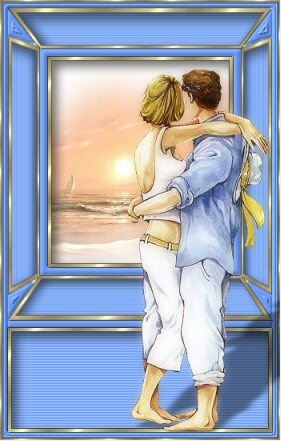
Open up the " couple83.tub " tube
Right click on the Title Bar and select COPY from the options
Go to your frame image
Right click on the Title Bar
and select PASTE AS NEW LAYER from the options.
IMAGE >>> RESIZE = 65%
Ensure "Resize all layers" is UNCHECKED
Use your MOVER tool to reposition.
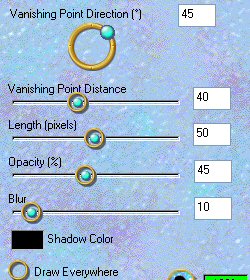
EFFECTS >>> PLUGINS >>> EYE CANDY 3 >>> PERSPECTIVE SHADOW.
Now let's give them some refreshment *S*
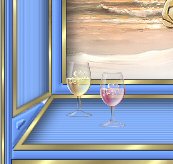
Open up the " CelebrationGlasses.psp " tube
WINDOW >>> DUPLICATE
Close the original Image
LAYERS >>> MERGE >>> MERGE VISIBLE
Right click on the Title Bar and select COPY from the options
Go to your frame image
Right click on the Title Bar
and select PASTE AS NEW LAYER from the options.
IMAGE >>> RESIZE = 25%
Ensure "Resize all layers" is UNCHECKED
Use your MOVER tool to reposition.
LAYERS >>> DUPLICATE
EFFECTS >>> PLUGINS >>> EYE CANDY 3 >>> PERSPECTIVE SHADOW.
Same settings.
LAYERS >>> MERGE >>> MERGE VISIBLE
Add your watermark
LAYERS >>> MERGE >>> MERGE ALL (Flatten)
Save as a .jpg file
Page designed by

for

http://www.artistrypsp.com/
Copyright © 2000-2006 Artistry In PSP / PSP Artistry
All rights reserved.
Unless specifically made available for
download,
no graphics or text may be removed from
this site for any reason
without written permission from Artistry
In PSP / PSP Artistry
|