JEWEL FRAME
PSP8/9/X
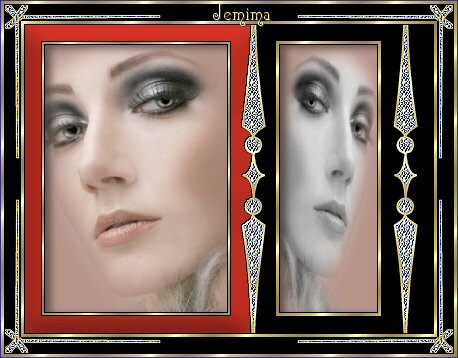
This tutorial was
written by Jemima ~ September 2006
Copyright © 2006/7 ~ Jemima
~ All rights reserved
********************************
You will need the
following to complete this tutorial
Materials
Tubes
Click link... then....
Right click and Save Image As to a folder on your computer
"c&s_b375" Tube (Elements)
"Myst~2 RobPohl_Daisy-mac_Sm" (Daisy I used)
"Image43LongWhiteDress_SM~bks" (Girl I used)
"porcelaine.psp" (Image I used in result above)
** SIMPLE FILTERS **
download
Download and extract to your PSP Plugins folder.
********************************
Open the "c&s_b375" Tube
Highlight Raster 4
Right click on the Title Bar and select COPY from the options
Open a new image 450 x 350 ...
Transparent background
PSPX: Colour Depth = 8bits/channel
LAYERS >>> NEW RASTER LAYER
Right click on the Title Bar
and select PASTE AS NEW SELECTION from the options.
IMAGE >>> ROTATE >>> FREE ROTATE = Right 90
Ensure "All layers" is UNCHECKED
Reposition in line with the 250 mark

DESELECT
LAYERS >>> DUPLICATE
Reposition in line with the 400 mark
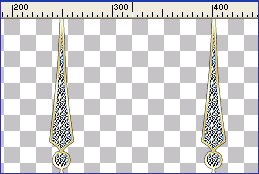
DESELECT
Close Raster 1 ...
LAYERS >>> MERGE >>> MERGE VISIBLE
With your MAGIC WAND
Mode = Replace
Match Mode = RGB Value
Tolerance = 0
Feather = 0
Antialias = UNchecked
Sample Merged = UNCHECKED
PSP9/X: Check CONTIGUOUS
PSPX: There is no " Sample Merged"
PSPX: Use all layers = UNChecked
Select the INNER transparent area between the 2 jewelled elements
SELECTIONS >>> MODIFY >>> EXPAND = 2
LAYERS >>> NEW RASTER LAYER
LAYERS >>> ARRANGE >>> MOVE DOWN
Flood fill with BLACK
DESELECT
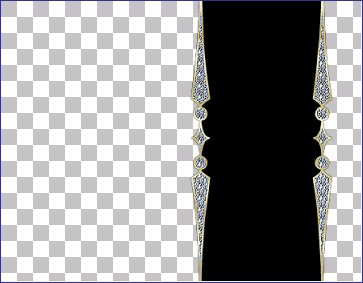
Highlight the MERGED layer
LAYERS >>> NEW RASTER LAYER
SELECTIONS >>> SELECT ALL
SELECTIONS >>> MODIFY >>> CONTRACT = 20
SELECTIONS >>> INVERT
Flood fill with GOLD (any gold you have in your stash *S*)
EFFECTS >>> 3D Effects >>> Drop Shadow
Vertical & Horizontal offsets = 1
Colour = Black
Opacity = 100
Blur = 0
Repeat Drop Shadow effect changing
Vertical & Horizontal Offsets to - ( minus ) 1
Click OK
DESELECT
SELECTIONS >>> SELECT ALL
SELECTIONS >>> MODIFY >>> CONTRACT = 17
SELECTIONS >>> INVERT
EDIT >>> CLEAR
Highlight the MERGED layer
EDIT >>> CLEAR
Highlight RASTER 2
EDIT >>> CLEAR
DESELECT
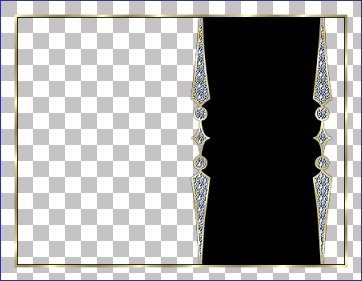
LAYERS >>> MERGE >>> MERGE VISIBLE
With your MAGIC WAND
Select the INNER transparent area between the left gold border & the jewelled element
SELECTIONS >>> MODIFY >>> EXPAND = 2
LAYERS >>> NEW RASTER LAYER
LAYERS >>> ARRANGE >>> MOVE DOWN
Flood fill with RED = #B82C21
EFFECTS >>> 3D EFFECTS >>> INNER BEVEL
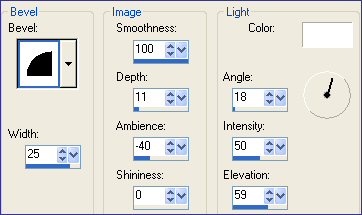
DESELECT
With your MAGIC WAND ...
Tolerance = 50 ...Select the RED area
EFFECTS >>> 3D Effects >>> Drop Shadow
Vertical & Horizontal offsets = 1
Colour = Black
Opacity = 100
Blur = 0
Repeat Drop Shadow effect changing
Vertical & Horizontal Offsets to - ( minus ) 1
Click OK
DESELECT
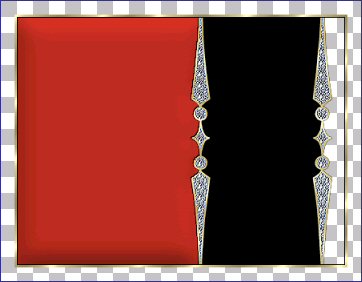
LAYERS >>> MERGE >>> MERGE VISIBLE
With your MAGIC WAND
Select the REMAINING transparent areas
SELECTIONS >>> MODIFY >>> EXPAND = 2
LAYERS >>> NEW RASTER LAYER
LAYERS >>> ARRANGE >>> MOVE DOWN
Flood fill with BLACK
DESELECT
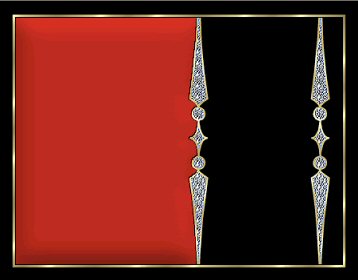
LAYERS >>> MERGE >>> MERGE VISIBLE
On the "c&s_b375" elements Tube...
Highlight Raster 3
Then with your SELECTION tool
set to RECTANGLE,,,
select the right half of the element as shown.
Now click inside the rectangle to select the section.


Right click on the Title Bar and select COPY from the options
Go to your frame image
LAYERS >>> NEW RASTER LAYER
Right click on the Title Bar
and select PASTE AS NEW SELECTION from the options.
With your MOVER tool Reposition as shown at the top left corner of your image
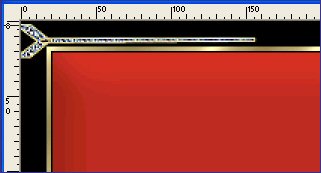
LAYERS >>> DUPLICATE
IMAGE >>> ROTATE >>> FREE ROTATE = RIGHT 90
Ensure "All layers" is UNCHECKED
With your MOVER tool Reposition as shown at the top left corner of your image
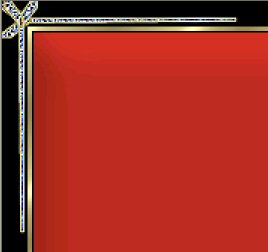
Close the MERGED layer
LAYERS >>> MERGE >>> MERGE VISIBLE
EFFECTS >>> PLUGINS >>> SIMPLE >>> TOP LEFT MIRROR
Open the bottom MERGED layer
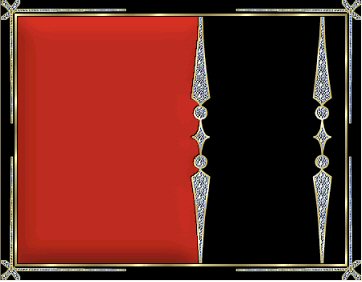
LAYERS >>> MERGE >>> MERGE VISIBLE
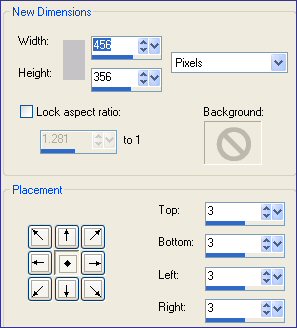
IMAGE >>> CANVAS SIZE
With your MAGIC WAND
Same settings
Select the OUTER transparent area
LAYERS >>> NEW RASTER LAYER
Flood fill with GOLD
EFFECTS >>> 3D Effects >>> Drop Shadow
Vertical & Horizontal offsets = 1
Colour = Black
Opacity = 100
Blur = 0
Repeat Drop Shadow effect changing
Vertical & Horizontal Offsets to - ( minus ) 1
Click OK
DESELECT
LAYERS >>> MERGE >>> MERGE VISIBLE
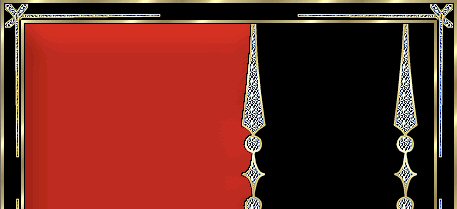
NOW, save as a .psp file.
You can use the frame as is by adding a new layer
and 'copying and pasting' your images onto the red and black framed areas as I did HERE
OR
continue on creating another possibility.
Choose your SELECTION TOOL then click on the CUSTOM SELECTION
symbol

Enter these co-ordinates
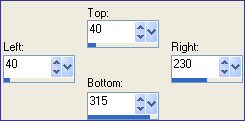
EDIT >>> CLEAR
EFFECTS >>> 3D Effects >>> Drop Shadow
Vertical & Horizontal offsets = 1
Colour = Black
Opacity = 100
Blur = 0
Repeat Drop Shadow effect changing
Vertical & Horizontal Offsets to - ( minus ) 1
Click OK
DO NOT DESELECT
SELECTIONS >>> INVERT
LAYERS >>> NEW RASTER LAYER
LAYERS >>> ARRANGE >>> MOVE DOWN
SELECTIONS >>> MODIFY >>> EXPAND = 3
Flood fill with GOLD
SELECTIONS >>> MODIFY >>> CONTRACT = 6
EDIT >>> CLEAR
SELECTIONS >>> INVERT
EFFECTS >>> 3D Effects >>> Drop Shadow
Vertical & Horizontal offsets = 1
Colour = Black
Opacity = 100
Blur = 0
Repeat Drop Shadow effect changing
Vertical & Horizontal Offsets to - ( minus ) 1
Click OK
DESELECT
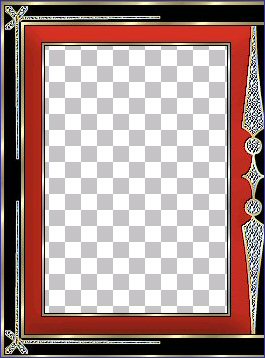
With the MERGED layer highlighted...
Choose your SELECTION TOOL then click on the CUSTOM SELECTION symbol
Enter these co-ordinates
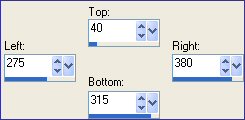
EDIT >>> CLEAR
Highlight RASTER 2
SELECTIONS >>> MODIFY >>> EXPAND = 3
Flood fill with GOLD
SELECTIONS >>> MODIFY >>> CONTRACT = 6
EDIT >>> CLEAR
SELECTIONS >>> INVERT
EFFECTS >>> 3D Effects >>> Drop Shadow
Vertical & Horizontal offsets = 1
Colour = Black
Opacity = 100
Blur = 0
Repeat Drop Shadow effect changing
Vertical & Horizontal Offsets to - ( minus ) 1
Click OK
DESELECT
LAYERS >>> MERGE >>> MERGE VISIBLE
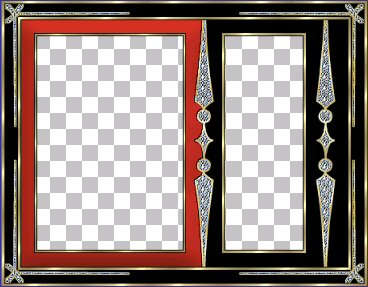
Open RASTER 1
Save as a .psp file giving it a different name from the first one you saved.
Your frame is now ready for your images.
~^~^~^~^~^~^~^~^~^~^~^~^~^~^~
Select a colour for your backgroung (Raster 1)
Then add a New Raster layer.
Copy and paste your
tube into each frame section resizing to fit.
LAYERS >>> MERGE >>> MERGE ALL (Flatten)
Once you add your images... save as a .gif file.
I hope you enjoyed this tutorial.. you got 2 frames for the price of one *S*
TUT TESTERS RESULTS
Page designed by

for

http://www.artistrypsp.com/
Copyright ©
2000-2007 Artistry In PSP / PSP Artistry
All rights reserved.
Unless specifically made available for
download,
no graphics or text may be removed from
this site for any reason
without written permission from Artistry
In PSP / PSP Artistry
|