Halloween
PSP8/9
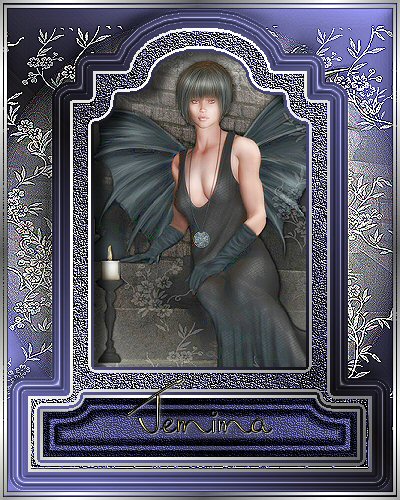
This tutorial was
written by Jemima ~ January 2007
Copyright © 2007 ~ Jemima
~ All rights reserved
********************************
You will need the
following to complete this tutorial
Materials
" Headstone_Shape.psp "
" CJ_Bat GirDbl MistedA.psp "
Click link... then....
Right click and Save Image As to a folder on your computer
" kk-halloween-06.PspGradient "
" Metallic.jgd "
Click link... then....
Right click and Save Image As to your PSP Gradients folder
********************************
In your MATERIALS PALETTE load
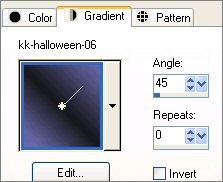
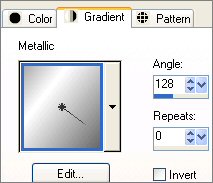
" kk-halloween-06.PspGradient " in the foreground and
" Metallic.jgd " in the background using these settings
 .. .. 
Open a new image 400 x 500
Transparent background
SELECTIONS >>> SELECT ALL
SELECTIONS >>> MODIFY >>> CONTRACT = 25
Open the " Headstone_Shape.psp " tube
Right click on the Title Bar and select COPY from the options
Go to your frame image
Right click on the Title Bar
and select PASTE INTO SELECTION from the options
DESELECT
Choose your SELECTION TOOL
Selection Type = Rectangle
Mode = Replace
Feather = 0
Antialias = UNChecked
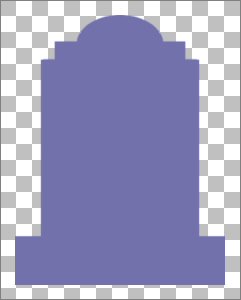
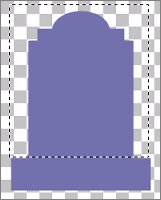
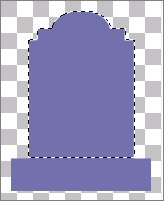
Draw a rectangle as shown in the left image, then click inside the
rectangle to select the top section of the shape.
 .. .. 
SELECTIONS >>> DEFLOAT
SELECTIONS >>> MODIFY >>> CONTRACT = 25
EDIT >>> CLEAR
DESELECT
Draw a rectangle as shown at the bottom of the image starting
at 380 pixels down,
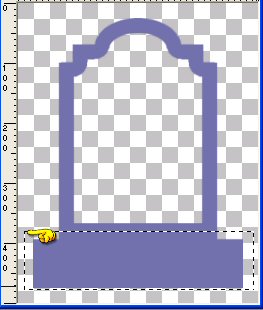
then click inside the
rectangle to select the lower section of the shape.
SELECTIONS >>> DEFLOAT
SELECTIONS >>> MODIFY >>> CONTRACT = 15
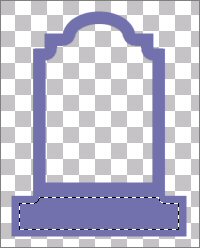
EDIT >>> CLEAR
LAYERS >>> NEW RASTER LAYER
LAYERS >>> ARRANGE >>> MOVE DOWN
Flood fill with " Metallic " gradient
SELECTIONS >>> MODIFY >>> CONTRACT = 3
EDIT >>> CLEAR
DESELECT
With your MAGIC WAND
Mode = Replace
Match Mode = RGB Value
Tolerance = 140
Feather = 0
Antialias = UNchecked
Sample Merged = UNCHECKED
PSP9 USERS: CHECK CONTIGUOUS
Select the metallic border
EFFECTS >>> 3D EFFECTS >>> DROP SHADOW
Vertical & Horizontal offsets = 1
Colour = Black
Opacity = 55
Blur = 1.00
Repeat Drop Shadow effect changing
Vertical & Horizontal Offsets to - ( minus ) 1
Click OK
DESELECT
With your MAGIC WAND... same settings, select the transparent area shown below.
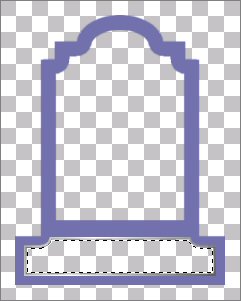
SELECTIONS >>> MODIFY >>> EXPAND = 3
LAYERS >>> NEW RASTER LAYER
LAYERS >>> ARRANGE >>> SEND TO BOTTOM
Flood fill with " kk-halloween-06 " gradient
DESELECT
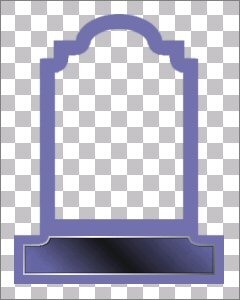
Activate Raster 1 (top layer)
With your MAGIC WAND... same settings
Select the purple shape area shown below
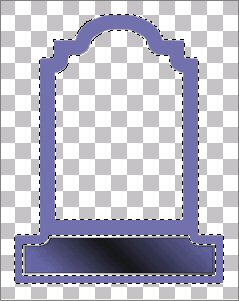
Flood fill with " kk-halloween-06 " gradient
SELECTIONS >>> MODIFY >>> CONTRACT = 3
Flood fill with " Metallic " gradient
SELECTIONS >>> MODIFY >>> CONTRACT = 3
Flood fill with " kk-halloween-06 " gradient
EFFECTS >>> TEXTURE EFFECTS >>> FINE LEATHER
COLOUR = ( #7271AB )
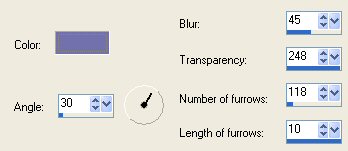
EFFECTS >>> EDGE EFFECTS >>> ENHANCE
DESELECT
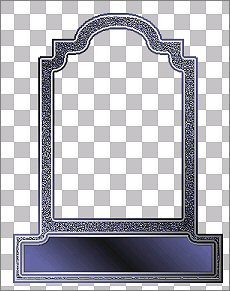
Activate Raster 2
With your MAGIC WAND... same settings
Select the area shown below
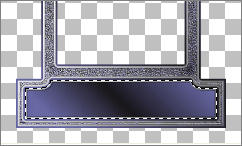
Activate Raster 3
Repeat
FINE LEATHER effect
EFFECTS >>> EDGE EFFECTS >>> ENHANCE
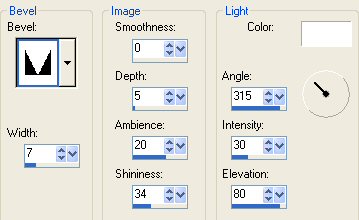
EFFECTS >>> 3D EFFECTS >>> INNER BEVEL
COLOUR = ( #7271AB )
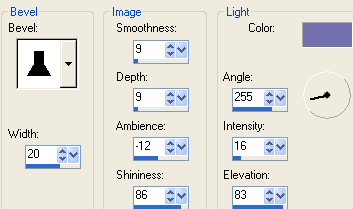
ADJUST >>> SHARPNESS >>> SHARPEN
DESELECT
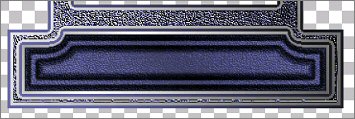
Activate Raster 1
With your MAGIC WAND ...
Same settings
Select the OUTER transparent area
LAYERS >>> NEW RASTER LAYER
Flood fill with " kk-halloween-06 " gradient
SELECTIONS >>> INVERT
SELECTIONS >>> MODIFY >>> EXPAND = 15
SELECTIONS >>> INVERT
EDIT >>> CLEAR
DESELECT
EFFECTS >>> 3D EFFECTS >>> INNER BEVEL
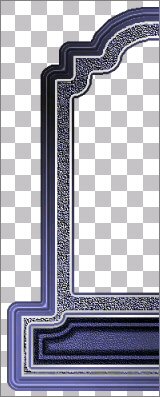
With your MAGIC WAND ...
Same settings
Select the OUTER transparent area
LAYERS >>> NEW RASTER LAYER
Flood fill with " kk-halloween-06 " gradient
SELECTIONS >>> INVERT
LAYERS >>> ARRANGE >>> MOVE DOWN
DESELECT
CLOSE Raster 5
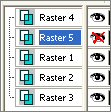 .. .. 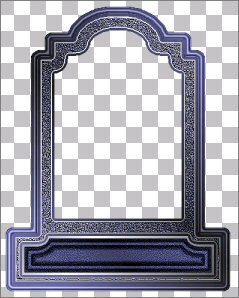
Activate Raster 1
LAYERS >>> MERGE >>> MERGE VISIBLE
OPEN & Activate Raster 5
LAYERS >>> ARRANGE >>> MOVE DOWN
LAYERS >>> NEW RASTER LAYER
Open the " CJ_Bat GirDbl MistedA " tube
Right click on the Title Bar and select COPY from the options
Go to your frame image
Right click on the Title Bar
and select PASTE AS NEW SELECTION from the options.
Position as shown...
DESELECT
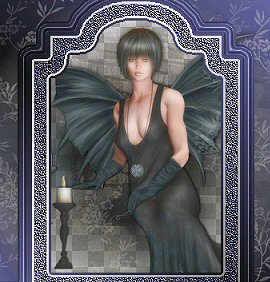
Activate Raster 5
LAYERS >>> NEW RASTER LAYER
LAYERS >>> ARRANGE >>> MOVE DOWN
CLOSE top 3 layers
Flood fill Raster 2 with "Metallic" gradient
OPEN ALL LAYERS
Activate Raster 1
ADJUST >>> SHARPNESS >>> SHARPEN
LAYERS >>> DUPLICATE
Activate the MERGED layer (top layer)
With your MAGIC WAND
Same settings
Select the CENTRE area of the image
SELECTIONS >>> MODIFY >>> EXPAND = 3
SELECTIONS >>> INVERT
LAYERS >>> NEW RASTER LAYER
LAYERS >>> ARRANGE >>> MOVE DOWN
EFFECTS >>> 3D EFFECTS >>> DROP SHADOW
Vertical = 10,
Horizontal = 14
Colour = Black
Opacity = 60
Blur = 12.00
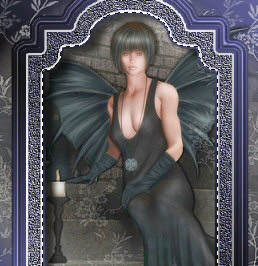
DESELECT
Activate the MERGED layer (top layer)
With your MAGIC WAND ...
Same settings
Select the patterned area outside the frame
CLOSE RASTER 2, 3 and the MERGED LAYER
ACTIVATE RASTER 1
LAYERS >>> MERGE >>> MERGE VISIBLE
EFFECTS >>> 3D EFFECTS >>> INNER BEVEL
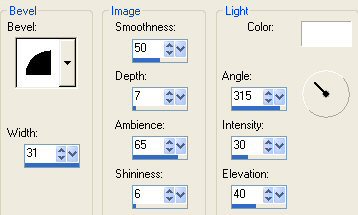
EFFECTS >>> EDGE EFFECTS >>> ENHANCE
DESELECT
OPEN ALL LAYERS
LAYERS >>> NEW RASTER LAYER
SELECTIONS >>> SELECT ALL
SELECTIONS >>> MODIFY >>> CONTRACT = 3
SELECTIONS >>> INVERT
In your MATERIALS PALETTE
Change REPEAT setting on "Metallic" gradient to 3
Flood fill with "Metallic" gradient
EFFECTS >>> 3D EFFECTS >>> DROP SHADOW
Vertical & Horizontal offsets = 1
Colour = Black
Opacity = 55
Blur = 0
Repeat Drop Shadow effect changing
Vertical & Horizontal Offsets to - ( minus ) 1
Click OK
DESELECT
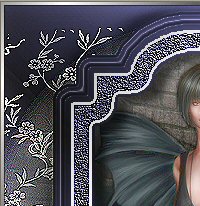
LAYERS >>> DUPLICATE
IMAGE >>> RESIZE = 98%
Ensure "Resize all layers" is UNCHECKED

LAYERS >>> MERGE >>> MERGE ALL (Flatten)
ADJUST >>> SHARPNESS >>> UNSHARP MASK

Reduce the size to 400 pixels in height if you wish.
Save your result as a .jpg image
Page designed by

for

http://www.artistrypsp.com/
Copyright ©
2000-2007 Artistry In PSP / PSP Artistry
All rights reserved.
Unless specifically made available for
download,
no graphics or text may be removed from
this site for any reason
without written permission from Artistry
In PSP / PSP Artistry
|