FEEDBACK
PSP9/X
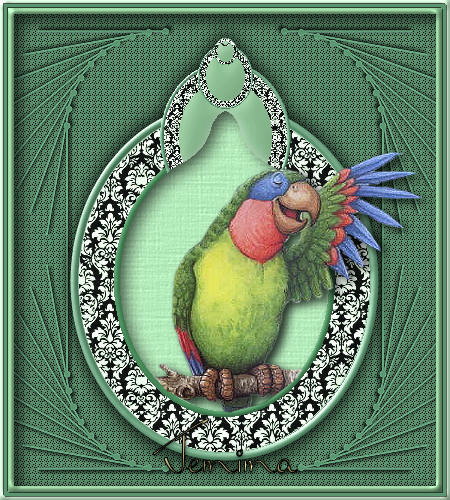
This tutorial was
written by Jemima ~ January 2007
Copyright © 2007 ~ Jemima
~ All rights reserved
********************************
You will need the
following to complete this tutorial
Materials
mc2990black.jpg
Click link... then....
Right click and Save Image As to your PSP Patterns folder
Image60.psp
Click link... then....
Right click and Save Image As to a folder on your computer
Plugins
** EYE CANDY3 **
http://www.pircnet.com/downloads.html
********************************
REMEMBER TO SAVE YOUR WORK OFTEN
********************************
In your MATERIALS PALETTE
Load SOLID DARK GREEN ' #5c9670 ' in your foreground
Load SOLID LIGHT GREEN ' #b7d7bb ' in your background
Open a new image 450 x 500
Transparent background
PSPX: Colour Depth = 8bits/channel
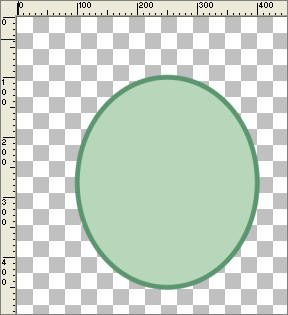
Select your PRESET SHAPES tool (Ellipse)

Start at position 100 across and 100 down and drag your cursor down to 450 down and 400 across.
With your MAGIC WAND
Mode = Replace
Match Mode = RGB Value
Tolerance = 0
Feather = 0
Antialias = Checked
Sample Merged = UNCHECKED
PSP9/X: Check CONTIGUOUS
PSPX: There is no " Sample Merged"
PSPX: Use all layers = UNChecked
PSP9/X: ANTIALIAS = Inside
Select the dark green border
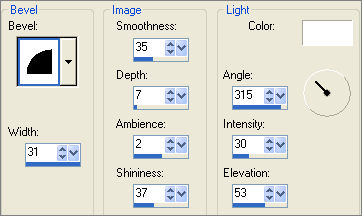
EFFECTS >>> 3D EFFECTS >>> INNER BEVEL
DESELECT
With your MAGIC WAND
Same settings
Select the light green centre
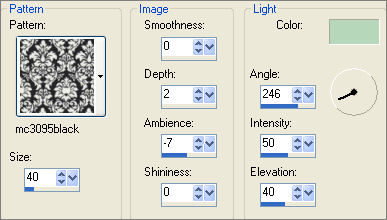
EFFECTS >>> TEXTURE EFFECTS >>> SCULPTURE
COLOUR =
LIGHT GREEN ' #b7d7bb '
SELECTIONS >>> MODIFY >>> CONTRACT = 35
EDIT >>> CLEAR
Flood fill with LIGHT GREEN ' #b7d7bb '
DESELECT
IMAGE >>> RESIZE = 95%
Ensure "Resize all layers" is UNCHECKED
To 'centre' your image....
Right click on the Title Bar and select COPY from the options
Right click on the Title Bar
and select PASTE AS NEW LAYER from the options.
DELETE RASTER 1
EFFECTS >>> REFLECTION EFFECTS >>> FEEDBACK
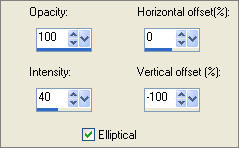
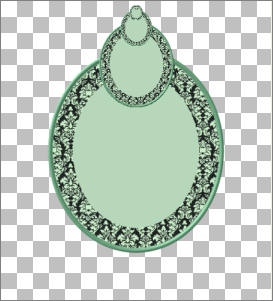
To 'REcentre' your image....
Right click on the Title Bar and select COPY from the options
Right click on the Title Bar and select PASTE AS NEW LAYER from the options.
DELETE RASTER 2
With your MAGIC WAND
Same settings
Select the OUTER transparent area
SELECTIONS >>> INVERT
SELECTIONS >>> MODIFY >>> CONTRACT = 50
EDIT >>> CLEAR
DESELECT
With your MAGIC WAND
Same settings
Select the light green border as shown below
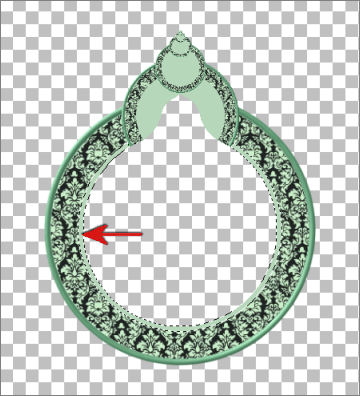
EFFECTS >>> 3D EFFECTS >>> INNER BEVEL
Same settings
COLOUR = DARK GREEN ' #5c9670 '
DESELECT
With your MAGIC WAND
Same settings
Select the areas shown below
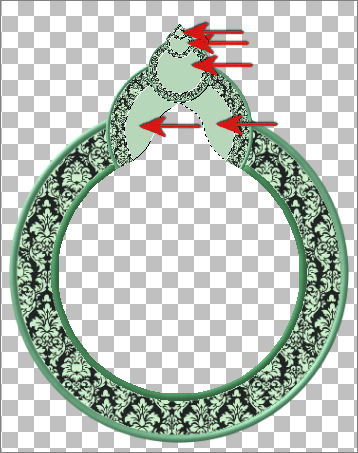
EFFECTS >>> 3D EFFECTS >>> INNER BEVEL
COLOUR = LIGHT GREEN ' #b7d7bb '
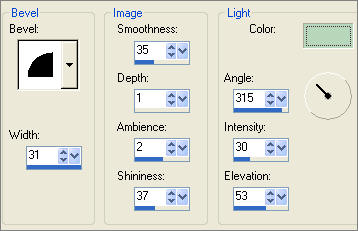
DESELECT
With your MAGIC WAND
Same settings
Select the CENTRE transparent area
SELECTIONS >>> MODIFY >>> EXPAND = 3
SELECTIONS >>> INVERT
LAYERS >>> NEW RASTER LAYER (2)
LAYERS >>> ARRANGE >>> MOVE DOWN
EFFECTS >>> PLUGINS >>> EYE CANDY 3 >>> DROP SHADOW
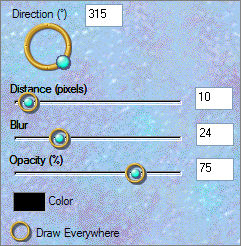
LAYERS >>> NEW RASTER LAYER (3)
LAYERS >>> ARRANGE >>> MOVE DOWN
Flood fill with DARK GREEN ' #5c9670 '
EFFECTS >>> TEXTURE EFFECTS >>> WEAVE
WEAVE COLOUR = BLACK
GAP COLOUR =
DARK GREEN ' #5c9670 '
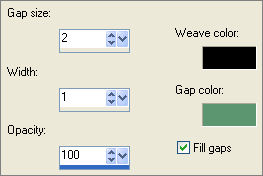
DESELECT
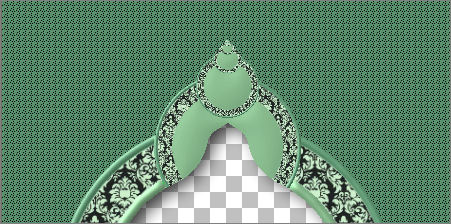
ACTIVATE RASTER 1
With your MAGIC WAND
Same settings
Select the area outside the frame shape
SELECTIONS >>> INVERT
SELECTIONS >>> MODIFY >>> CONTRACT = 3
LAYERS >>> NEW RASTER LAYER (4)
LAYERS >>> ARRANGE >>> MOVE DOWN
EFFECTS >>> PLUGINS >>> EYE CANDY 3 >>> DROP SHADOW
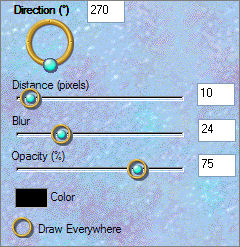
EDIT >>> Repeat Drop Shadow
Change DIRECTION = 90
DESELECT
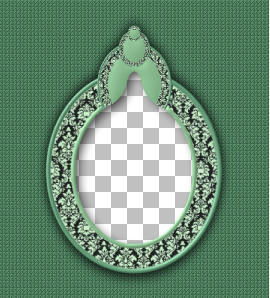
ACTIVATE RASTER 1
LAYERS >>> NEW RASTER LAYER (5)
SELECTIONS >>> SELECT ALL
SELECTIONS >>> MODIFY >>> CONTRACT = 4
SELECTIONS >>> INVERT
Flood fill with LIGHT GREEN ' #b7d7bb '
EFFECTS >>> 3D EFFECTS >>> INNER BEVEL
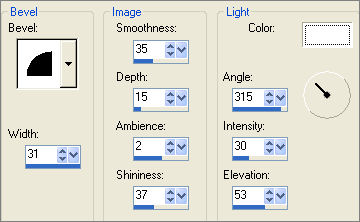
SELECTIONS >>> INVERT
LAYERS >>> NEW RASTER LAYER (6)
Flood fill with DARK GREEN ' #5c9670 '
EFFECTS >>> 3D EFFECTS >>> DROP SHADOW
Vertical & Horizontal offsets = 1
Colour = Black
Opacity = 60
Blur = 0
Repeat Drop Shadow effect changing
Vertical & Horizontal Offsets to - ( minus ) 1
Click OK
SELECTIONS >>> MODIFY >>> CONTRACT = 4
EDIT >>> CLEAR
EFFECTS >>> 3D EFFECTS >>> DROP SHADOW
Use the same settings
Click OK
Repeat Drop Shadow effect changing
Vertical & Horizontal Offsets to 1
Click OK
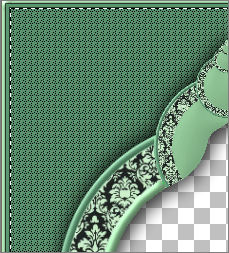
LAYERS >>> NEW RASTER LAYER (7)
Flood fill with LIGHT GREEN ' #b7d7bb '
SELECTIONS >>> MODIFY >>> CONTRACT = 6
EDIT >>> CLEAR
DESELECT
With your MAGIC WAND
Same settings
Select the light green border
EFFECTS >>> 3D EFFECTS >>> INNER BEVEL
Same settings
Change COLOUR = LIGHT GREEN ' #b7d7bb '

SELECTIONS >>> INVERT
LAYERS >>> NEW RASTER LAYER (8)
LAYERS >>> ARRANGE >>> MOVE DOWN
EFFECTS >>> PLUGINS >>> EYE CANDY 3 >>> DROP SHADOW
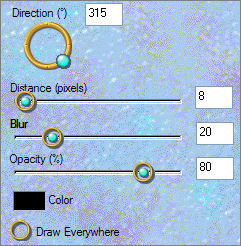
DESELECT

Close the bottom 4 layers
LAYERS >>> MERGE >>> MERGE VISIBLE
Close the MERGED LAYER
OPEN & ACTIVATE RASTER 1
OPEN RASTER 4
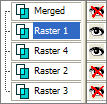
LAYERS >>> MERGE >>> MERGE VISIBLE
Rename this layer " MERGED 2 "
OPEN ALL LAYERS
ACTIVATE RASTER 3
LAYERS >>> NEW RASTER LAYER (1)
Open up the Image60.psp image in your PSP workspace
WINDOW >>> DUPLICATE
Close the original Image
IMAGE >>> RESIZE = 50%
Ensure "Resize all layers" is UNCHECKED
LAYERS >>> DUPLICATE
LAYERS >>> DUPLICATE
LAYERS >>> MERGE >>> MERGE VISIBLE
Choose your SELECTION TOOL
Selection Type = Rectangle
Mode = Replace
Feather = 0
Antialias = Checked
Draw a rectangle around the shape
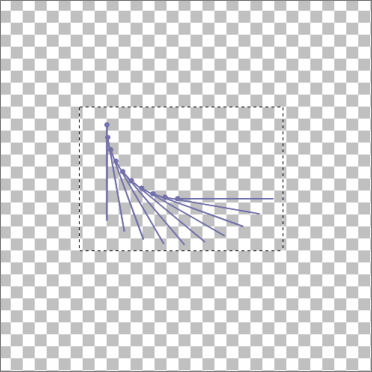
Click inside the rectangle to select the shape
Flood fill with DARK GREEN ' #5c9670 '
DESELECT
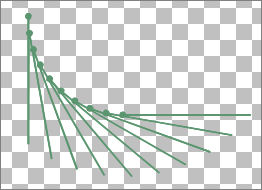
IMAGE >>> ROTATE >>> FREE ROTATE = LEFT 90
Ensure "All layers" is UNCHECKED
IMAGE >>> MIRROR
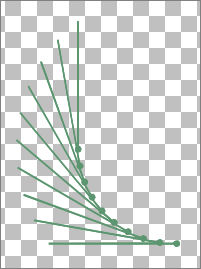
Right click on the Title Bar and select COPY from the options
Right click on the Title Bar of your frame image
and select PASTE AS NEW SELECTION from the options.
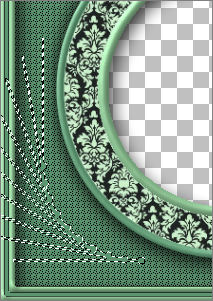
EFFECTS >>> 3D EFFECTS >>> DROP SHADOW
Vertical & Horizontal offsets = 1
Colour = Black
Opacity = 60
Blur = 0
EFFECTS >>> PLUGINS >>> EYE CANDY 3 >>> DROP SHADOW
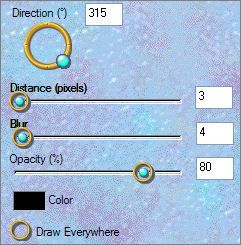
ADJUST >>> SHARPNESS >>> SHARPEN
DESELECT
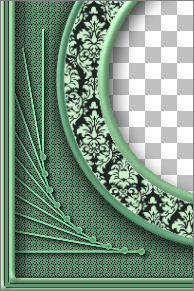
LAYERS >>> DUPLICATE
IMAGE >>> FLIP
CLOSE THE LAYERS SHOWN BELOW
and make sure
" Copy of Raster 1 " is activated
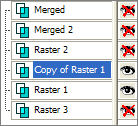
LAYERS >>> MERGE >>> MERGE VISIBLE
LAYERS >>> DUPLICATE
IMAGE >>> MIRROR
LAYERS >>> MERGE >>> MERGE VISIBLE
OPEN ALL LAYERS
ACTIVATE MERGED 2
ADJUST >>> SHARPNESS >>> UNSHARP MASK

LAYERS >>> MERGE >>> MERGE VISIBLE
Save as .psp image
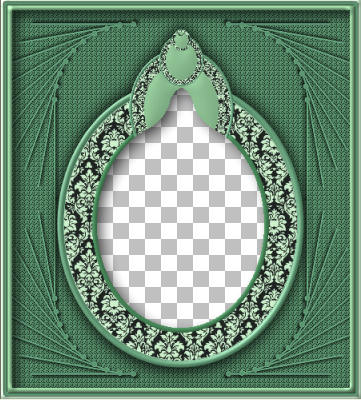
Your frame is now ready for an image of your choice.
This is the tube I used
JFparrot1.psp
Page designed by

for

http://www.artistrypsp.com/
Copyright ©
2000-2007 Artistry In PSP / PSP Artistry
All rights reserved.
Unless specifically made available for
download,
no graphics or text may be removed from
this site for any reason
without written permission from Artistry
In PSP / PSP Artistry
|