DISCOVERY
PSP8/9
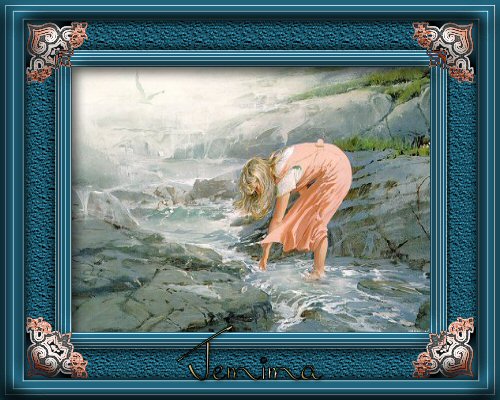
This tutorial was
written by Jemima ~ January 2007
Copyright © 2007 ~ Jemima
~ All rights reserved
********************************
This has been tested successfully in PSPX and PSPXI
********************************
You will need the
following to complete this tutorial
Materials
BlishCarolyn-Amy-sj1
PIT_lace67.psp
Click link... then....
Right click and Save Image As to a folder on your computer
bktexture10.gif
Click link... then....
Right click and Save Image As to your PSP Textures folder.
Plugins
** EYE CANDY3 **
** SIMPLE FILTERS **
download
********************************
Open a new image 500 x 400
Transparent background
Flood fill with GREEN ( #1E5B71 )
LAYERS >>> NEW RASTER LAYER
SELECTIONS >>> SELECT ALL
SELECTIONS >>> MODIFY >>> CONTRACT = 5
SELECTIONS >>> INVERT
Flood fill with GREEN ( #1E5B71 )
EFFECTS >>> 3D EFFECTS >>> DROP SHADOW
Vertical & Horizontal offsets = 1
Colour = WHITE
Opacity = 60
Blur = 0
Repeat Drop Shadow effect changing
Vertical & Horizontal Offsets to - ( minus ) 1
Click OK
DESELECT
LAYERS >>> DUPLICATE
IMAGE >>> RESIZE = 97%
Ensure "Resize all layers" is UNCHECKED
LAYERS >>> DUPLICATE
IMAGE >>> RESIZE = 96%
Ensure "Resize all layers" is UNCHECKED
CLOSE Raster 1
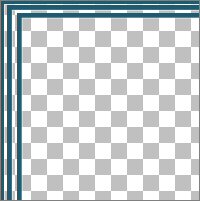
LAYERS >>> MERGE >>> MERGE VISIBLE
With your MAGIC WAND
Mode = Replace
Match Mode = RGB Value
Tolerance = 0
Feather = 0
Antialias = UNchecked
Sample Merged = UNCHECKED
PSP9 USERS: CHECK CONTIGUOUS
Select the CENTRE transparent area
OPEN and activate Raster 1
EDIT >>> CLEAR
LAYERS >>> MERGE >>> MERGE VISIBLE
DESELECT
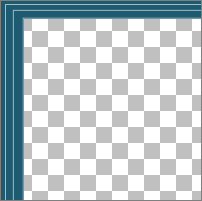
LAYERS >>> NEW RASTER LAYER
LAYERS >>> ARRANGE >>> MOVE DOWN
Flood fill with GREEN ( #1E5B71 )
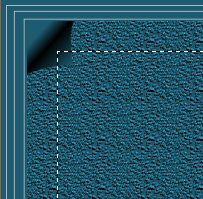
Choose your SELECTION TOOL then click on the CUSTOM SELECTION symbol
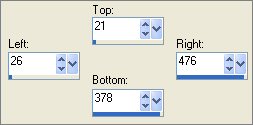
LAYERS >>> DUPLICATE
SELECTIONS >>> INVERT
EDIT >>> CLEAR
DESELECT
EFFECTS >>> TEXTURE EFFECTS >>> TEXTURE
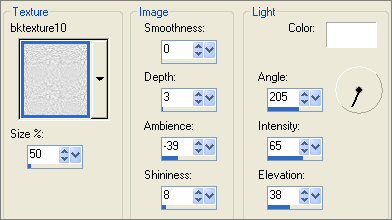
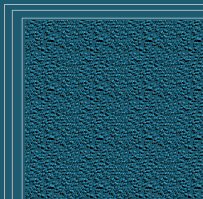
EFFECTS >>> IMAGE EFFECTS >>> PAGE CURL
COLOUR =
GREEN ( #1E5B71 )
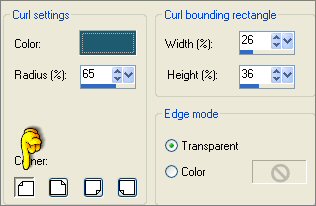
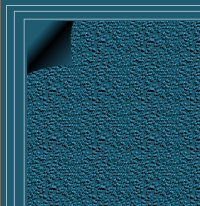
REPEAT PAGE CURL until all 4 corners are done
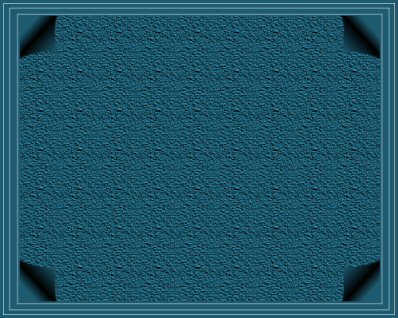
Choose your SELECTION TOOL then click on the CUSTOM SELECTION symbol
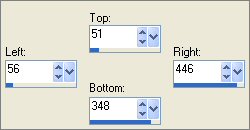 .. .. 
LAYERS >>> NEW RASTER LAYER
Flood fill with GREEN ( #1E5B71 )
(1).... EFFECTS >>> 3D EFFECTS >>> DROP SHADOW
Vertical & Horizontal offsets = 1
Colour = WHITE
Opacity = 60
Blur = 0
Repeat Drop Shadow effect changing
Vertical & Horizontal Offsets to - ( minus ) 1
Click OK
SELECTIONS >>> MODIFY >>> CONTRACT = 3
(2).... EFFECTS >>> 3D EFFECTS >>> DROP SHADOW
Use the same settings
Click OK
Repeat Drop Shadow effect changing
Vertical & Horizontal Offsets to 1
Click OK
SELECTIONS >>> MODIFY >>> CONTRACT = 3
(3).... EFFECTS >>> 3D EFFECTS >>> DROP SHADOW
Use the same settings
Click OK
Repeat Drop Shadow effect changing
Vertical & Horizontal Offsets to 1
Click OK
SELECTIONS >>> MODIFY >>> CONTRACT = 4
(4).... EFFECTS >>> 3D EFFECTS >>> DROP SHADOW
Use the same settings
Click OK
Repeat Drop Shadow effect changing
Vertical & Horizontal Offsets to 1
Click OK
SELECTIONS >>> MODIFY >>> CONTRACT = 5
(5).... EFFECTS >>> 3D EFFECTS >>> DROP SHADOW
Use the same settings
Click OK
Repeat Drop Shadow effect changing
Vertical & Horizontal Offsets to 1
Click OK
SELECTIONS >>> MODIFY >>> CONTRACT = 1
EDIT >>> CLEAR
Activate ' Copy of Raster 1 '
EDIT >>> CLEAR
Activate ' Raster 1 '
EDIT >>> CLEAR
DESELECT
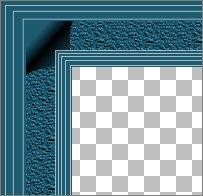
Activate ' Raster 2 '
EFFECTS >>> 3D EFFECTS >>> INNER BEVEL
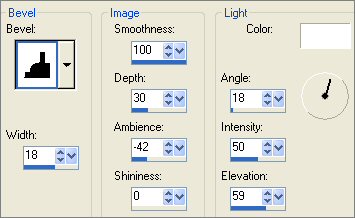
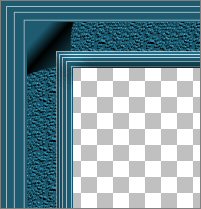
Open the " PIT_lace67 " tube
Activate Raster 5
Right click on the Title Bar and select COPY from the options
Go to your frame image
LAYERS >>> NEW RASTER LAYER
Right click on the Title Bar
and select PASTE AS NEW SELECTION from the options.
IMAGE >>> RESIZE = 40%
Ensure "Resize all layers" is UNCHECKED
ADJUST >>> SHARPNESS >>> SHARPEN MORE
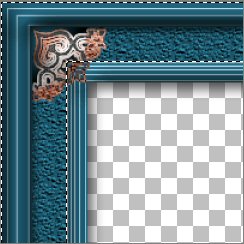
Reposition with your MOVER tool as shown below
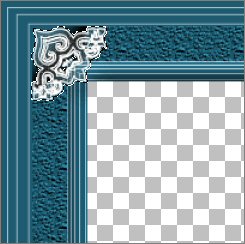
DESELECT
EFFECTS >>> PLUGINS >>> SIMPLE >>> TOP LEFT MIRROR
On your LAYER PALETTE change the BLEND MODE to DIFFERENCE
(If you want to keep the lace in the same tonings
... change the BLEND MODE to LUMINANCE)
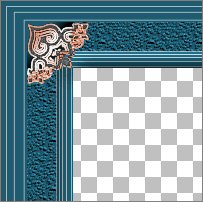
EFFECTS >>> 3D EFFECTS >>> INNER BEVEL
Same settings
Activate Raster 2
With your MAGIC WAND
Same settings
Select the CENTRE transparent area
SELECTIONS >>> MODIFY >>> EXPAND = 3
SELECTIONS >>> INVERT
LAYERS >>> NEW RASTER LAYER
LAYERS >>> ARRANGE >>> SEND TO BOTTOM
EFFECTS >>> PLUGINS >>> EYE CANDY 3 >>> DROP SHADOW
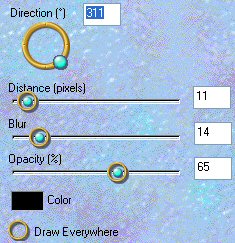
Activate the MERGED layer
DESELECT
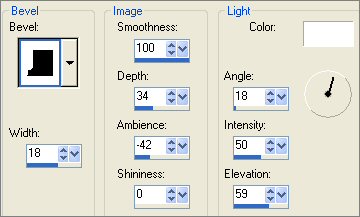
EFFECTS >>> 3D EFFECTS >>> INNER BEVEL
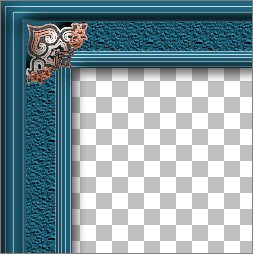
EFFECTS >>> PLUGINS >>> EYE CANDY 3 >>> DROP SHADOW
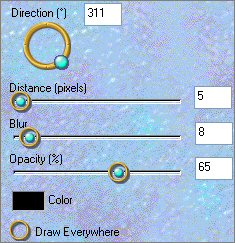
REPEAT DROP SHADOW changing DIRECTION = 135
Activate Raster 2
With your MAGIC WAND
Same settings
Select the OUTER frame area
SELECTIONS >>> INVERT
EFFECTS >>> PLUGINS >>> EYE CANDY 3 >>> DROP SHADOW
Same settings
REPEAT DROP SHADOW changing DIRECTION = 311
LAYERS >>> MERGE >>> MERGE VISIBLE
Save as .psp image
Choose your SELECTION TOOL
Selection Type = Rectangle
Mode = Replace
Feather = 0
Antialias = UNChecked
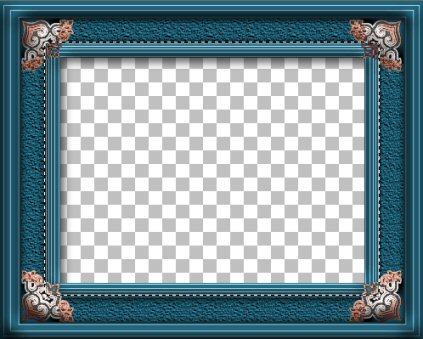
Draw a rectangle as shown
(doesn't have to be exact)
LAYERS >>> NEW RASTER LAYER
Open up the " BlishCarolyn-Amy-sj1.jpg " image
Right click on the Title Bar and select COPY from the options
Go to your frame image
Right click on the Title Bar
and select PASTE INTO SELECTION from the options.
LAYERS >>> ARRANGE >>> SEND TO BOTTOM
LAYERS >>> MERGE >>> MERGE ALL (Flatten)
Save as .jpg image
Page designed by

for

http://www.artistrypsp.com/
Copyright © 2000-2007 Artistry In PSP / PSP Artistry
All rights reserved.
Unless specifically made available for
download,
no graphics or text may be removed from
this site for any reason
without written permission from Artistry
In PSP / PSP Artistry
|