DOUBLE MASK
PSP7 / PSP9
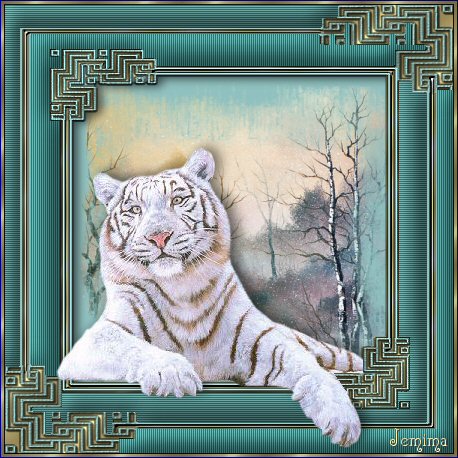
This tutorial was
written by Jemima ~ September 2006
Copyright © 2006/7 ~ Jemima
~ All rights reserved
********************************
You will need the
following to complete this tutorial
Mask:
HERE
Click link... then....
Right click and Save Image As to your PSP Masks folder
********************************
Open a new image 450 x 450 ...
Transparent background
LAYERS >>> NEW RASTER LAYER
Flood fill with GREEN ( #91C1C0 )
LAYERS >>> LOAD/SAVE MASK >>> LOAD MASK FROM DISK
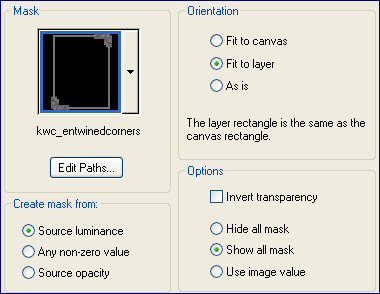
LAYERS >>> DELETE

LAYERS >>> MERGE>>> MERGE GROUP
EFFECTS >>> 3D Effects >>> Drop Shadow
Vertical & Horizontal offsets = 1
Colour = Black
Opacity = 100
Blur = 0
ADJUST >>> SHARPNESS >>> SHARPEN
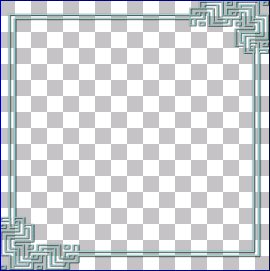
LAYERS >>> DUPLICATE
IMAGE >>> RESIZE = 80%
Ensure "Resize all layers" is UNCHECKED
IMAGE >>> MIRROR
ADJUST >>> SHARPNESS >>> SHARPEN
With your MAGIC WAND
Mode = Replace
Match Mode = RGB Value
Tolerance = 6
Feather = 0
Antialias = UNchecked
Sample Merged = CHECKED
PSP9 USERS: CHECK CONTIGUOUS
Select the transparent areas shown below
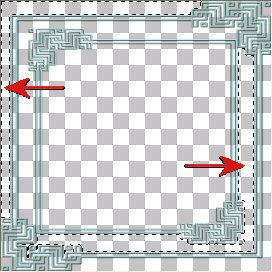
Flood fill with GREEN ( #91C1C0 )
EFFECTS >>> TEXTURE EFFECTS >>> BLINDS
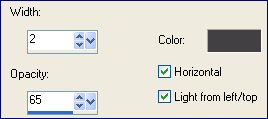
EFFECTS >>> 3D EFFECTS >>> INNER BEVEL
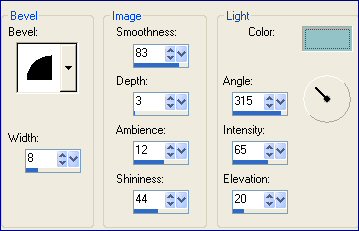
DESELECT
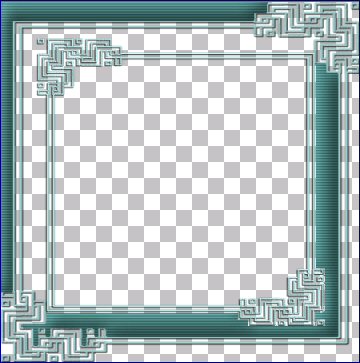
With your MAGIC WAND ... Use the same settings
Select the transparent areas shown below
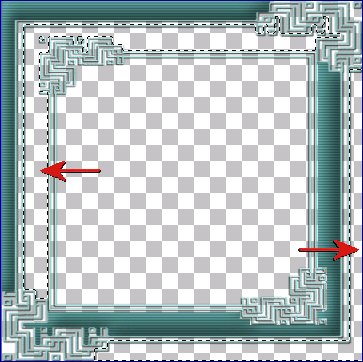
SELECTIONS >>> MODIFY >>> EXPAND = 2
LAYERS >>> NEW RASTER LAYER
LAYERS >>> ARRANGE >>> MOVE DOWN
Flood fill with GREEN ( #91C1C0 )
EFFECTS >>> TEXTURE EFFECTS >>> BLINDS
Uncheck Horizontal
EFFECTS >>> 3D EFFECTS >>> INNER BEVEL
Use the same settings
DESELECT
Activate 'Copy of Group - Raster 2'
With your MAGIC WAND ... Use the same settings
Select the CENTRE transparent area
SELECTIONS >>> MODIFY >>> EXPAND = 2
SELECTIONS >>> INVERT
Activate Raster 1
Flood fill with GOLD
DESELECT
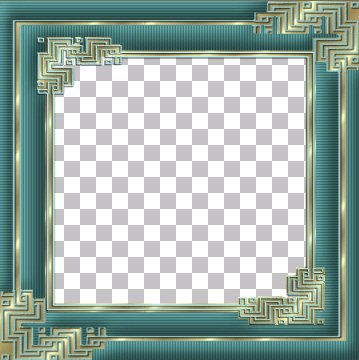
CLOSE Raster 1
Highlight one of the other layers
LAYERS >>> MERGE >>> MERGE VISIBLE
With your MAGIC WAND ... Use the same settings
Select the transparent areas shown
SELECTIONS >>> MODIFY >>> EXPAND = 2
OPEN Raster 1
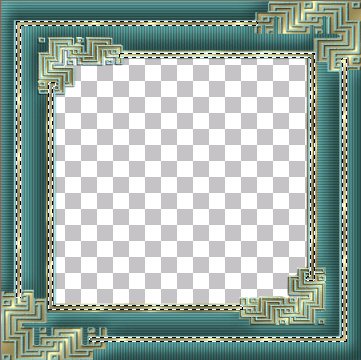
Highlight Raster 1
EFFECTS >>> 3D EFFECTS >>> INNER BEVEL
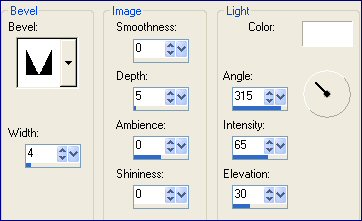
DESELECT
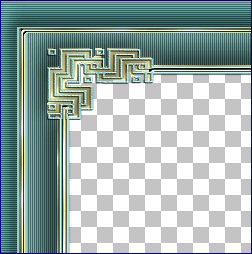
Activate the MERGED LAYER
EFFECTS >>> 3D Effects >>> Drop Shadow
Vertical & Horizontal offsets = 1
Colour = Black
Opacity = 100
Blur = 0
Repeat Drop Shadow effect changing
Vertical & Horizontal Offsets to - ( minus ) 1
Click OK
LAYERS >>> MERGE >>> MERGE VISIBLE
With your MAGIC WAND ... Use the same settings
Select the CENTRE transparent area
SELECTIONS >>> MODIFY >>> EXPAND = 3
SELECTIONS >>> INVERT
LAYERS >>> NEW RASTER LAYER
LAYERS >>> ARRANGE >>> MOVE DOWN
EFFECTS >>> PLUGINS >>> EYE CANDY 3 >>> DROP SHADOW
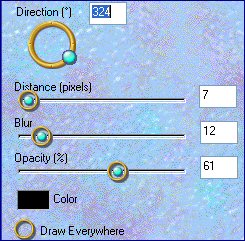
LAYERS >>> MERGE >>> MERGE VISIBLE
IMAGE >>> CANVAS SIZE
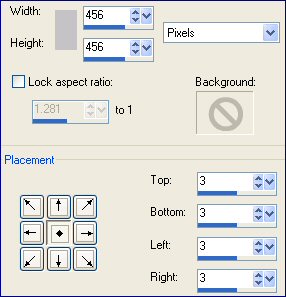
With your MAGIC WAND
Select the OUTER transparent area
Flood fill with GOLD
EFFECTS >>> 3D Effects >>> Drop Shadow
Vertical & Horizontal offsets = 1
Colour = Black
Opacity = 100
Blur = 0
Repeat Drop Shadow effect changing
Vertical & Horizontal Offsets to - ( minus ) 1
Click OK
ADJUST >>> BRIGHTNESS and CONTRAST >>> BRIGHTNESS/CONTRAST

DESELECT
Save as a .psp image
Your frame is now ready for an image of your choice
Page designed by

for

http://www.artistrypsp.com/
Copyright ©
2000-2007 Artistry In PSP / PSP Artistry
All rights reserved.
Unless specifically made available for
download,
no graphics or text may be removed from
this site for any reason
without written permission from Artistry
In PSP / PSP Artistry
|