Classic Frame
PSP8/9
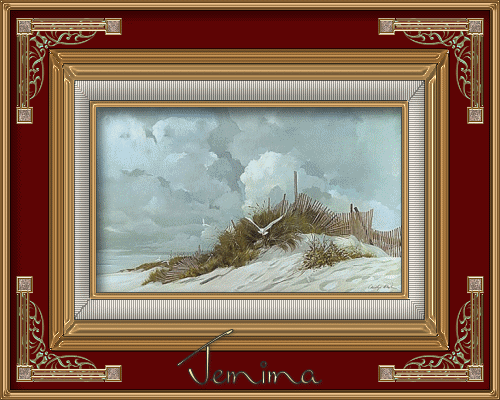
This tutorial was
written by Jemima ~ February 2007
Copyright © 2007 ~ Jemima
~ All rights reserved
********************************
You will need the
following to complete this tutorial
Materials
CB00024lg.jpg
ivy_corners0216.psp
MattTemplate.psp
nel's_creation_Gold_corner_07a.psp
Click link... then....
Right click and Save Image As to a folder on your computer
Plugins
** EYE CANDY3 **
http://www.pircnet.com/downloads.html
http://pspdutch.eu/
(Click on 'PSP' link at top of page >> Filters)
** SIMPLE FILTERS **
download
********************************
Open up the " MattTemplate.psp " tube
Right click on the Title Bar and select COPY from the options
Open a new image 500 x 400
Transparent background
Right click on the Title Bar
and select PASTE AS NEW LAYER from the options.
With your MAGIC WAND
Mode = Replace
Match Mode = RGB Value
Tolerance = 0
Feather = 0
Antialias = UNchecked
Sample Merged = UNCHECKED
PSP9 USERS: CHECK CONTIGUOUS
and using your SHIFT key.....Select the horizontal top and bottom of the template
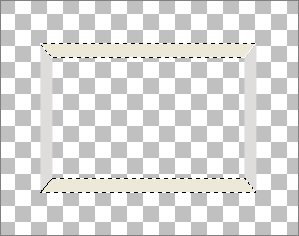
Flood fill with 'Cream' ( #FFF8EF )
EFFECTS >>> TEXTURE EFFECTS >>> BLINDS
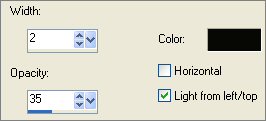
EFFECTS >>> 3D EFFECTS >>> DROP SHADOW
Vertical & Horizontal offsets = 1
Colour = GREY ( #808080 )
Opacity = 60
Blur = 0
Repeat Drop Shadow effect changing
Vertical & Horizontal Offsets to - ( minus ) 1
Click OK
DESELECT
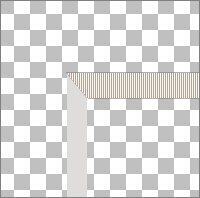
With your MAGIC WAND and using your SHIFT key.....
Select the left and right sides of the template
Flood fill with 'Cream' ( #FFF8EF )
EFFECTS >>> TEXTURE EFFECTS >>> BLINDS
CHECK 'Horizontal'
EFFECTS >>> 3D EFFECTS >>> DROP SHADOW
Vertical & Horizontal offsets = 1
Colour = GREY ( #808080 )
Opacity = 60
Blur = 0
Repeat Drop Shadow effect changing
Vertical & Horizontal Offsets to - ( minus ) 1
Click OK
DESELECT
EFFECTS >>> 3D EFFECTS >>> INNER BEVEL
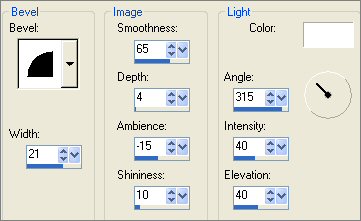
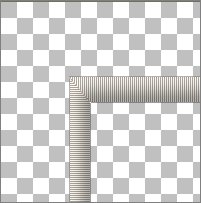
LAYERS >>> NEW RASTER LAYER
Choose your SELECTION TOOL then click on the CUSTOM SELECTION
symbol
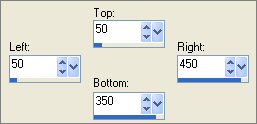
Right click on the Title Bar of the "Frame Template" and select COPY from the options
Go to your frame image
Right click on the Title Bar
and select PASTE INTO SELECTION from the options.
DESELECT
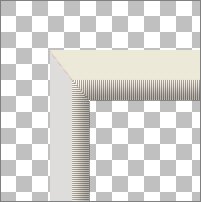
LAYERS >>> DUPLICATE
With your MAGIC WAND
Same settings
Select the OUTER transparent area
SELECTIONS >>> INVERT
SELECTIONS >>> MODIFY >>> CONTRACT = 12
EDIT >>> CLEAR
Activate Raster 3
SELECTIONS >>> INVERT
EDIT >>> CLEAR
DESELECT
CLOSE "Copy of Raster 3"
With your MAGIC WAND and using your SHIFT key.....
Select the horizontal top and bottom of the template
Flood fill with Light Tan ( #A5814F )
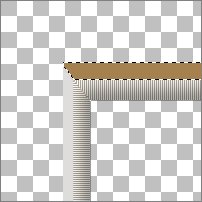
EFFECTS >>> 3D EFFECTS >>> INNER BEVEL

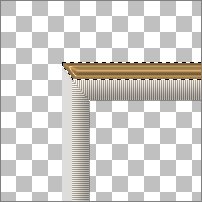
DESELECT
CLOSE Raster 2
With your MAGIC WAND and using your SHIFT key.....
Select the left and right sides of the template
SELECTIONS >>> MODIFY >>> EXPAND = 2
EDIT >>> CLEAR
Flood fill with Light Tan ( #A5814F )
EFFECTS >>> 3D EFFECTS >>> INNER BEVEL
Same settings
ADJUST >>> SHARPNESS >>> SHARPEN
DESELECT
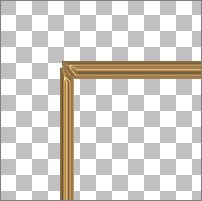
EFFECTS >>> 3D EFFECTS >>> DROP SHADOW
Vertical & Horizontal offsets = 1
Colour = Black
Opacity = 60
Blur = 0
Repeat Drop Shadow effect changing
Vertical & Horizontal Offsets to - ( minus ) 1
Click OK
CLOSE Raster 3... OPEN and activate "Copy of Raster 3"
With your MAGIC WAND and using your SHIFT key.....
Select the horizontal top and bottom of the template
SELECTIONS >>> MODIFY >>> EXPAND = 1
EDIT >>> CLEAR
Flood fill with Dark Tan ( #906736 )
EFFECTS >>> 3D EFFECTS >>> INNER BEVEL
Same settings
ADJUST >>> SHARPNESS >>> SHARPEN
DESELECT
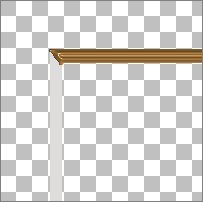
With your MAGIC WAND and using your SHIFT key.....
Select the left and right sides of the template
SELECTIONS >>> MODIFY >>> EXPAND = 1
EDIT >>> CLEAR
Flood fill with Dark Tan ( #906736 )
EFFECTS >>> 3D EFFECTS >>> INNER BEVEL
Same settings
ADJUST >>> SHARPNESS >>> SHARPEN
DESELECT
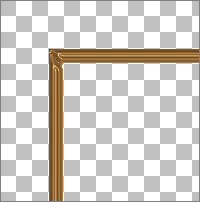
EFFECTS >>> 3D EFFECTS >>> DROP SHADOW
Vertical & Horizontal offsets = 1
Colour = Black
Opacity = 60
Blur = 0
Repeat Drop Shadow effect changing
Vertical & Horizontal Offsets to - ( minus ) 1
Click OK
OPEN all layers

Activate Raster 2
With your MAGIC WAND
Same settings
Select the CENTRE transparent area
LAYERS >>> NEW RASTER LAYER
Flood fill with Light Tan ( #A5814F )
SELECTIONS >>> MODIFY >>> CONTRACT = 4
EDIT >>> CLEAR
DESELECT
EFFECTS >>> 3D EFFECTS >>> INNER BEVEL
Same settings
ADJUST >>> SHARPNESS >>> SHARPEN
EFFECTS >>> 3D EFFECTS >>> DROP SHADOW
Use the same settings
Click OK
Repeat Drop Shadow effect changing
Vertical & Horizontal Offsets to 1
Click OK
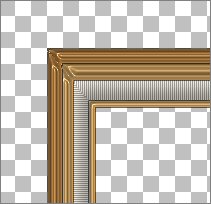
CLOSE Raster 1
LAYERS >>> MERGE >>> MERGE VISIBLE
With your MAGIC WAND
Same settings
Select the OUTER transparent area
LAYERS >>> NEW RASTER LAYER
SELECTIONS >>> MODIFY >>> EXPAND = 2
LAYERS >>> ARRANGE >>> MOVE DOWN
Flood fill with Maroon ( #5E0404 )
DESELECT
Activate the Merged layer
LAYERS >>> NEW RASTER LAYER
SELECTIONS >>> SELECT ALL
SELECTIONS >>> MODIFY >>> CONTRACT = 10
SELECTIONS >>> INVERT
Flood fill with ( #906736 )
EFFECTS >>> 3D EFFECTS >>> INNER BEVEL
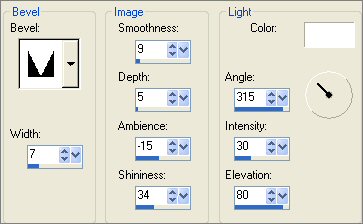
ADJUST >>> SHARPNESS >>> SHARPEN
EFFECTS >>> 3D EFFECTS >>> DROP SHADOW
Use the same settings
Click OK
Repeat Drop Shadow effect changing
Vertical & Horizontal Offsets to 1
Click OK
EFFECTS >>> PLUGINS >>> EYE CANDY 3 >>> DROP SHADOW
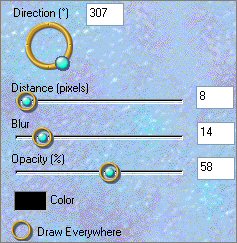
DESELECT
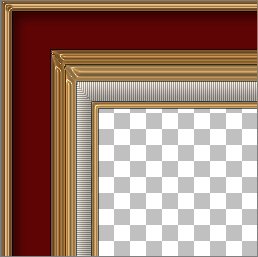
With Raster 1 CLOSED
LAYERS >>> MERGE >>> MERGE VISIBLE
LAYERS >>> NEW RASTER LAYER
Open up the " nel's_creation_Gold_corner_07a " tube
Right click on the Title Bar and select COPY from the options
Go to your frame image
Right click on the Title Bar
and select PASTE AS NEW SELECTION from the options.
IMAGE >>> RESIZE = 55%
Ensure "Resize all layers" is UNCHECKED
ADJUST >>> SHARPNESS >>> SHARPEN
With your MOVER tool reposition the corner as shown below.
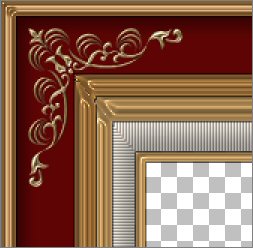
On your LAYER PALETTE change the BLEND MODE to EXCLUSION
EFFECTS >>> PLUGINS >>> SIMPLE >>> TOP LEFT MIRROR
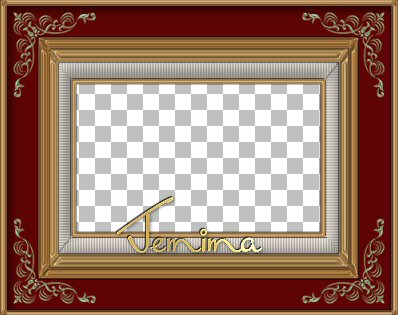
LAYERS >>> NEW RASTER LAYER
Open up the " ivy_corners0216 " tube
Activate Layer 2
Right click on the Title Bar and select COPY from the options
Go to your frame image
Right click on the Title Bar
and select PASTE AS NEW SELECTION from the options.
IMAGE >>> RESIZE = 30%
Ensure "Resize all layers" is UNCHECKED
ADJUST >>> SHARPNESS >>> SHARPEN
IMAGE >>> MIRROR
With your MOVER tool reposition the corner as shown below.
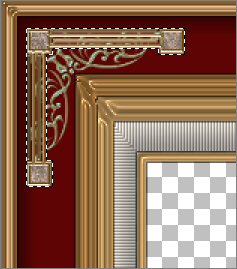
DESELECT
EFFECTS >>> PLUGINS >>> SIMPLE >>> TOP LEFT MIRROR
LAYERS >>> MERGE >>> MERGE VISIBLE
With your MAGIC WAND
Same settings
Select the CENTRE transparent area
LAYERS >>> NEW RASTER LAYER
LAYERS >>> ARRANGE >>> MOVE DOWN
SELECTIONS >>> INVERT
EFFECTS >>> PLUGINS >>> EYE CANDY 3 >>> DROP SHADOW
Same settings
LAYERS >>> MERGE >>> MERGE VISIBLE
Save as .psp image
At this point you can insert your own image... OR use the one supplied.
~*~*~*~*~*~*~*~*~*~*~*~*~
Open the " CB00024lg " image
Right click on the Title Bar and select COPY from the options
Go to your frame image... Open and activate Raster 1
Right click on the Title Bar
and select PASTE AS NEW SELECTION from the options.
IMAGE >>> RESIZE = 65%
Ensure "Resize all layers" is UNCHECKED
Reposition with you MOVER tool
DESELECT
LAYERS >>> MERGE >>> MERGE ALL (Flatten)
Save as .gif image
Page designed by

for

http://www.artistrypsp.com/
Copyright ©
2000-2007 Artistry In PSP / PSP Artistry
All rights reserved.
Unless specifically made available for
download,
no graphics or text may be removed from
this site for any reason
without written permission from Artistry
In PSP / PSP Artistry
|