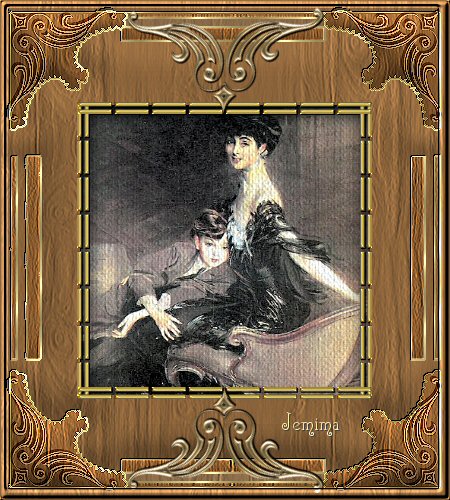
CLASSIC WOOD FRAME
PSP8/9
This tutorial was
written by Jemima ~ September 2006
Copyright © 2006/7 ~ Jemima
~ All rights reserved
********************************
You will need the
following to complete this tutorial
TUBES
Click link... then....
Save Image As to a folder on your computer
fram14
nel's_creation_Gold_corner_01a
PIT_jewels113
ivy_verticalborders2
TEXTURE
Click link... then....
Right click and Save Image As to your PSP Textures folder.
wood115
PATTERN
Click link... then....
Right click and Save Image As to your PSP Patterns folder.
goldfill1.bmp
*************************************
** EYE CANDY3 **
http://www.pircnet.com/downloads.html
OR
http://pspdutch.info/
(Click on 'PSP' link at top of page >> Filters)
** SIMPLE FILTERS **
download
********************************
Open a new image 450 x 500...
Transparent background
LAYERS >>> NEW RASTER LAYER
Choose your SELECTION TOOL then click on the CUSTOM SELECTION
symbol
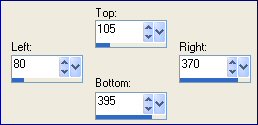
SELECTIONS >>> INVERT
Flood fill with BROWN ( #93714D )
EFFECTS >>> TEXTURE EFFECTS >>> TEXTURE
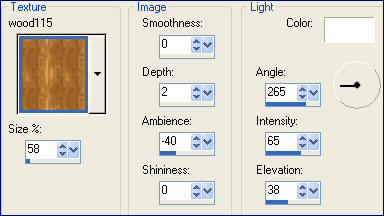
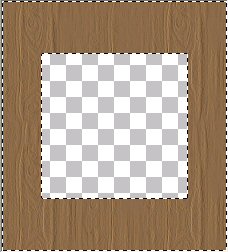
DESELECT
LAYERS >>> NEW RASTER LAYER
Open up the " fram14" tube
Right click on the Title Bar and select COPY from the options
Go to your frame image ...
Right click on the Title Bar
and select PASTE AS NEW SELECTION from the options.
Position as shown below
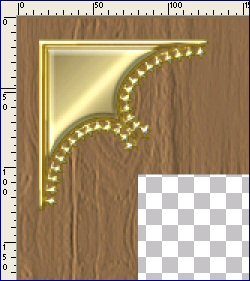
DESELECT
EFFECTS >>> PLUGINS >>> SIMPLE >>> TOP LEFT MIRROR
With your MAGIC WAND
Mode = Replace
Match Mode = RGB Value
Tolerance = 0
Feather = 0
Antialias = UNchecked
Sample Merged = UNCHECKED
PSP9 USERS: CHECK CONTIGUOUS
Select the CENTRE transparent area
SELECTIONS >>> INVERT
LAYERS >>> NEW RASTER LAYER
Flood fill the selected areas with BROWN ( #93714D )
EFFECTS >>> TEXTURE EFFECTS >>> TEXTURE
Same settings
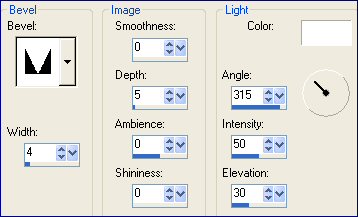
EFFECTS >>> 3D EFFECTS >>> INNER BEVEL
COLOUR = "
#ffeed0 "
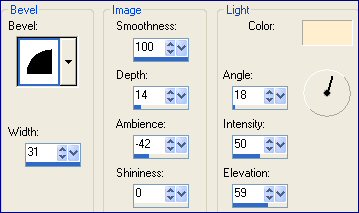
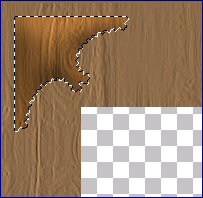
SELECTIONS >>> INVERT
LAYERS >>> NEW RASTER LAYER
Flood fill with GOLD pattern
SELECTIONS >>> INVERT
SELECTIONS >>> MODIFY >>> EXPAND = 2
SELECTIONS >>> INVERT
EDIT >>> CLEAR
DESELECT
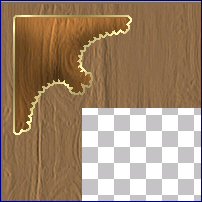
Close the " fram14" tube
Close Rasters 1 & 2
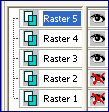
LAYERS >>> MERGE >>> MERGE VISIBLE
ADJUST >>> SHARPNESS >>> SHARPEN
LAYERS >>> NEW RASTER LAYER
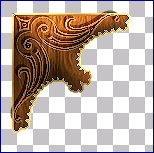
Open the " nel's_creation_Gold_corner_01a " tube
Right click on the Title Bar and select COPY from the options
Go to your frame image ...
Right click on the Title Bar
and select PASTE AS NEW SELECTION from the options.
IMAGE >>> RESIZE = 70%
Ensure "Resize all layers" is UNCHECKED
Position as shown below
DESELECT
Open Raster 2
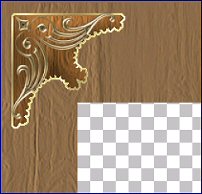
EFFECTS >>> PLUGINS >>> SIMPLE >>> TOP LEFT MIRROR
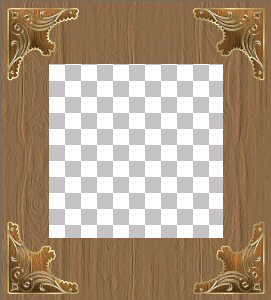
On Raster 3 change the Blend Mode to SOFT LIGHT
EFFECTS >>> EDGE EFFECTS >>> ENHANCE MORE
EFFECTS >>> 3D Effects >>> Drop Shadow
Vertical & Horizontal offsets = 3
Colour = Black
Opacity = 100
Blur = 0
Repeat Drop Shadow effect
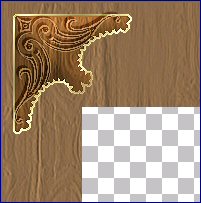
MINIMIZE the " nel's_creation_Gold_corner_01a " tube
Close Raster 2
LAYERS >>> MERGE >>> MERGE VISIBLE
EFFECTS >>> 3D EFFECTS >>> INNER BEVEL
Same settings
ADJUST >>> SHARPNESS >>> SHARPEN
LAYERS >>> NEW RASTER LAYER
Open the " PIT_jewels113 " tube
On your LAYER PALETTE highlight and activate RASTER 4
Right click on the Title Bar and select COPY from the options
Go to your frame image ...
Right click on the Title Bar
and select PASTE AS NEW SELECTION from the options.
Position on centre left of frame image as shown below
DESELECT

LAYERS >>> DUPLICATE
IMAGE >>> MIRROR
LAYERS >>> DUPLICATE
IMAGE >>> ROTATE >>> FREE ROTATE = LEFT 90
Ensure "All layers" is UNCHECKED
Position at top of image as shown below

LAYERS >>> DUPLICATE
IMAGE >>> FLIP
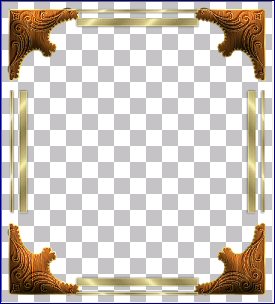
Close the MERGED LAYER
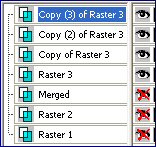
LAYERS >>> MERGE >>> MERGE VISIBLE
CLOSE the " PIT_jewels113 " tube
Choose your SELECTION TOOL
Selection Type = Rectangle
Mode = Replace
Feather = 0
Antialias = UNchecked
Draw a rectangle around the entire image
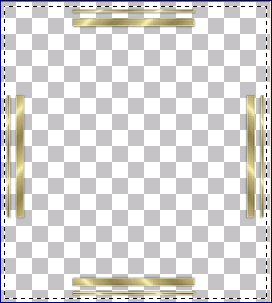
Click inside the rectangle to select each image
Flood fill (TOLERANCE = 140) each section with SOLID BROWN
DESELECT
With your MAGIC WAND
Check 'Sample Merged'
With your SHIFT KEY depressed select all the brown areas
EFFECTS >>> TEXTURE EFFECTS >>> TEXTURE
Same settings
EFFECTS >>> EDGE EFFECTS >>> ENHANCE
EFFECTS >>> 3D EFFECTS >>> INNER BEVEL
Same settings
EDIT >>> Repeat Inner Bevel
SELECTIONS >>> INVERT
Flood fill with GOLD pattern
ZOOM in to make sure you flood fill all surrounding areas
SELECTIONS >>> INVERT
SELECTIONS >>> MODIFY >>> EXPAND = 2
SELECTIONS >>> INVERT
EDIT >>> CLEAR
DESELECT

Open the other MERGED LAYER
Check to see if
the top centre section is level with the top side sections.
If not....
Using your SELECTION TOOL set to RECTANGLE,
Mode - Replace
Feather = 0
Antialias = UNchecked
Draw a rectangle
as shown below...

Click inside the rectangle with your cursor...

and slide the section down until it is level.

Do the same with the bottom centre section
so that it is level
with the bottom side sections

LAYERS >>> ARRANGE >>> MOVE DOWN
LAYERS >>> MERGE >>> MERGE VISIBLE
With your MAGIC WAND
Same settings
Select the CENTRE transparent area
EFFECTS >>> 3D Effects >>> Drop Shadow
Vertical & Horizontal offsets = 1
Colour = Black
Opacity = 100
Blur = 0
Open and activate RASTER 2
EFFECTS >>> 3D EFFECTS >>> INNER BEVEL
Same settings
DESELECT
LAYERS >>> MERGE >>> MERGE VISIBLE
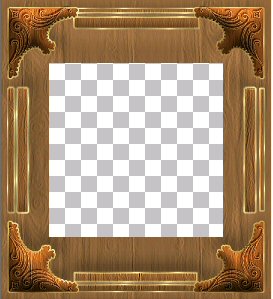
LAYERS >>> NEW RASTER LAYER
Open the " ivy_verticalborders2 " tube and activate LAYER 4
Right click on the Title Bar and select COPY from the options
Go to your frame image ...
Right click on the Title Bar
and select PASTE AS NEW SELECTION from the options.
Reposition as shown
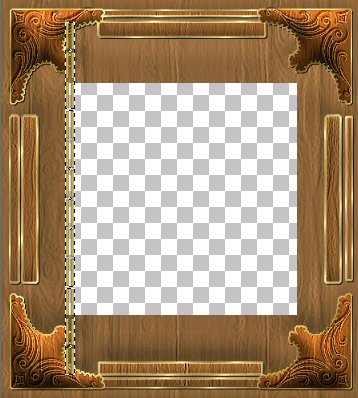
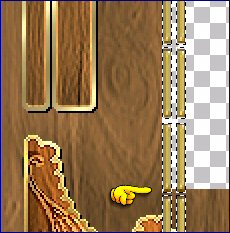
DESELECT
LAYERS >>> DUPLICATE
IMAGE >>> MIRROR
LAYERS >>> DUPLICATE
IMAGE >>> ROTATE >>> FREE ROTATE = LEFT 90
Ensure "All layers" is UNCHECKED
Reposition as shown below ... at top of transparent centre
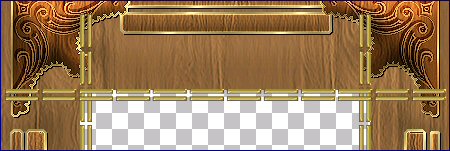
LAYERS >>> DUPLICATE
IMAGE >>> FLIP
Close the MERGED LAYER
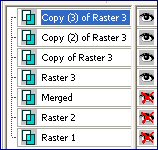
LAYERS >>> MERGE >>> MERGE VISIBLE
With your SELECTION TOOL ... same settings, select the overlapping sections
EDIT >>> CLEAR
DESELECT
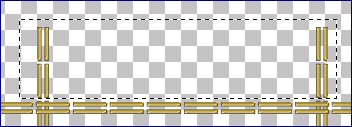
Repeat this for the overlapping section at the bottom and sides
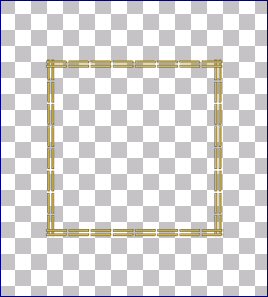
EFFECTS >>> 3D Effects >>> Drop Shadow
Vertical & Horizontal offsets = 1
Colour = Black
Opacity = 100
Blur = 0
ADJUST >>> SHARPNESS >>> SHARPEN
CLOSE the " ivy_verticalborders2 " tube
Open the other MERGED LAYER & RASTER 2
LAYERS >>> MERGE >>> MERGE VISIBLE
LAYERS >>> NEW RASTER LAYER
MAXIMIZE the " nel's_creation_Gold_corner_01a " tube
Right click on the Title Bar and select COPY from the options
Go to your frame image ... Right click on the Title Bar
and select PASTE AS NEW LAYER from the options.
IMAGE >>> ROTATE >>> FREE ROTATE = LEFT 135
Ensure "All layers" is UNCHECKED
Reposition as shown below using your MOVER tool
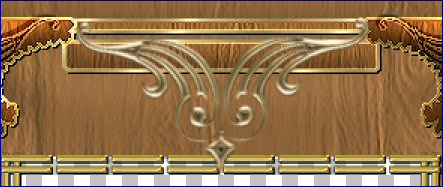
EFFECTS >>> 3D Effects >>> Drop Shadow
Vertical & Horizontal offsets = 1
Colour = Black
Opacity = 100
Blur = 0
LAYERS >>> DUPLICATE
IMAGE >>> FLIP
LAYERS >>> MERGE >>> MERGE VISIBLE
With your SELECTION TOOL ... same settings
Select the centre transparent area
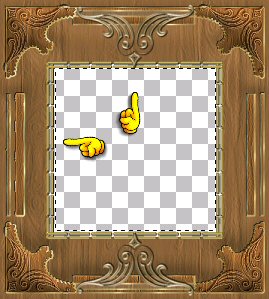
SELECTIONS >>> MODIFY >>> EXPAND = 10
SELECTIONS >>> INVERT
LAYERS >>> NEW RASTER LAYER
LAYERS >>> ARRANGE >>> MOVE DOWN
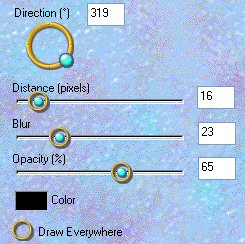
EFFECTS >>> PLUGINS >>> EYE CANDY 3 >>> DROP SHADOW
DESELECT
Choose your SELECTION TOOL then click on the CUSTOM SELECTION
symbol
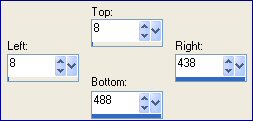
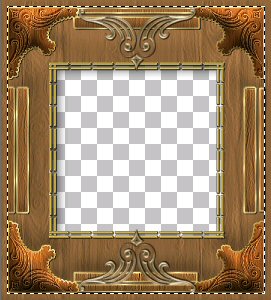
Activate the MERGED LAYER
SELECTIONS >>> INVERT
EFFECTS >>> 3D EFFECTS >>> INNER BEVEL
LAYERS >>> MERGE >>> MERGE VISIBLE
Save as a .psp file.
Your frame is now ready for your image
Page designed by

for

http://www.artistrypsp.com/
Copyright © 2000-2007 Artistry In PSP / PSP Artistry
All rights reserved.
Unless specifically made available for
download,
no graphics or text may be removed from
this site for any reason
without written permission from Artistry
In PSP / PSP Artistry
|