BROWN PAPER
PSP8/9/X

This tutorial was
written by Jemima ~ March 2007
Copyright © 2007 ~ Jemima
~ All rights reserved
********************************
You will need the
following to complete this tutorial
Materials
RIGHT CLICK >>> SAVE TARGET AS
brownpaper_0111_lge.jpg
g.psp
SS_681_Misted.psp
Click link... then....
Right click and Save Image As to a folder on your computer
esp_diamond_grille.jpg
Click link... then....
Right click and Save Image As to your PSP Textures folder
Plugins
** EYE CANDY3 **
http://www.pircnet.com/downloads.html
********************************
REMEMBER TO SAVE YOUR WORK OFTEN
********************************
Open up the brownpaper_0111_lge image in your PSP workspace
and minimize.
In your MATERIALS PALETTE
Load the ' brownpaper_0111_lge ' pattern in your foreground
using the settings below.
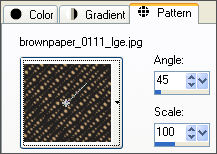
Load SOLID ' #d6ad7a ' in your background
Open a new image 400 x 500
Transparent background
PSPX: Colour Depth = 8bits/channel
Flood fill with the ' brownpaper_0111_lge ' pattern
With your MAGIC WAND
Mode = Replace
Match Mode = RGB Value
Tolerance = 4
Feather = 0
Antialias = Checked
Sample Merged = UNCHECKED
PSP9/X: Check CONTIGUOUS
PSP9/X: ANTIALIAS = Inside
PSPX: There is no " Sample Merged"
PSPX: Use all layers = UNChecked
Click anywhere in the black area
SELECTIONS >>> INVERT
EFFECTS >>> 3D EFFECTS >>> INNER BEVEL
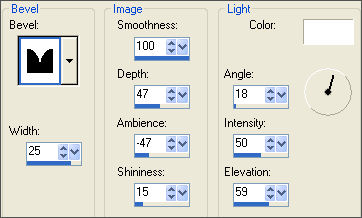
EDIT >>> Repeat Inner Bevel (TWICE)
DESELECT
(This example is a small section at 100%)
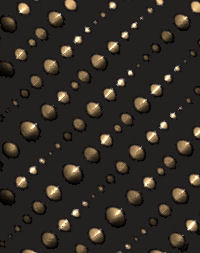
LAYERS >>> NEW RASTER LAYER
PSP8:
Choose your SELECTION TOOL
Selection Type = ELLIPSE
Mode = Replace
Feather = 0
Antialias = Checked
Starting at position 200 across and 250 down drag your cursor to
325 across and 425 down.
Flood fill with the SOLID ' #d6ad7a '
SELECTIONS >>> MODIFY >>> CONTRACT = 6
EDIT >>> CLEAR
PSP9/X:
Select your ELLIPSE tool
NULL your foreground pattern
Starting at position 75 across and 75 down drag your cursor to
325 across and 425 down.
With your MAGIC WAND
Same settings
Select the ellipse
SELECTIONS >>> MODIFY >>> CONTRACT = 6
EDIT >>> CLEAR
DESELECT
ALL VERSIONS:
EFFECTS >>> 3D EFFECTS >>> INNER BEVEL
Same settings
EDIT >>> Repeat Inner Bevel
To make sure this is truly centred on your image.....
Right click on the Title Bar and select COPY from the options
Right click on the Title Bar ...
and select PASTE AS NEW LAYER from the options.
Go to your LAYER PALETTE and RIGHT CLICK on RASTER 2... Select DELETE
ACTIVATE RASTER 3
With your MAGIC WAND
Same settings
Click inside the 'ellipse' border
SELECTIONS >>> MODIFY >>> EXPAND = 3
ACTIVATE RASTER 1
EDIT >>> CLEAR
DESELECT
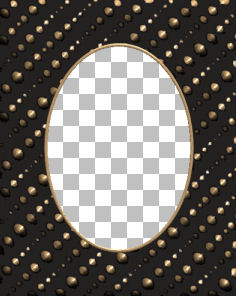
CLOSE RASTER 1
ACTIVATE RASTER 3
LAYERS >>> NEW RASTER LAYER
SELECTIONS >>> SELECT ALL
Open up the g.psp image in your PSP workspace
Right click on the Title Bar and select COPY from the options
Go to your frame image ...
Right click on the Title Bar
and select PASTE INTO SELECTION from the options.
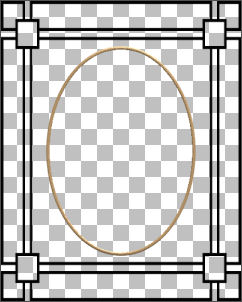
With your MAGIC WAND
Same settings
Select the BLACK border
SELECTION >>> DEFLOAT
SELECTIONS >>> MODIFY >>> EXPAND = 1
EDIT >>> CLEAR
Flood fill with the SOLID ' #d6ad7a '
(Zoom in to make sure you 'fill' to the edges)
EFFECTS >>> 3D EFFECTS >>> INNER BEVEL
Same settings
EDIT >>> Repeat Inner Bevel
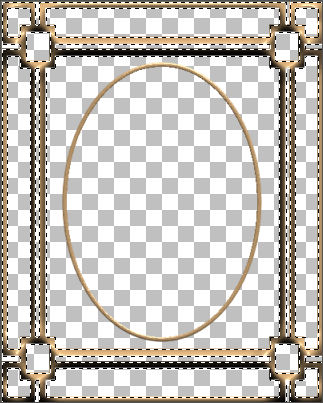
EFFECTS >>> 3D EFFECTS >>> DROP SHADOW
Vertical & Horizontal offsets = 1
Colour = WHITE
Opacity = 70
Blur = 0
Repeat Drop Shadow effect changing
Vertical & Horizontal Offsets to - ( minus ) 1
Click OK
DESELECT
With your MAGIC WAND
Same settings.. and while depressing your SHIFT KEY...
Select the 4 transparent areas shown below
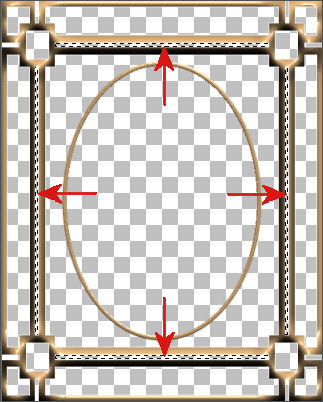
LAYERS >>> NEW RASTER LAYER
LAYERS >>> ARRANGE >>> MOVE DOWN
SELECTIONS >>> MODIFY >>> EXPAND = 1
Flood fill with BLACK
DESELECT
ACTIVATE RASTER
2
With your MAGIC WAND
Same settings.. and while depressing your SHIFT KEY...
Select the 4 transparent areas shown below
SELECTIONS >>> MODIFY >>> EXPAND = 1
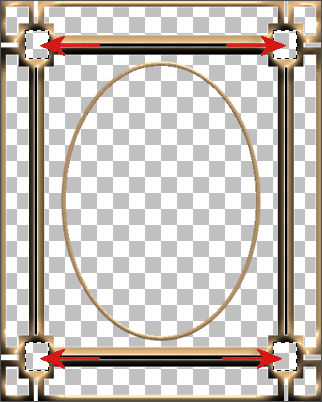
ACTIVATE RASTER 4
Flood fill with the SOLID ' #d6ad7a '
EFFECTS >>> 3D EFFECTS >>> INNER BEVEL
Same settings
EDIT >>> Repeat Inner Bevel
DESELECT
CLOSE RASTER 1 & RASTER 3
LAYERS >>> MERGE >>> MERGE VISIBLE
Go to your LAYER PALETTE
On the MERGED LAYER
Change the OPACITY to 70%
Change the BLEND MODE to LUMINANCE (Legacy)

ADJUST >>> SHARPNESS >>> SHARPEN MORE
OPEN ALL LAYERS
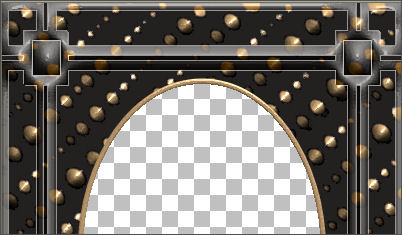
Still on the MERGED layer
With your MAGIC WAND
Same settings.. and while depressing your SHIFT KEY...
Select the 4 transparent areas shown below
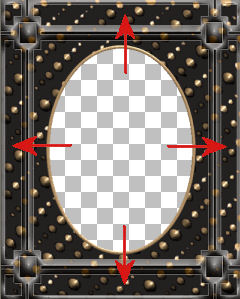
LAYERS >>> NEW RASTER LAYER
Flood fill with the SOLID ' #d6ad7a '
Go to your LAYER PALETTE
On the RASTER 2
Change the OPACITY to 30%
DESELECT
ACTIVATE RASTER 1
ADJUST >>> SHARPNESS >>> SHARPEN MORE
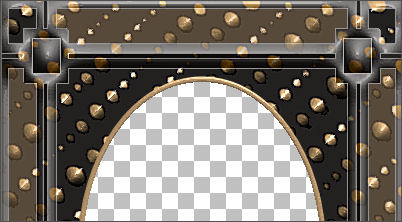
LAYERS >>> MERGE >>> MERGE VISIBLE
With your MAGIC WAND
Same settings
Select the CENTRE transparent area
SELECTIONS >>> MODIFY >>> EXPAND = 3
SELECTIONS >>> INVERT
LAYERS >>> NEW RASTER LAYER
LAYERS >>> ARRANGE >>> MOVE DOWN
EFFECTS >>> PLUGINS >>> EYE CANDY 3 >>> DROP SHADOW
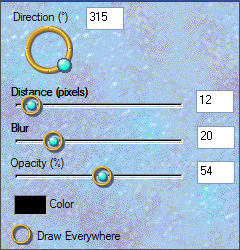
DESELECT
LAYERS >>> NEW RASTER LAYER
LAYERS >>> ARRANGE >>> MOVE DOWN
Flood fill with the SOLID ' #d6ad7a '
EFFECTS >>> TEXTURE EFFECTS >>> TEXTURE
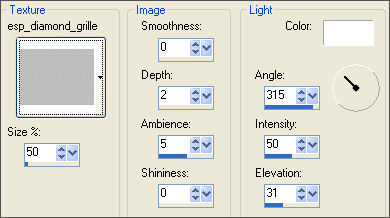
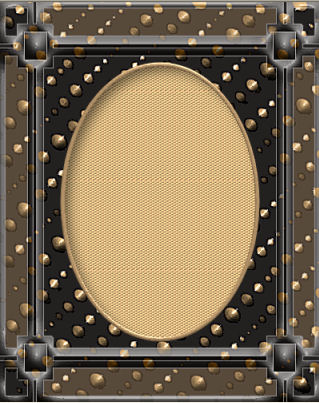
Open up the SS_681_Misted.psp image in your PSP workspace
(Isn't he yummy!!)
Right click on the Title Bar and select COPY from the options
Go to your frame image ...
Right click on the Title Bar
and select PASTE AS NEW LAYER from the options.
IMAGE >>> RESIZE = 65%
Ensure "Resize all layers" is UNCHECKED
LAYERS >>> MERGE >>> MERGE ALL (Flatten)
IMAGE >>> ADD BORDERS = SYMMETRIC 2 .. BLACK
Save as .jpg image
Page designed by

for
ttp://www.artistrypsp.com/
Copyright ©
2000-2007 Artistry In PSP / PSP Artistry
All rights reserved.
Unless specifically made available for
download,
no graphics or text may be removed from
this site for any reason
without written permission from Artistry
In PSP / PSP Artistry
|