
INSTANT MIRROR FRAME
PSP7
This
tutorial was written by Jemima ~ January
2005
Copyright © 2005 ~
Jemima ~ All rights reserved
********************************
You will
need the following to complete this
tutorial
"hearts001_mdh.bmp" pattern
download
Download and extract
to your PSP Patterns folder.
PLUGIN GALAXY
http://thepluginsite.com/products/download.htm
Fill in your email
addy
then select PLUGIN GALAXY (on top row)
********************************
Go to your COLOUR PALETTE
Load SOLID PINK ( #E4D6E2 )
in your Background box
Load the "hearts001_mdh.bmp"
pattern in your Foreground box
Scale = 25
Angle = 0

Create a new image 350 x 440
transparent background
Go to LAYERS >>> NEW RASTER
LAYER
Go to SELECTIONS >>> SELECT ALL
Go to SELECTIONS >>> MODIFY
>>> CONTRACT = 25
Go to SELECTIONS >>> INVERT
flood fill with the " hearts001 '
pattern
Go to EFFECTS >>> 3D EFFECTS
>>> INNER BEVEL

Click OK
Go to EFFECTS >>> EDGE
>>> ENHANCE
Go to EFFECTS >>> 3D Effects
>>> Drop Shadow
Vertical & Horizontal offsets = 1
Colour = Black
Opacity = 100
Blur = 0
Repeat Drop
Shadow effect changing
Vertical & Horizontal Offsets to - (
minus ) 1
Click OK
DESELECT

With your MAGIC WAND
Match Mode = RGB Value
Tolerance = 0
Feather = 0
Sample Merged = UNCHECKED
Select the transparent area
Go to LAYERS >>> NEW RASTER
LAYER
Flood fill with the SOLID PINK
Go to SELECTIONS >>> MODIFY
>>> CONTRACT = 10
Go to EDIT CLEAR
Go to SELECTIONS >>> SELECT NONE
With your MAGIC WAND
Select the solid pink border
Go to EFFECTS >>> TEXTURE
EFFECTS >>> BLINDS
COLOUR = DARK PINK ( #BB8B97 )

Click OK
Go to EFFECTS >>> EDGE
>>> ENHANCE
Go to EFFECTS >>> 3D EFFECTS
>>> INNER BEVEL
Go to EDIT >>> Repeat Inner
Bevel
Go to EFFECTS >>> 3D Effects
>>> Drop Shadow
Vertical & Horizontal offsets = 1
Colour = Black
Opacity = 100
Blur = 0
Repeat Drop
Shadow effect changing
Vertical & Horizontal Offsets to - (
minus ) 1
Click OK
DESELECT

With your MAGIC WAND
Match Mode = RGB Value
Tolerance = 0
Feather = 0
Sample Merged = UNCHECKED
Select the transparent area
Go to LAYERS >>> NEW RASTER
LAYER
Flood fill with the SOLID PINK
Go to SELECTIONS >>> MODIFY
>>> CONTRACT = 10
Go to EDIT CLEAR
Go to SELECTIONS >>> SELECT NONE
With your MAGIC WAND
Select the solid pink border
Go to EFFECTS >>> 3D EFFECTS
>>> INNER BEVEL
Go to EDIT >>> Repeat Inner
Bevel
Go to EFFECTS >>> 3D Effects
>>> Drop Shadow
Vertical & Horizontal offsets = 1
Colour = Black
Opacity = 100
Blur = 0
Repeat Drop
Shadow effect changing
Vertical & Horizontal Offsets to - (
minus ) 1
Click OK
DESELECT

With your MAGIC WAND
Select the transparent area
Go to LAYERS >>> NEW RASTER
LAYER
Flood fill with the " hearts001 '
pattern
Go to EFFECTS >>> EDGE
>>> ENHANCE
Go to SELECTIONS >>> MODIFY
>>> CONTRACT = 10
Go to EDIT CLEAR
Go to SELECTIONS >>> SELECT NONE
With your MAGIC WAND
Tolerance = 200
Select the solid patterned border
Go to EFFECTS >>> 3D EFFECTS
>>> INNER BEVEL
Go to EDIT >>> Repeat Inner
Bevel
Go to EFFECTS >>> 3D Effects
>>> Drop Shadow
Vertical & Horizontal offsets = 1
Colour = Black
Opacity = 100
Blur = 0
Repeat Drop
Shadow effect changing
Vertical & Horizontal Offsets to - (
minus ) 1
Click OK
DESELECT

Go to your LAYER PALETTE
Close Layer 1
Go to LAYERS >>> MERGE
>>> MERGE VISIBLE
Go to LAYERS >>> DUPLICATE
Go to SELECTIONS >>> SELECT ALL
Go to SELECTIONS >>> MODIFY
>>> CONTRACT = 25
Go to SELECTIONS >>> INVERT
Go to EDIT CLEAR
DO NOT DESELECT
Go to SELECTIONS >>> INVERT
Go to your LAYER PALETTE
Click on the MERGED Layer
Go to EDIT CLEAR
Go to your LAYER PALETTE
Click on "Copy of Merged" Layer
DESELECT
Go to EFFECTS >>> PLUGINS
>>> PLUGIN GALAXY>>>
INSTANT MIRROR
Select "Crossing Buttom"

Click OK
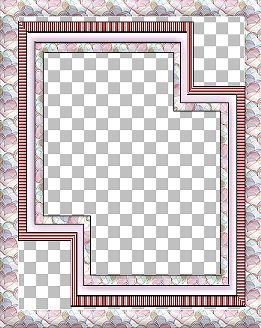
Your image should now look like the one
on the left below.
The pattern is slightly distorted because
the size is reduced.
The right hand image is a section of the
'actual' size.
 .... .... 
Go to your LAYER PALETTE
Click on the MERGED layer
With your MAGIC WAND
Tolerance = 0
Select the transparent area
Flood fill with the SOLID PINK
DESELECT
Go to your LAYER PALETTE
Click on "Copy of Merged" Layer
With your MAGIC WAND
Tolerance = 0
Select the centre PINK area
Go to your LAYER PALETTE
Click on the MERGED layer
Go to EDIT CLEAR

With your MAGIC WAND
Tolerance = 0
Select one of the PINK corners
(It will select a larger are than is
visible.. don't worry about that)
Go to EFFECTS >>> 3D EFFECTS
>>> INNER BEVEL
DESELECT
Go to LAYERS >>> MERGE
>>> MERGE VISIBLE
Go to your LAYER PALETTE
Open Layer 1
Save as a .psp file for future use.
You can now add an image of your choice
If you do this...
FIRST go to SELECTIONS >>>
DUPLICATE
and use the duplicated image to add the
image of your choice.

Once I added my image and included a drop
shadow
I went to LAYERS >>> MERGE
>>> MERGE ALL (flatten)
Then added another 2 pixel border around
the whole thing.
I would like to thank ANNIE
from GrafixAddixNewzSharesForU
for her assistance in testing this
tutorial *S*
Great result Annie *S*

Page designed by

for

http://www.artistrypsp.com/
Copyright
© 2000-2005 Artistry In PSP / PSP
Artistry
All rights reserved.
Unless specifically made available for
download,
no graphics or text may be removed from
this site for any reason
without written permission from Artistry
In PSP / PSP Artistry
TUTORIAL INDEX
|